Segment
Connect Segment with Statsig to forward customer data platform events to Statsig for experiment analysis, metrics, and audience targeting.
Enabling the Segment integration for Statsig allows Statsig to pull in your Segment events. This integration lets you run your experiment analysis on Statsig with all of your existing events from Segment without requiring any additional logging.
When Statsig receives events from Segment, Statsig displays and aggregates them in the Metrics tab in the Statsig console. Statsig automatically includes these events in your Pulse results for A/B tests with Statsig's feature gates and all your Experiment results.Supported Segment event types
Statsig supports Identify calls only for syncing Segment Engage Audiences with Statsig Segments.
Benefits of using the Segment integration
The Segment integration has several benefits over other methods of event ingestion:
- Customers ingesting data with Segment can quickly populate Statsig with metrics and can typically get started within a day.
- Customers only need to use Statsig's assignment SDKs (gate/experiment allocation), which simplifies code and engineering workflows.
- You can do additional logging through the event logging SDKs, but it requires additional code orchestration and a collection window.
- With event filtering you can control which events are ingested and make billing more predictable.
- If you have Segment Replay, you can forward up to 7 days of historical events to Statsig for analysis.
Configuring inbound events into Statsig
Ingestion with this integration is available only for Statsig Cloud. For Warehouse Native, create a metrics source that references this data in your warehouse.
To send events collected from Segment into Statsig, you must configure the Statsig Destination within your Segment account:
Using OAuth
The easiest way to connect Statsig to Segment is through OAuth.
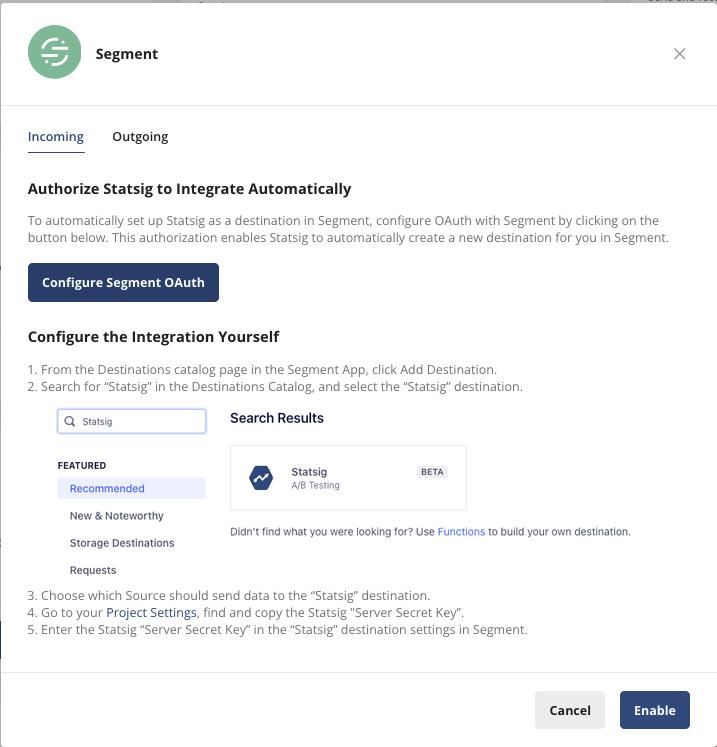
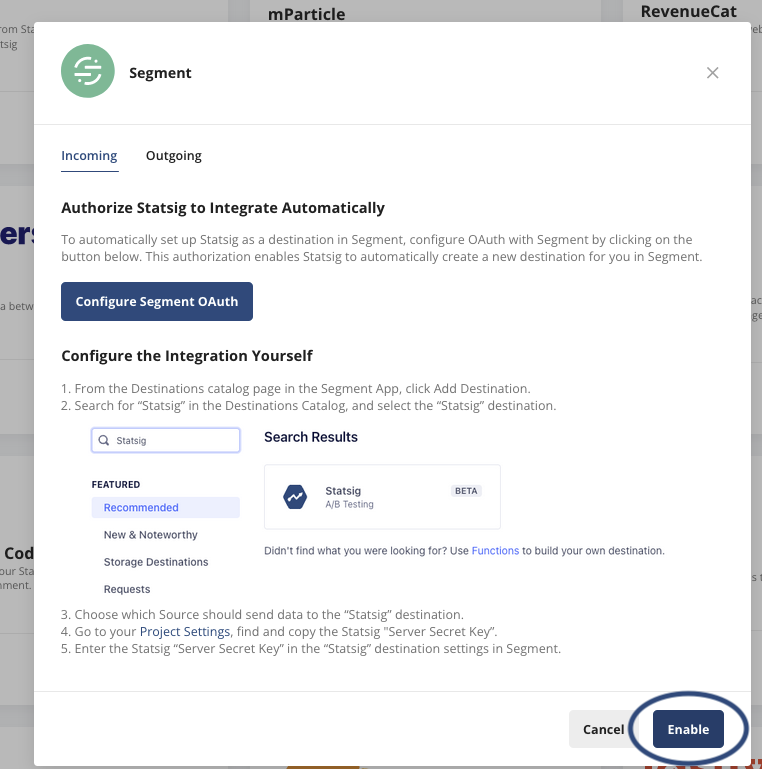
To get started, within the Statsig Console, go to project settings → integrations → Segment → Enable
Click “Configure Segment OAuth”
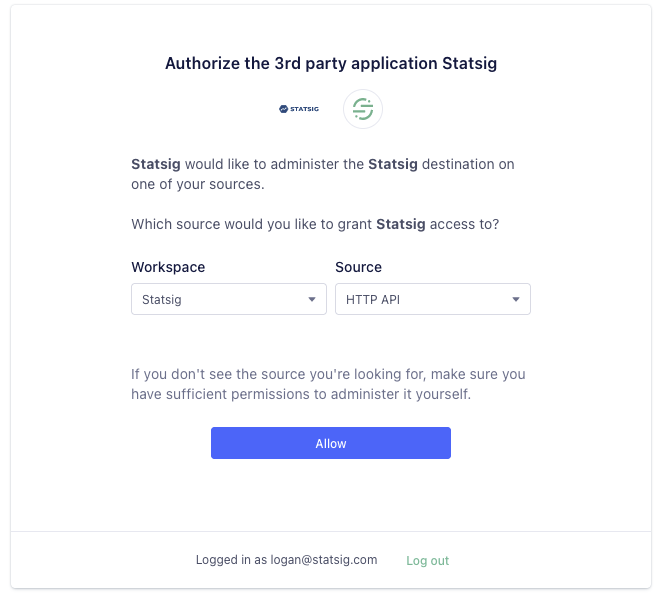
Select the workspace and source that sends data to Statsig. Click “Allow”:
After you enable the integration, you can configure event filtering and map additional identifiers. Mapping additional identifiers is useful for device-level identifiers and
anonymousIdsgenerated from Segment. Statsig recommends creating a custom ID calledsegmentAnonymousIdand mapping theanonymousIdfrom Segment to it.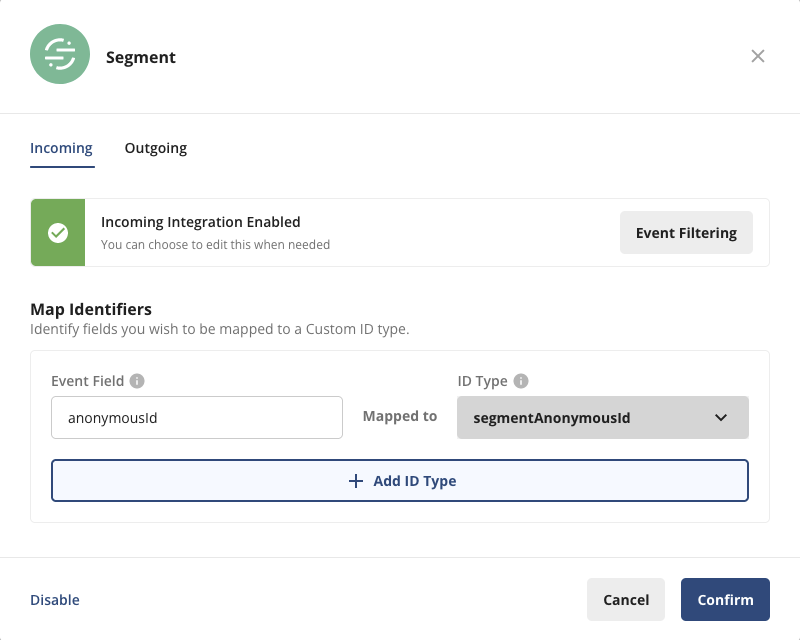
Manual configuration
If you're unable to connect to Segment through OAuth, you can manually connect Statsig to Segment by configuring the following:
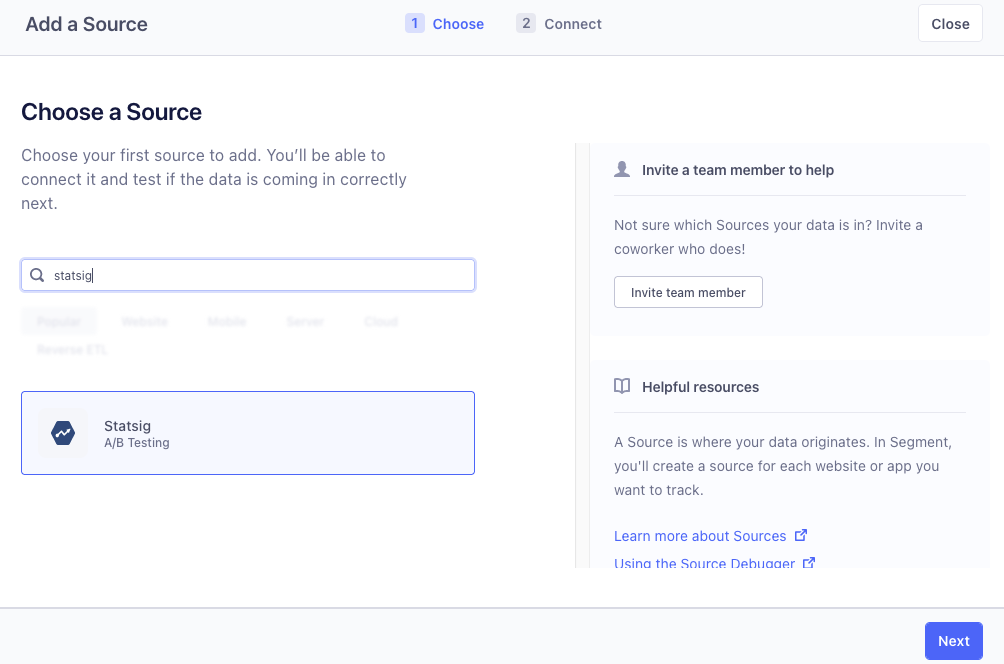
- Within the Segment App, navigate to your Destinations, and select "Add Destination"
Search for “Statsig” and select the destination
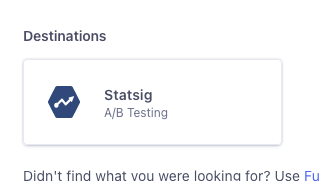
Select "Statsig" from the list of available integrations, and then select sources that send data to Statsig.
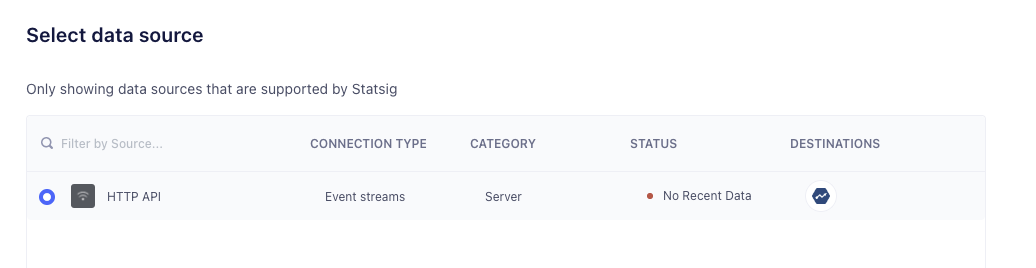
- You must provide a Statsig Server SDK key. You can copy an existing server key or create a new one from the Statsig console settings.
Create or copy a server SDK key

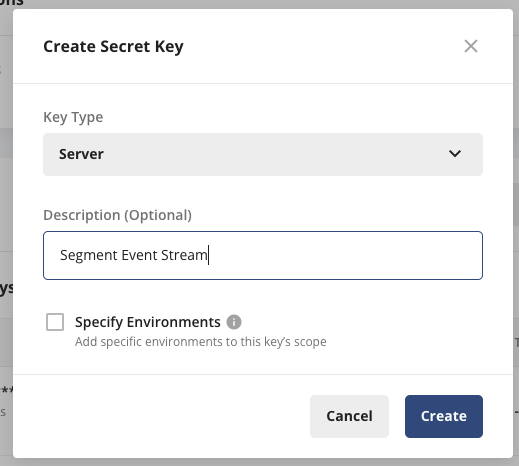
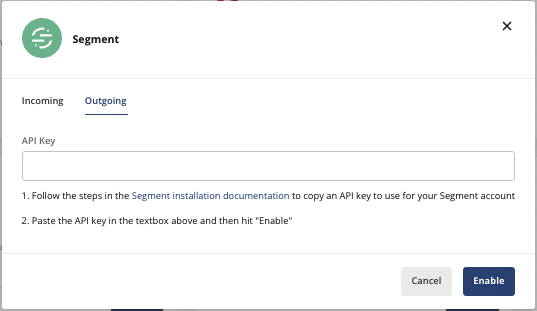
Put your Server Secret Key in the “API Key” field in the Statsig Destination
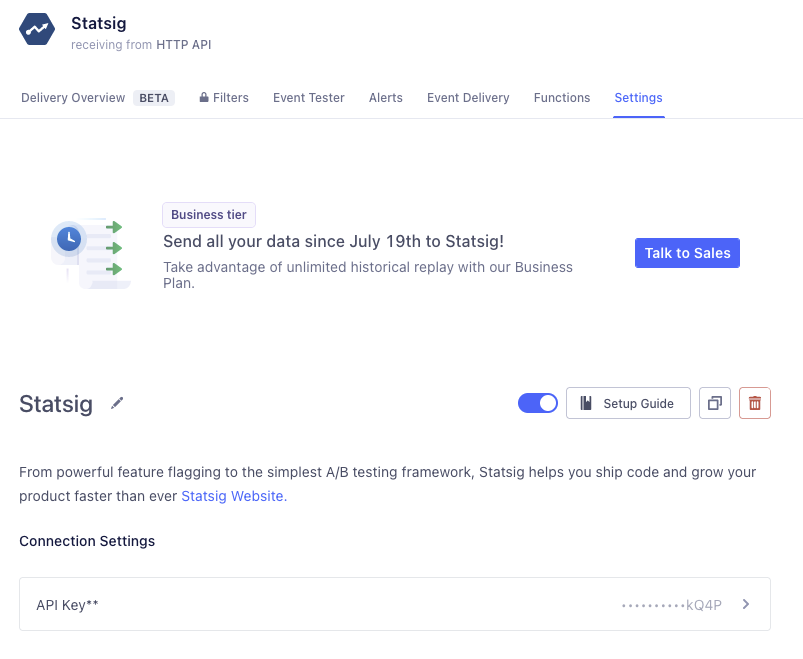
To set up mappings, you must enable the Segment Integration in Statsig. Go to the Statsig Console, then Project Settings, then the Integrations tab, then Segment, and click Enable:
- After you enable the integration, you can configure event filtering and map additional identifiers. Mapping additional identifiers is useful for device-level identifiers and
anonymousIdsgenerated from Segment.
- After you enable the integration, you can configure event filtering and map additional identifiers. Mapping additional identifiers is useful for device-level identifiers and
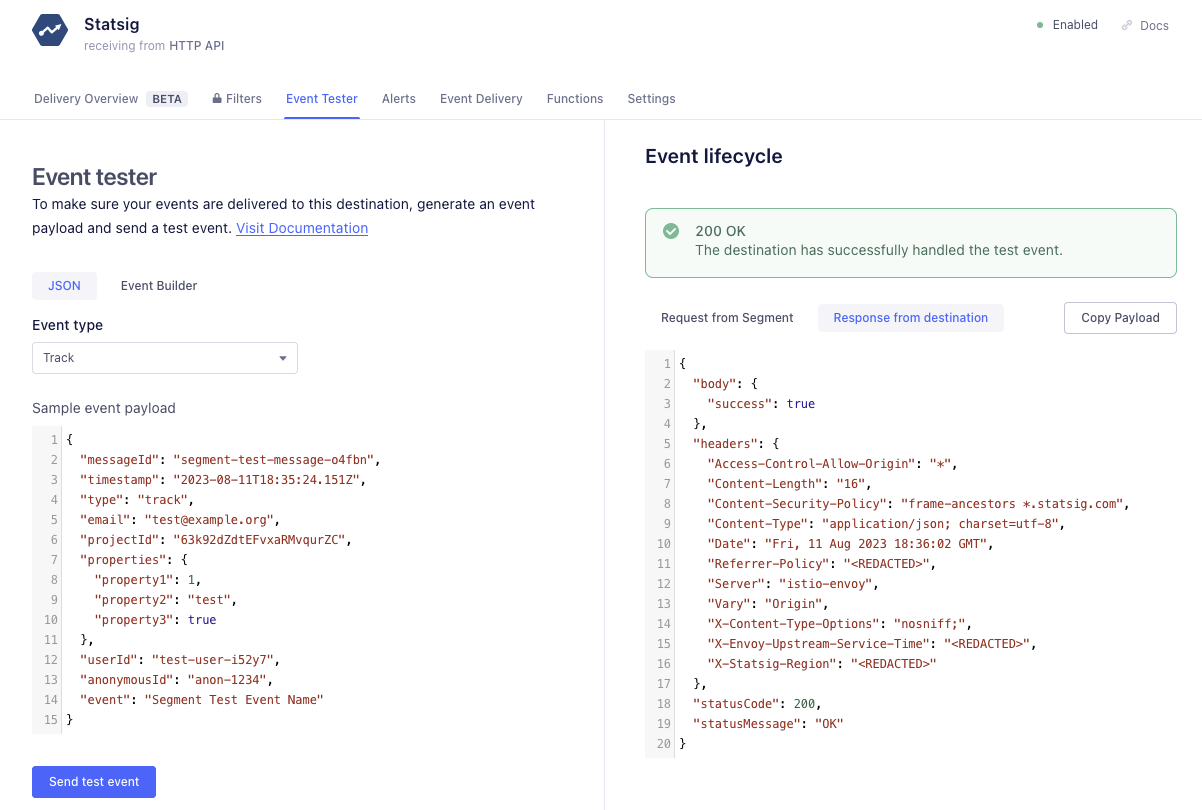
- Verify that Statsig is receiving events using the Segment Event Tester.
In the event tester, send a test event to verify any filtering and mapping you've set up:
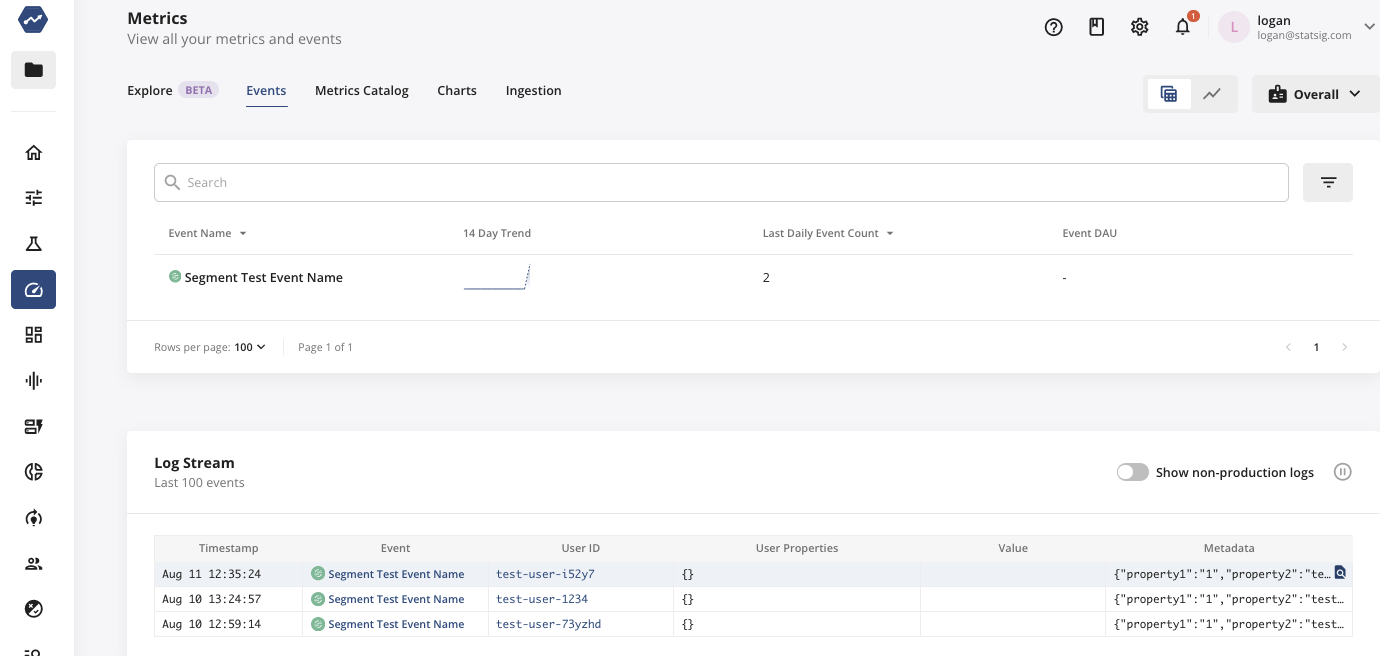
- In the your Statsig Console Events Explorer, click on the test event in the log stream and verify the event:
In this example, the mapping connects the
anonymousIdto Statsig’ssegmentAnonymousId. Statsig infers the User ID from the SegmentuserIDfield.
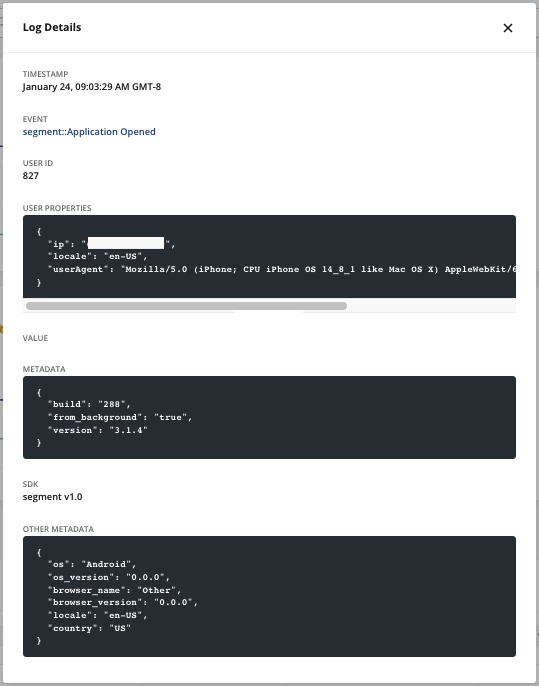
- As your Segment events flow into Statsig, you see a live Log Stream in the Metrics tab in the Statsig console. You can click one of these events to see the details logged as part of the event.
Working with users
Statsig joins incoming user identifiers to whichever unit of randomization you choose. This flexibility lets you test on known (userID) and unknown (anonymousID) traffic, as well as any custom identifiers your team uses (deviceID, companyID, vehicleID).User IDs and custom IDs
Statsig automatically detects theevent and userId fields logged through your Segment events (refer to track for an example). If you're running an experiment with the userId as your unit type, this userID should match the user identifier that you log with the Statsig SDK.If you're using a custom ID as the unit type for your experiment, you can provide this identifier using the key statsigCustomIDs as part of the Segment properties field as shown below.{
...
properties: {
"statsigCustomIDs": [ "companyID", "<this_company_id>"]
}
}
statsigCustomIDs field in properties should be an array. In this array, the even index is the name of the user ID type, and the odd index is the value of the previous element. After you create this custom ID type on Statsig (under ID Type Settings in your Project Settings), Statsig automatically recognizes these custom identifiers to compute your experiment results.Anonymous users
Mapping anonymous users
The Segment integration also allows the mapping of top-level fields to custom IDs you define in Statsig. To map fields, visit the Segment panel on the Statsig Integrations page and look for the "Map Identifier" section. Here you can choose fields to map to a Custom ID. Field mapping is useful for working with the Segment anonymous ID, which Segment passes as an event fieldanonymousId. By defining a custom ID called segmentAnonymousId, Statsig can map your anonymous Segment traffic to your metric data.Values passed in properties.statsigCustomIDs take precedence over mapped identifiers below.
Experimenting on anonymous traffic
For example, if you're running experiments on anonymous users, you can use Segment'sanonymousId as the unit of randomization. First, add a new customer identifier to Statsig. In this example, the new custom ID is segmentAnonymousId. Then, when initializing the Statsig SDK, pass the Segment anonymousId to Statsig as a custom ID if it's available. For example, your Statsig initialization may look like this:import { StatsigClient } from '@statsig/js-client';
await Statsig.initialize(
"client-sdk-key",
);
const client = new StatsigClient(sdkKey,
{
userID: "some_user_id",
customIDs: {
segmentAnonymousId: analytics.user().anonymousId()
}
},
{ environment: { tier: "production" } }
);
anonymousId using analytics.user().anonymousId() as outlined in the Segment docs here.The Segment SDK may initialize after the Statsig SDK, and the anonymousId may not be available in that scenario. Check the timing in your specific implementation. If you're using vanilla JavaScript, wait for the anonymousId from the Segment SDK after initialization, then call the updateUser() method on the Statsig SDK to update this ID.
Example mapping flow
Refer to the following diagram for an overview of mapping anonymousIds in Segment to a custom ID representing anonymous users in Statsig:
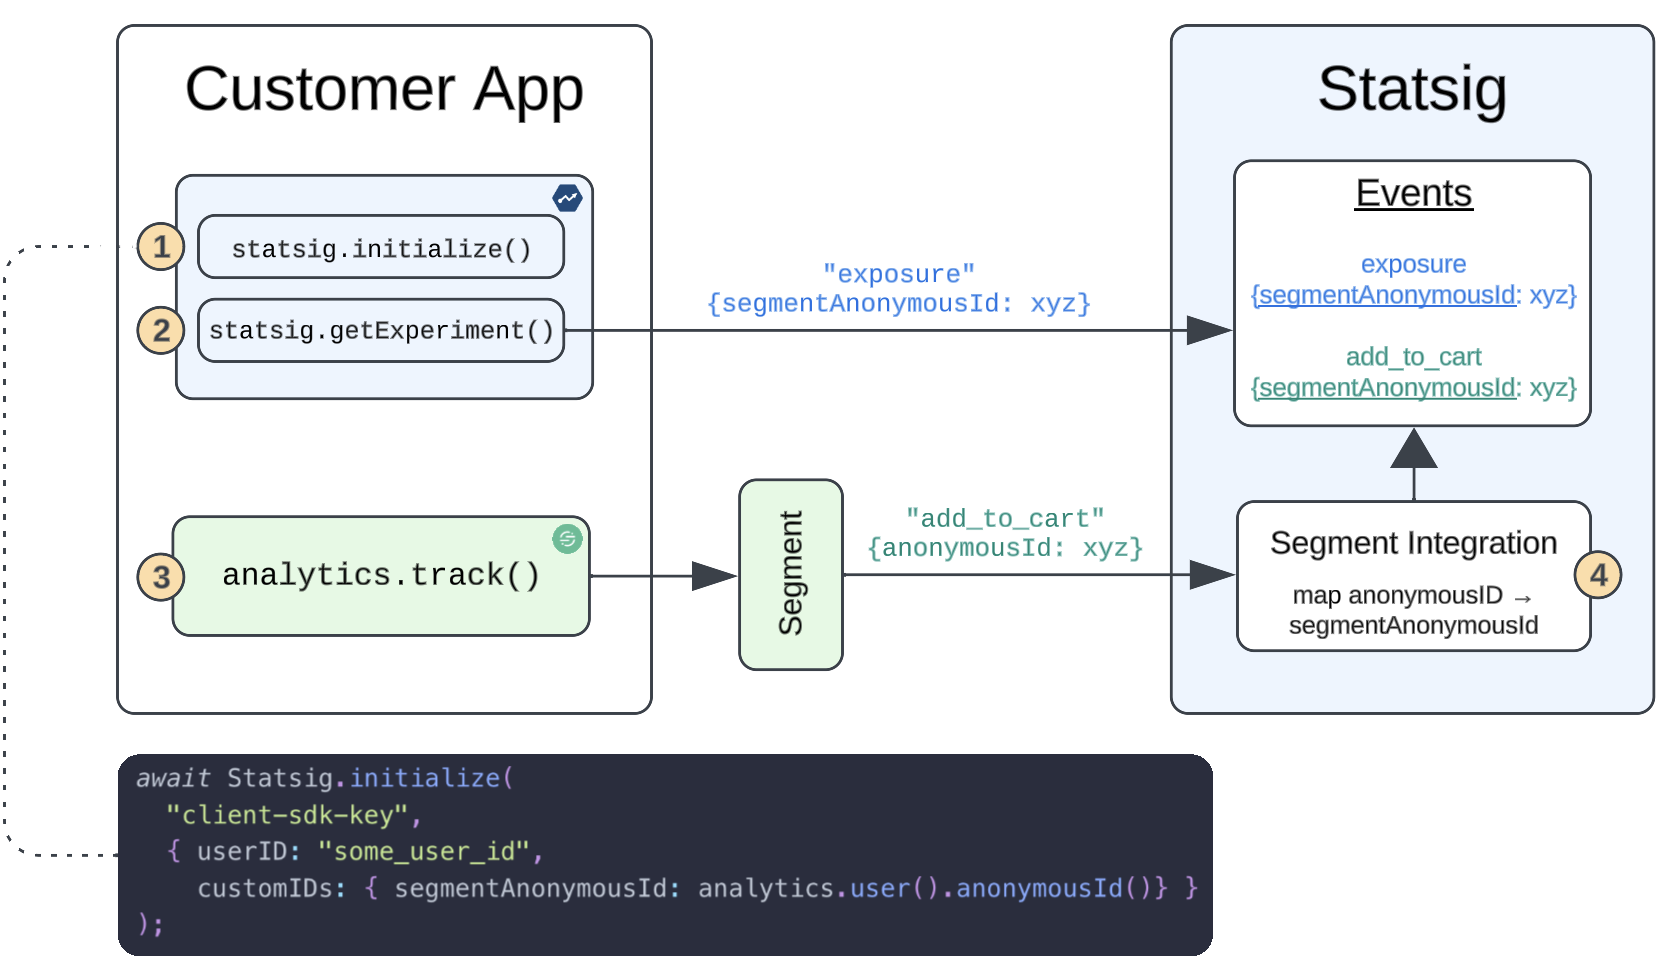
- Initialize the Statsig SDK with your Statsig User, which contains an optional
userIDvalue and acustomIDthat you've created in the Statsig UI -segmentAnonymousIdin this example. - As you orchestrate features and experiments, Statsig associates this user to a variant using the unit of randomization chosen. For anonymous users, Statsig uses
segmentAnonymousId. - Your existing Segment implementation tracks user traffic and associates anonymous users to the top-level field
anonymousId. - Statsig maps this
anonymousId(tosegmentAnonymousId), properly associating the identifier used in experiment exposures to the same identifier used to track user actions.
Syncing Statsig Segment ID lists with Segment Engage Audiences
Using Segment Engage Audiences, you can maintain a list of users for targeting using Statsig Feature Gates. To configure this:- Create a Statsig ID List Segment on the Statsig Console.
- Follow the Segment guide for Audiences to create a new Audience and choose
Statsigas a Destination. Theaudience_keymust match the ID of theStatsig ID List Segmentcreated.
After you complete these steps, Statsig syncs your Segment Audience, and you can target those users for features you develop or experiments you run.
Custom properties
Passing custom properties to a Statsig User (refer to thecustom field) enables targeting on specific cohorts of users in feature gates and experimentation. Custom user properties also let you filter results to specific populations (for example: android/iOS, isVIP) when reading pulse results.If you're using custom fields to target users in your feature gates, provide these properties through Segment. Use the key statsigCustom as part of the Segment properties field, as an array of key-value pairs: [key1, value1, key2, value2, ...]. For example:{
...
properties: {
"statsigCustom": [ "isVIP", "true", "marketing_campaign", "abx343", ...]
}
}
Configuring outbound events to Segment
To export your Statsig events to Segment,
- In your Segment app, add a new source → search for Statsig → click Next
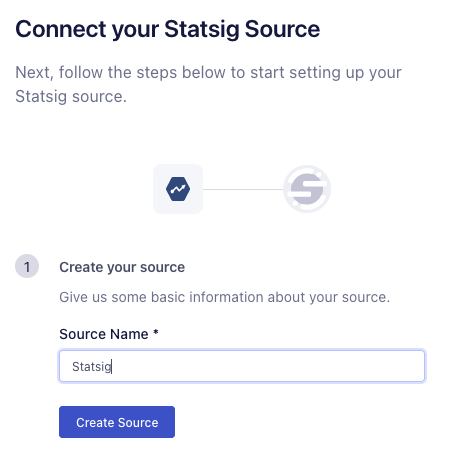
- Name your source → Create Source → click Done:
- Locate your Write Key and copy it.
- Log into the Statsig console and navigate to the Integrations page.
- Click on the Segment card and switch to the Outbound tab, paste the Write Key into the API Key text box shown below, and click Enable.
Outbound event schema
Statsig exports log events and exposure events to Segment as track events:
{
    type: 'track',
    userId: event.userID,
    timestamp: Number(event.timestamp),
    event: event.eventName,
    context: {
      user: event.user,
      value: event.value,
      metadata: event.metadata,
      library: {
        name: 'statsig',
        version: '1.0',
      },
      stableID: event.statsigMetadata.stableID // stableID, if you are relying on that for anonymous users
    },
    properties: {
      value: event.value,
      metadata: event.metadata,
    },
  };
}
Config Change events follow this schema:
{
  userId: statsigUserID,
  timestamp: Date.now(),
  event: 'statsig::config_change',
  context: {
    library: {
      name: 'statsig',
      version: '1.0',
    },
  },
  properties: {
    author: author,
    configName: configName,
    description: changeDescription,
    environment: environment,
  },
},
Environments
By default, Statsig treats all events as "production" events, but you can differentiate your event traffic by specifying the environment the events are coming from. This prevents non-production data from appearing in your production metrics.
To include the environment tier, add it to the properties object of your event. The required format is below:
{
  ...
  "properties": {
   "statsigEnvironment": {
        "tier": "staging"
    }
  }
}
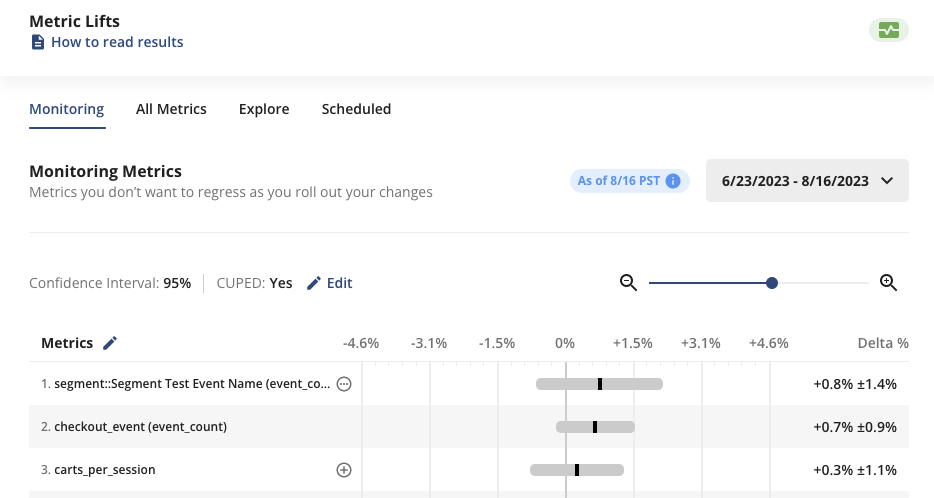
Working with Segment metrics in the Statsig UI
Statsig pipes Segment events in, and they're accessible in the metrics console like any other event. You can also use these metrics as monitoring metrics in your feature gates and experiments. Using them this way lets you combine your existing Segment metric collection with Statsig's experimentation platform.
Statsig prepends segment:: to Segment events so you can easily distinguish them from other sources
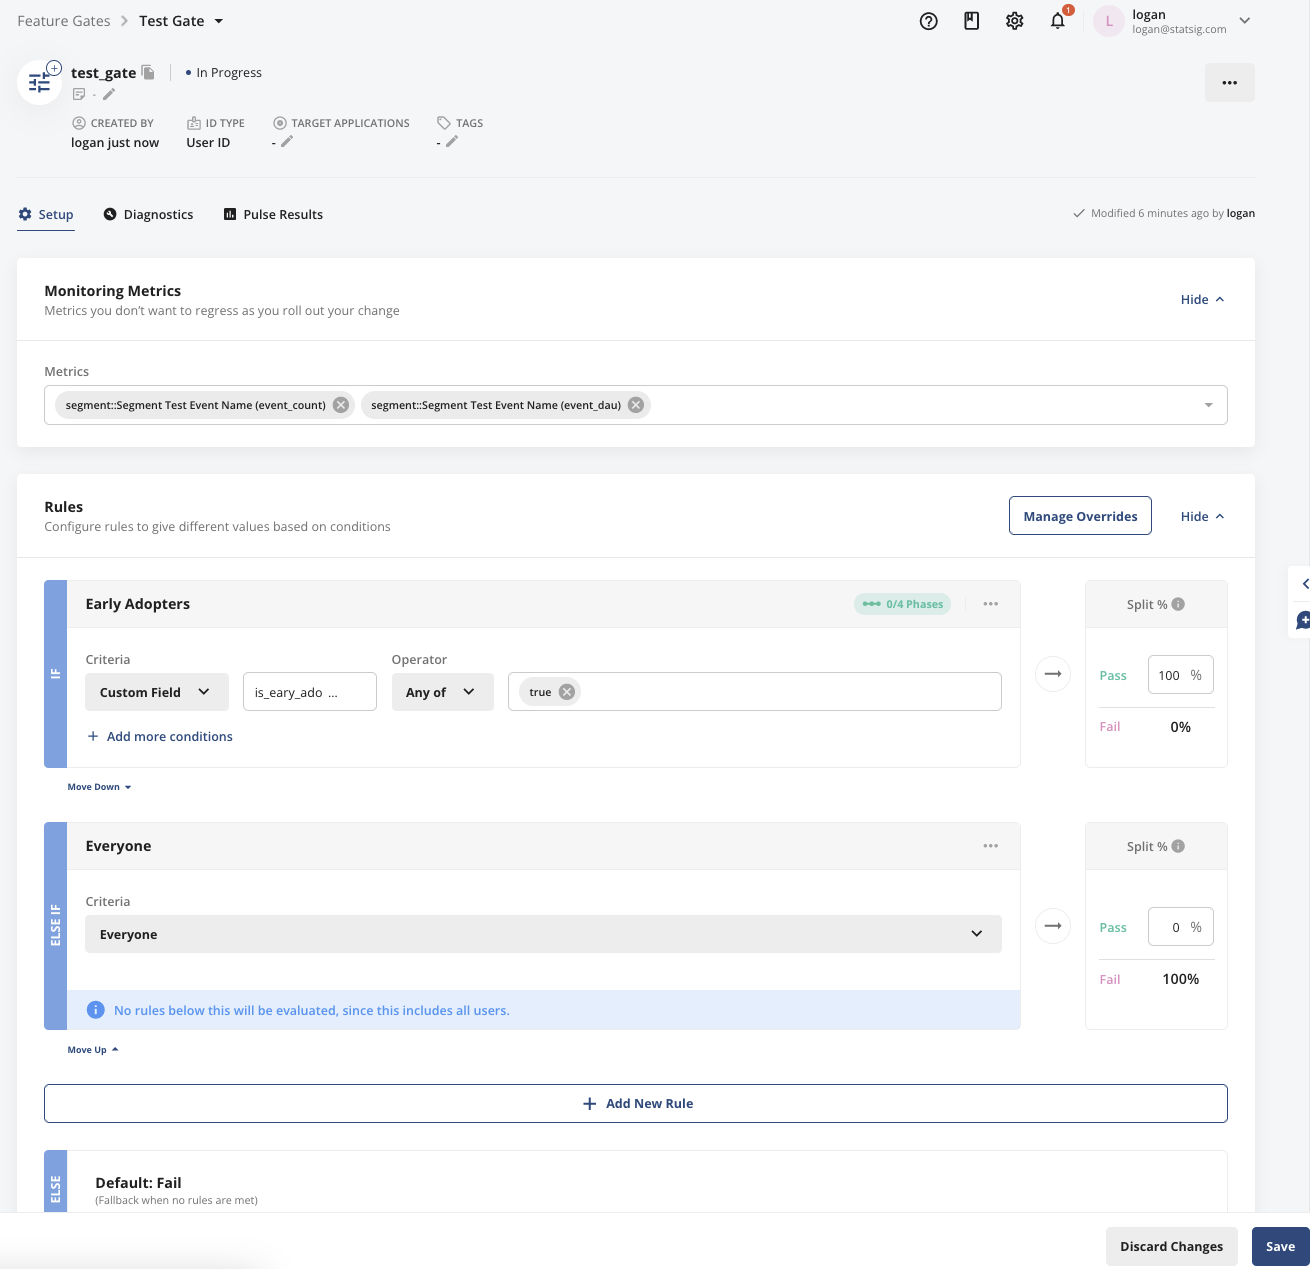
These metrics appear in pulse results among other monitoring metrics:
Filtering events
You can customize which events you send and receive through Segment using Event Filtering.Was this helpful?