RudderStack
Connect RudderStack with Statsig to forward customer data platform events to Statsig for experiment analysis, metrics, and audience targeting.
How the RudderStack integration works
Enabling the RudderStack integration for Statsig allows Statsig to pull in your RudderStack events. This allows you to run your experiment analysis on Statsig with all of your existing events from RudderStack without requiring any additional logging.
When Statsig receives events from RudderStack, the events are visible and aggregated in the Metrics tab in the Statsig console. These events are automatically included in your Pulse results for A/B tests with Statsig's feature flags and all your Experiment results.Configuring incoming events
Ingestion with this integration is available only for Statsig Cloud. For Warehouse Native, create a metrics source that references this data in your warehouse.
To ingest your events from RudderStack,
- On app.rudderstack.com, navigate to "Connections" and click Add Destination .
- Search for “Statsig” in the Destinations Catalog, and select the “Statsig” destination.
- Give your connection a name and choose which Source should send data to the “Statsig” destination.
- From the Statsig dashboard, copy the Statsig "Server Secret Key”.
- Enter the Statsig “Server Secret Key” in the “Statsig” destination settings in RudderStack.
- On the Statsig Integration page enable the RudderStack integration.
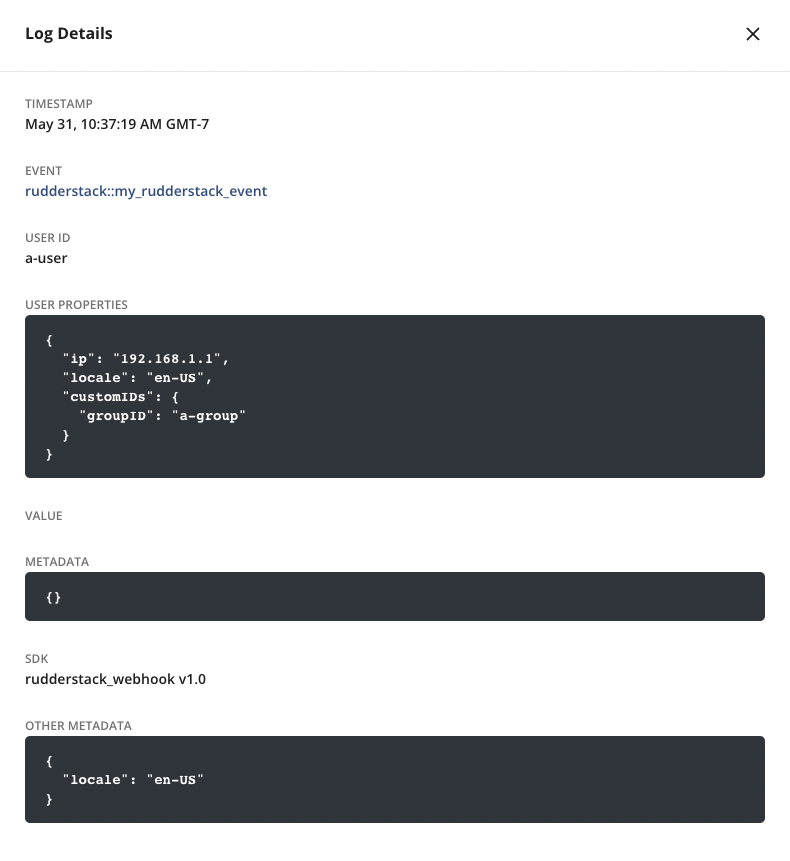
- As your RudderStack events flow into Statsig, you see a live Log Stream in the Metrics tab in the Statsig console. You can click one of these events to see the details logged as part of the event.
User IDs and custom IDs
Statsig automatically detects the event and userID fields that you log through your RudderStack events. If you're running an experiment with the user as your unit type, this userID should match the user identifier that you log with the Statsig SDK.
statsigCustomIDs as part of the RudderStack properties field as shown below.{
...
properties: {
"statsigCustomIDs": [ "companyID", "<this_company_id>", "stableID", "<this_stable_id>",]
}
}
statsigCustomIDs field in properties should be an array, where the even index is the name of the user ID type and the odd index is the value of the previous element in the array. After you create this custom ID type on Statsig (under ID Type Settings in your Project Settings), Statsig automatically recognizes these custom identifiers to compute your experiment results.Environments
By default, all events are treated as "production" events, but you can differentiate your event traffic by specifying the environment the events are coming from. This prevents non-production data from appearing in your production metrics.
To include the environment tier, add it to the properties object of your event. The required format is below:
{
  ...
  "properties": {
   "statsigEnvironment": {
        "tier": "staging"
    }
  }
}
Configuring outbound events
To export your Statsig events to RudderStack,
- Log into the Statsig console and navigate to the Integrations page.
- Click on the RudderStack card and switch to the Outbound tab.
- Follow the steps outlined in RudderStack's Webhook Source to get the required "Write Key" and "Data Plane URL".
- After filling in the fields, click enable to save your changes.
Filtering events
You can customize which events are sent and received through RudderStack using Event Filtering.Was this helpful?