Configuring Experiments
Configure a Statsig Warehouse Native experiment, including assignment source, variants, metrics, allocation, and analysis settings end to end.
A Warehouse Native experiment runs in one of two modes: connect to existing assignment data in your warehouse, or configure the experiment in Statsig, generate exposures with the Statsig SDK, and analyze them in your warehouse.
For most A/B/n experiments, the default settings produce a standard, powerful analysis.
Creating an experiment
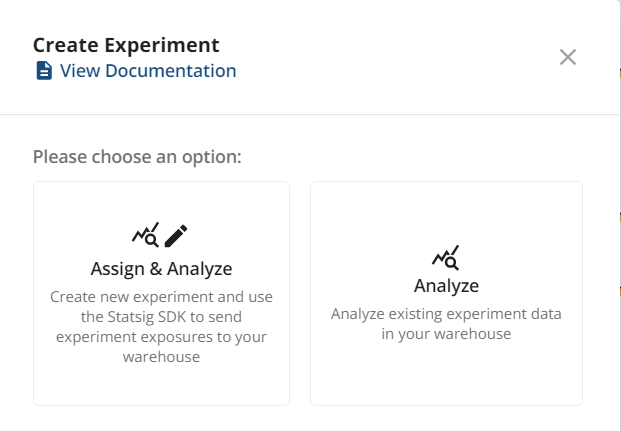
To create an experiment, go to the experiments tab in your console and click the create button.
There are two types of experiments in Statsig Warehouse Native:
- Analyze: these are for 3rd-party or in-house exposure sources.
- Assign & Analyze: these are Statsig-configured experiments. You can set up all of the configuration here, implement it through Statsig SDKs, and track results.
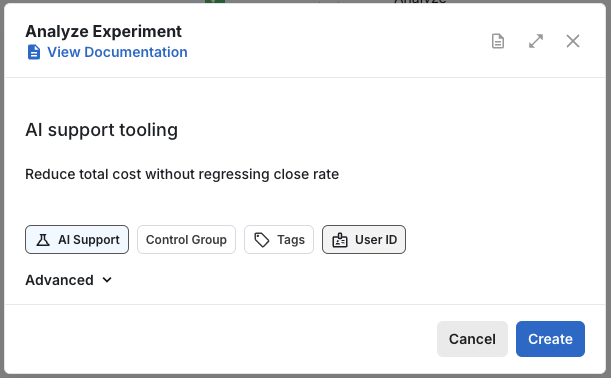
Next, give the experiment a name, specify your hypothesis, and select the experiment from your exposure sources. Sync sources if your exposure isn't available in the dropdown.
Specify the control group and the ID type the experiment uses.
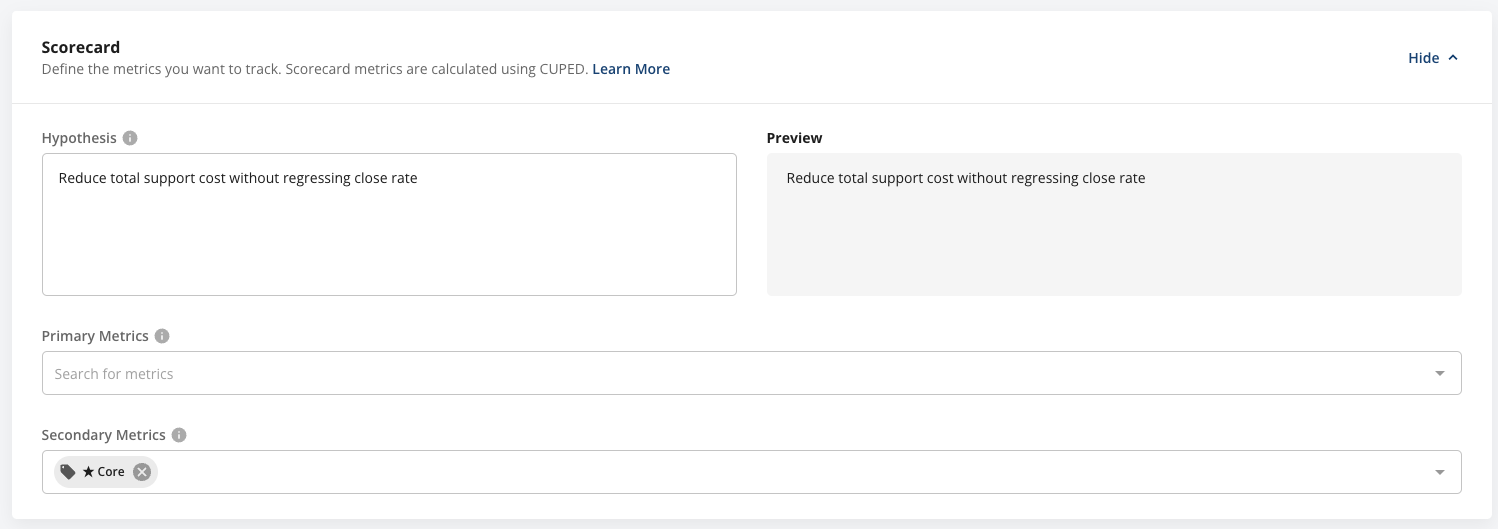
Choose metrics
On the experiment setup page, refine your hypothesis and add the Primary and Secondary metrics for your experiment.
- Primary metrics: a short list (1-3) of metrics that define your overall evaluation criteria. Typically one target metric and one first-mile metric, such as revenue and checkout clicks.
- Secondary metrics: guardrail and explanatory metrics. These are observational in nature and are less conclusive. Applying Bonferroni corrections is one way to formalize this approach, though it can be overly conservative.
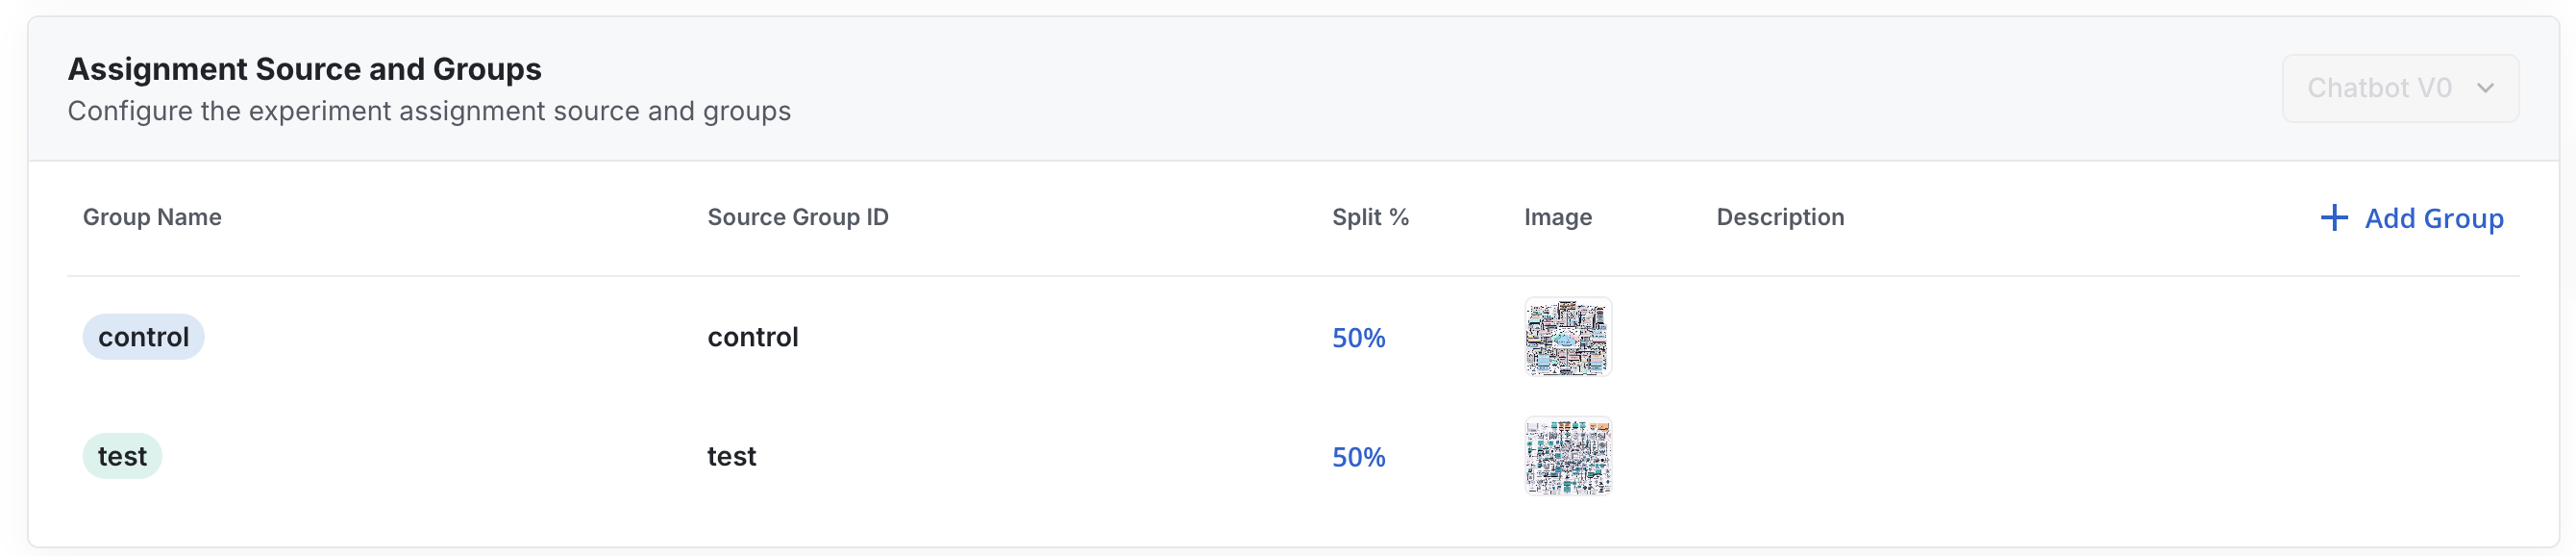
Choose groups
Statsig infers the groups and group splits in your experiment. Check and correct the splits to ensure SRM checks work as intended.
You can also rename groups or delete irrelevant groups.
Advanced settings
Statsig has many configurable settings for experiments. You can set defaults at the org level. Available settings include:
- Frequentist vs. Bayesian analysis
- Target duration of the experiment
- Whether to apply Sequential Testing adjustments
- Allocation Duration
- Stop enrolling new users into the experiment after X days
- Cohort Duration
- Specify a timeline for collecting metric data
- Include only units with a completed duration, so Statsig doesn't include units with incomplete data in Pulse
- Whether to allow cohort metrics to mature after experiment end
After you configure this value, it overwrites the only include units with a completed duration setting above.
- ID stitching
- Whether and how to apply Bonferroni Correction
- Default Confidence Intervals
- Default rollup windows for result readouts (cumulative, 1, 7, 14, or 28 days from the analysis date)
- Turbo Mode
- Skip time series calculations to reduce cost and runtime when you only need the overall effect
- Filter exposures by qualifying event
- Only applicable in Analyze-only experiments
- Filter assignment source
- Add optional filters on the experiment's assignment source. By default, Statsig filters the assignment source to the experiment and groups you're analyzing. Use this setting to exclude known bad actors from the primary scorecard or to analyze a sub-population in the main scorecard.
Testing in a lower environment
After you launch experiments, you can't edit the groups without restarting the experiment, because Statsig has already allocated users to each group. Test each experiment in lower environments before starting. Click the Test button on the experiment setup page, then select Enable for Environments. These environments should match your SDK environment setup. Testing in a lower environment and using overrides lets you manually set your experiment group to test each variant.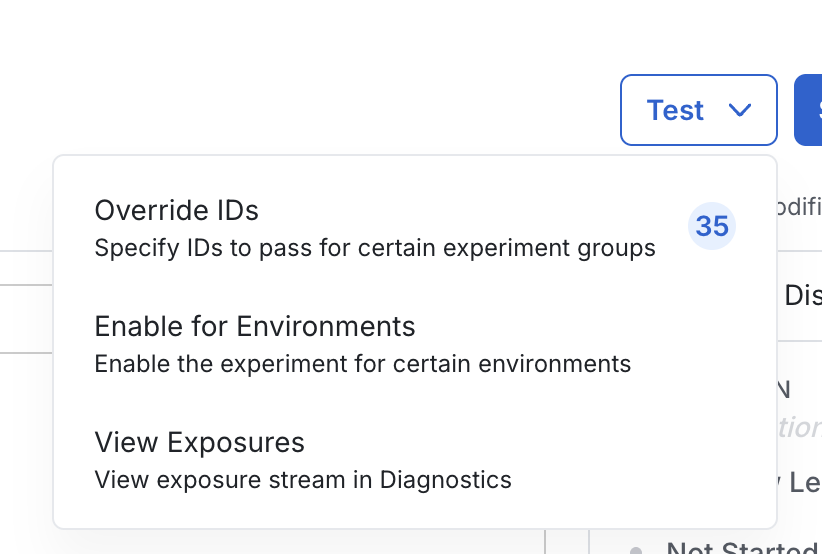
When you enable an experiment for lower environments, Warehouse Native customers can check exposure logs to troubleshoot exposures. Lower environments don't provide experiment results or cumulative exposures.
Start the experiment
After completing setup, click Save and Analyze to start the experiment. Statsig prompts you to finalize the dates, experiment status, and optionally configure a schedule to reload experiment results.
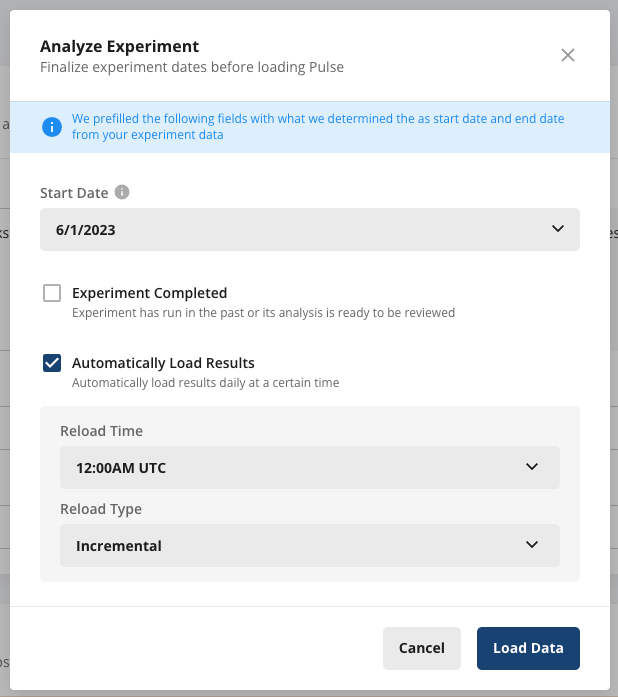
When you click Load Data, a Pulse analysis starts and Statsig takes you to the results page.
Data freshness
For a Statsig-configured experiment using the Statsig SDKs to generate exposures, by default Statsig batches, deduplicates, and writes exposures to your warehouse once a day. When you launch an experiment, early metric data can help detect crashes or significant bugs. When you load Pulse shortly after the experiment starts, Statsig updates exposures in your warehouse before computing Pulse results. This allows you to see Pulse results as fresh as approximately 15 minutes, assuming events and metrics arrive at the same speed.
If the number of exposures on an experiment is fewer than 1 million, Statsig performs a just-in-time update of exposures in your warehouse when you load Pulse.
Statsig only writes exposure information to your warehouse that it uses for experiment analysis. Statsig doesn't write exposures from pre-production environments or overrides, because it doesn't use them in analysis.
Was this helpful?