Build Your First Feature
Walk through creating a feature gate, targeting audiences, and rolling out your first feature with the JavaScript SDK.
Statsig refers to feature flags as feature gates across the console and SDKs. The terms are interchangeable throughout this guide.
After your Statsig account is ready, follow the steps below to create and test-drive a new feature gate.
Create a feature gate
Navigate to the Feature Gates page and click Get Started (or Create if you already have gates).
Give the gate a clear name and description. For example,
Mobile Registrationwith a note about the new mobile sign-up flow.Target mobile platforms
New gates default to returning
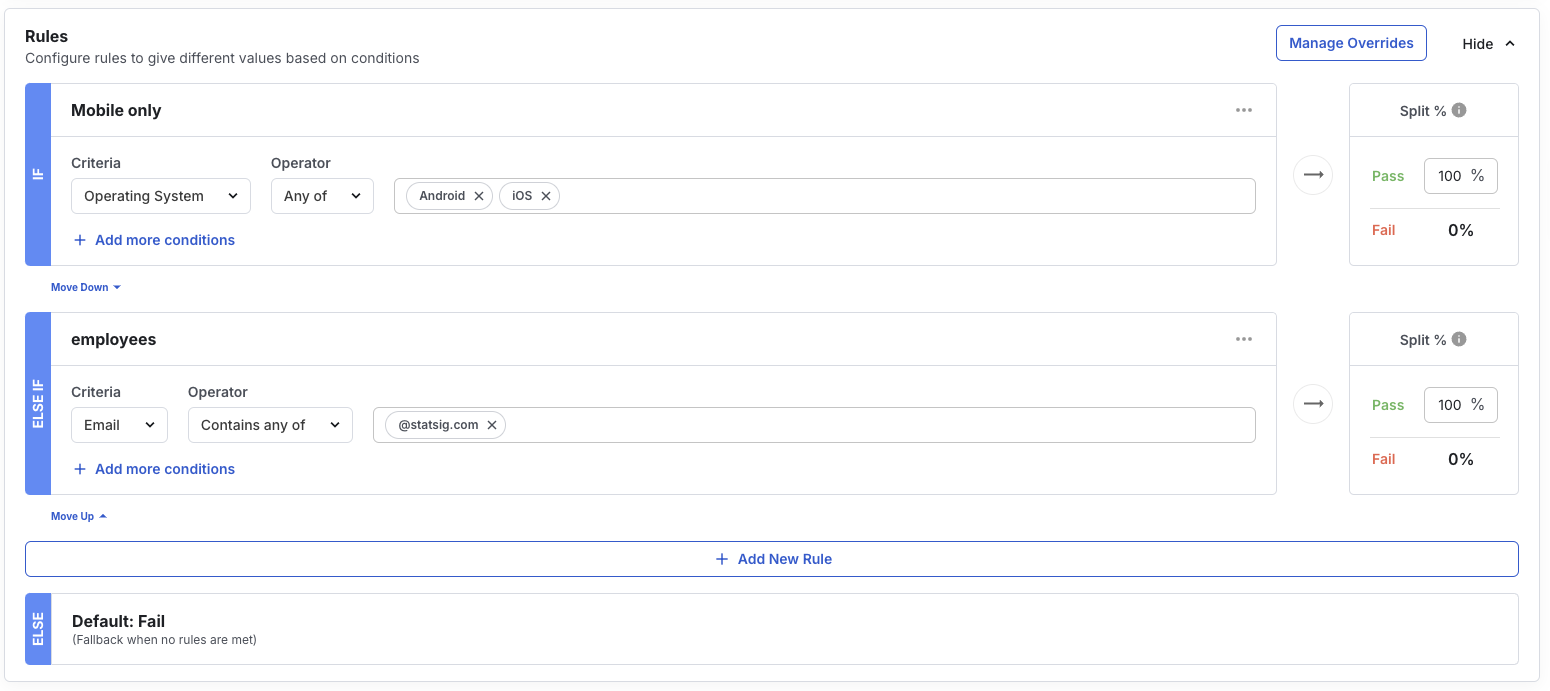
falseuntil you add targeting. Click Add New Rule, choose Operating System → Any of, and select Android and iOS. Set the pass percentage to 100% and click Add Rule, then Save.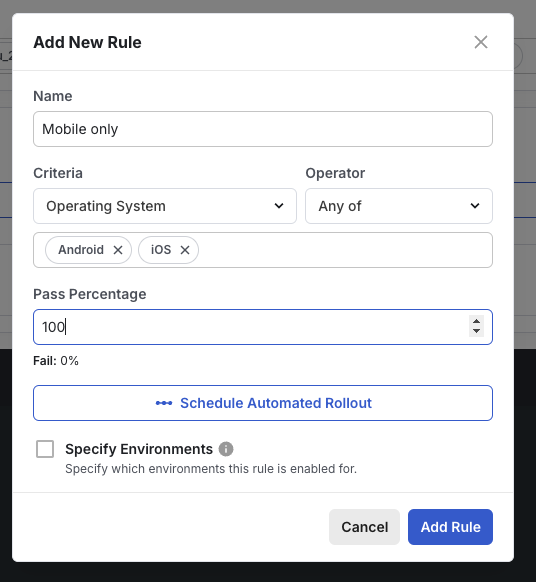
Add an internal testing rule
Layer on a second rule for your team. For example, use Email → Contains any of with your company domain so employees can exercise the feature regardless of device.
Generate a client API key
Go to Project Settings → API Keys and copy the Client API key. Keep server secret keys on backends only, and use console API keys for programmatic configuration work.Load the JavaScript SDK
Statsig supports many platforms. Refer to Client SDK options for alternatives. This walkthrough uses the browser SDK so you can experiment directly in DevTools.Paste the snippet below into the browser console on any site to load the SDK from jsDelivr:
jsconst script = document.createElement('script'); script.src = 'https://cdn.jsdelivr.net/npm/@statsig/js-client@3/build/statsig-js-client+session-replay+web-analytics.min.js'; document.head.appendChild(script);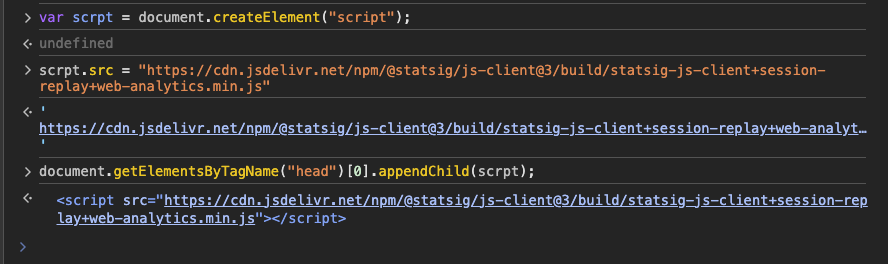
Initialize and check the gate
Replace
YOUR\_SDK\_KEYwith the client key from Step 4 and run:jsconst client = new window.Statsig.StatsigClient('YOUR_SDK_KEY', {}); await client.initializeAsync();Then call:
jsclient.checkGate('mobile_registration');You should see
falsebecause the current session is not mobile and doesn’t use the employee email domain.Simulate a mobile environment
Enable the mobile device toolbar in Chrome DevTools.
Re-evaluate the user to pick up the new environment and re-check the gate:
jsawait client.updateUserAsync({}); client.checkGate('mobile_registration');The gate should now return
truefor the mobile profile.
Test the employee backdoor
Switch DevTools back to the desktop view and update the user with a company email:
jsawait client.updateUserAsync({ email: 'teammate@statsig.com' }); client.checkGate('mobile_registration');The gate passes again because of the email rule.

Flush exposures and inspect diagnostics
jsclient.flush();Open the gate’s Diagnostics tab to confirm each exposure, including the failing desktop check, mobile pass, and employee pass.

Use the gate in production
Wrap feature logic in a gate check so only targeted users see the experience:
if (client.checkGate('mobile_registration')) {
  show(mobileRegistrationPage);
} else {
  show(oldRegistrationPage);
}
Your feature gate is ready for production.
Was this helpful?