Snowflake
Configure Statsig data warehouse ingestion from Snowflake, including authentication, scheduled queries, and mapping to events and user properties.
Connect Snowflake to Statsig
Statsig ingests your event and metric data from Snowflake so it flows into your Statsig metrics and experiments. To set up a connection with Snowflake, Statsig needs the following
- Account Name
- Database Name
- Schema Name
- Admin User Name
- If authenticating through login credentials:
- Admin User Password
- If authenticating through key-pair authentication:
- Private Key
- Private Key Passphrase (Optional)
Account name
For the Account Name field, enter the value in the format <id>.<region>.<provider>. For example:
xy12345.us-central1.gcp
To get this information, navigate to the bottom left of your Snowflake console and copy the link URL, as shown below:
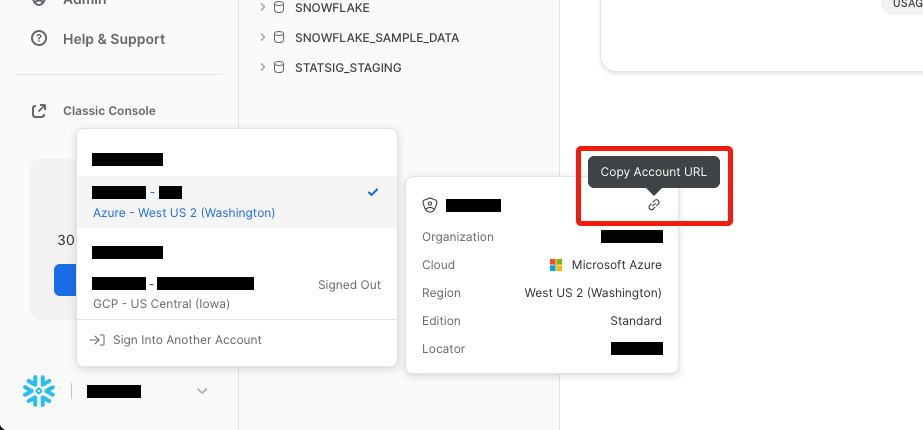
The copied URL looks something like this:
https://xy12345.us-central1.gcp.snowflakecomputing.com
Extract the required fields for Account Name from this URL. In this example, the Account Name is xy12345.us-central1.gcp.
Using <orgname>-<account_name> for Account Name
<orgname>-<account_name>. To find the <orgname> in the Snowflake console, click on your account profile (usually at the bottom left) to view account details as shown below.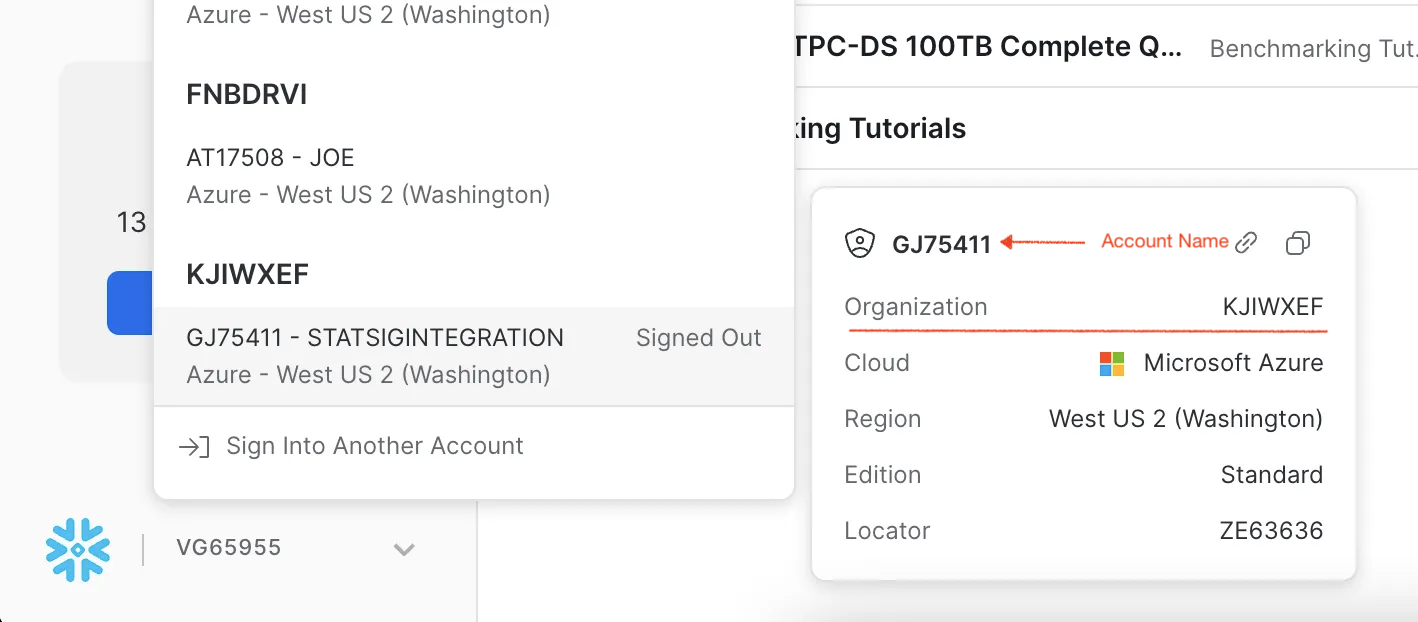
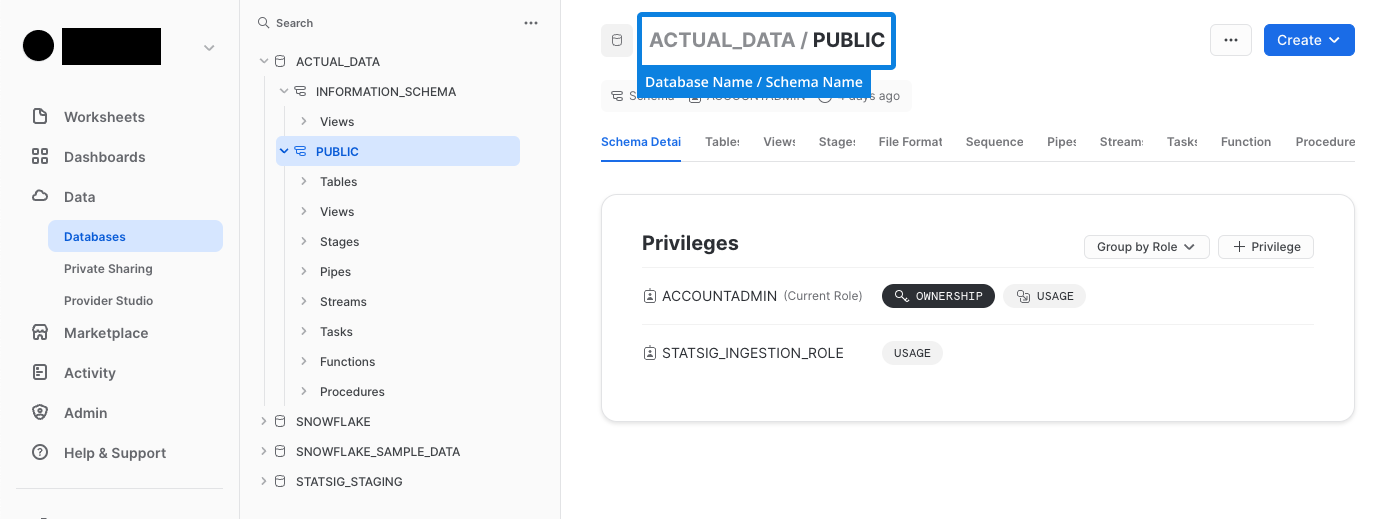
Database and schema name
For each data type, provide the database/schema of the table(s) you're ingesting from.
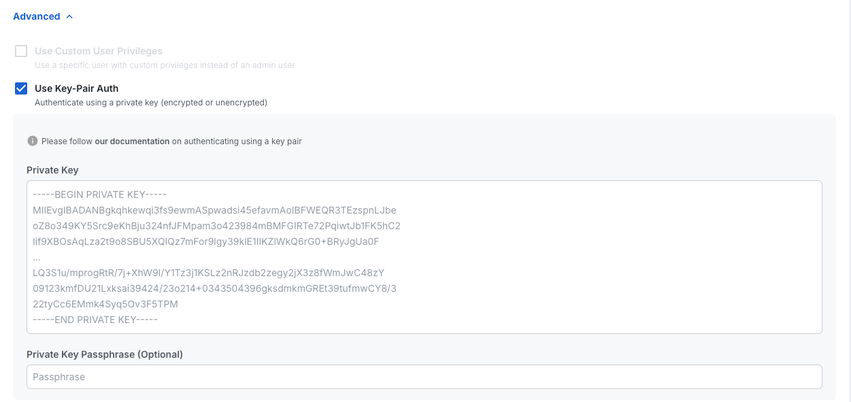
Key-pair authentication
To set up key-pair authentication, follow the Snowflake documentation to generate the private and public keys, then set the public key on the service user.Enter the private key in the field below:
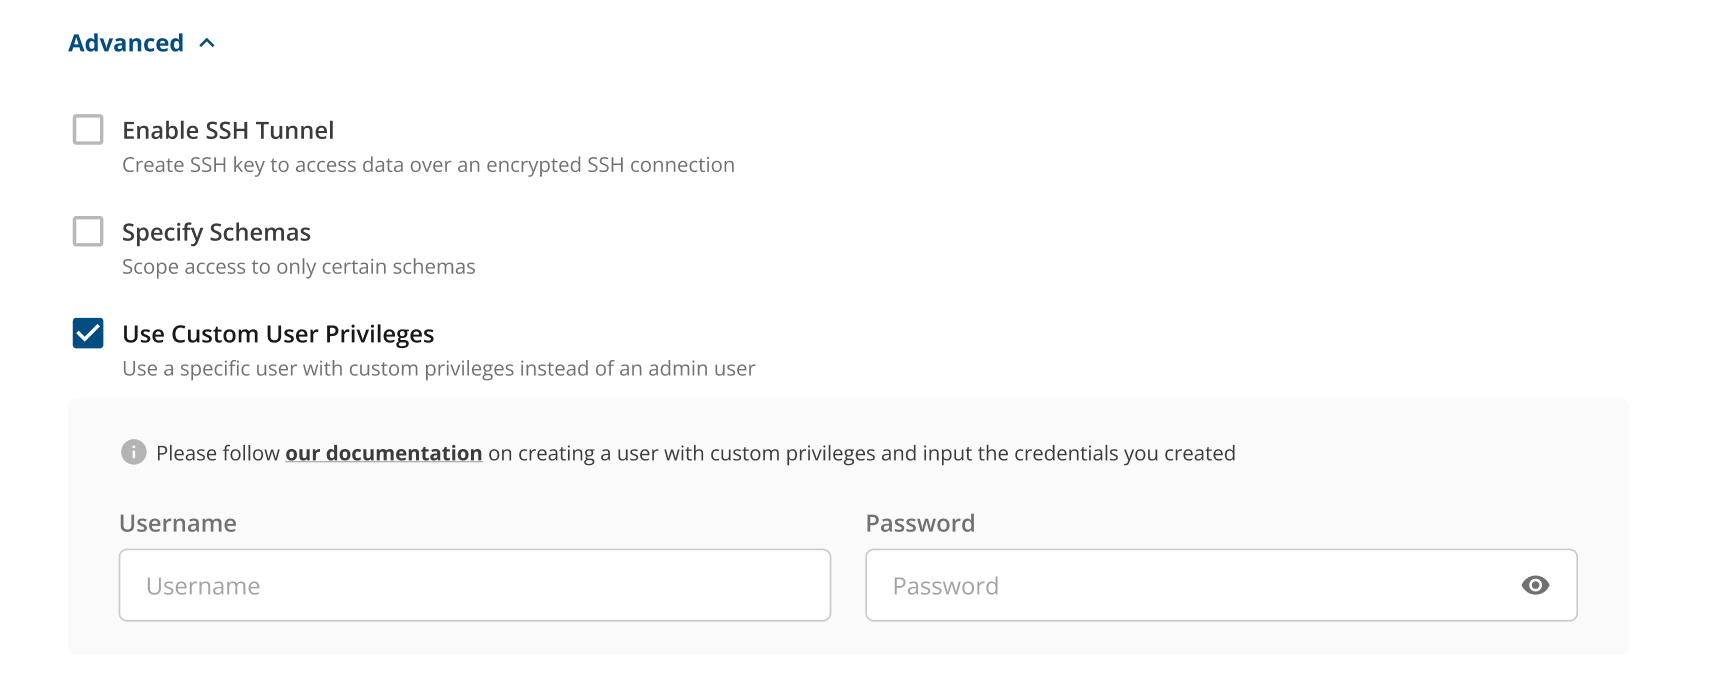
Custom user privileges
To create a custom user with specific privileges instead of using an admin user, run the following code in your Snowflake worksheet that has sysadmin and securityadmin roles. Replace <USER> and <PASSWORD> with your values, which you enter in the Statsig console.
BEGIN;

  -- set up variable values to be used in statements later
  -- make sure to configure user_name and user_password with your own values
  SET user_name = '<USER>'; -- REPLACE WITH YOUR OWN VALUE
  SET user_password = '<PASSWORD>'; -- REPLACE WITH YOUR OWN VALUE
  SET role_name = 'STATSIG_ROLE'; -- CAN BE ANYTHING, BUT THE USER NEEDS TO
    -- HAVE THIS ROLE AND THE ROLE NEEDS ACCESS TO THE TABLES PER THE GRANTS BELOW

  -- change role to sysadmin for warehouse / database steps
  USE ROLE sysadmin;

  -- create a warehouse, database, schema and tables for Statsig
  CREATE OR REPLACE WAREHOUSE STATSIG_INGESTION WITH warehouse_size='XSMALL';
  CREATE DATABASE IF NOT EXISTS STATSIG_STAGING;

  -- change current role to securityadmin to create role and user for Statsig's access
  USE ROLE securityadmin;

  -- create role for Statsig
  CREATE ROLE IF NOT EXISTS identifier($role_name);
  GRANT ROLE identifier($role_name) TO ROLE SYSADMIN;

  -- create a user for Statsig
  CREATE USER IF NOT EXISTS identifier($user_name)
  password = $user_password
  default_role = $role_name
  default_warehouse = STATSIG_INGESTION;
  GRANT ROLE identifier($role_name) TO USER identifier($user_name);

  -- grant Statsig role access to create warehouse and schema
  GRANT USAGE ON WAREHOUSE STATSIG_INGESTION TO ROLE identifier($role_name);
  GRANT CREATE SCHEMA, MONITOR, USAGE ON DATABASE STATSIG_STAGING TO ROLE identifier($role_name);

  -- grant Statsig role read access to database and schema passed in
  GRANT USAGE ON DATABASE <DATABASE> TO ROLE identifier($role_name);
  GRANT USAGE ON SCHEMA <DATABASE>.<SCHEMA> TO ROLE identifier($role_name);
  GRANT SELECT ON ALL TABLES IN DATABASE <DATABASE> TO ROLE identifier($role_name);
  GRANT SELECT ON FUTURE TABLES IN DATABASE <DATABASE> TO ROLE identifier($role_name);
  GRANT SELECT ON ALL VIEWS IN DATABASE <DATABASE> TO ROLE identifier($role_name);
  GRANT SELECT ON FUTURE VIEWS IN DATABASE ACTUAL_DATA TO ROLE identifier($role_name);

COMMIT;
After running the script, enter the <USER> and <PASSWORD> you created in the Statsig console during the Connection Set Up stage, under the Advanced settings options.
Was this helpful?