Get Started With Autotune
Set up a Statsig Autotune experiment, including selecting a goal metric, defining variants, configuring traffic allocation, and launching to users.
How to set up Autotune
- To create a new Autotune experiment, navigate to the Autotune section on the Statsig console.
- Click the Create button and enter the name and description of the Autotune experiment that you want to create.
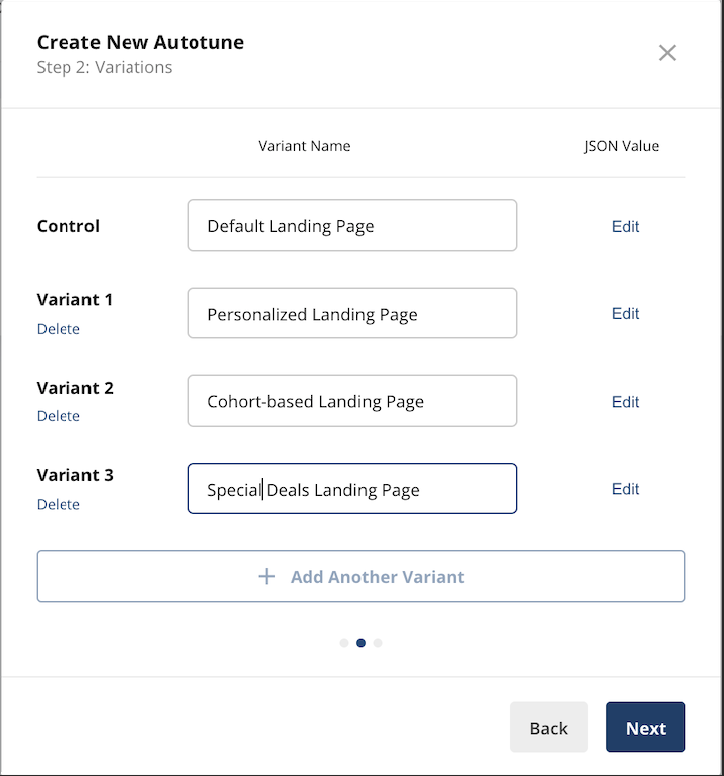
- Provide the variants that you want to test in the Autotune experiment. Each variant needs a name, and a corresponding JSON value. The variant listed as Control/Default is returned when the Autotune experiment isn't running.
- Select the success event to optimize for as shown below. You can further specify an optional event value.
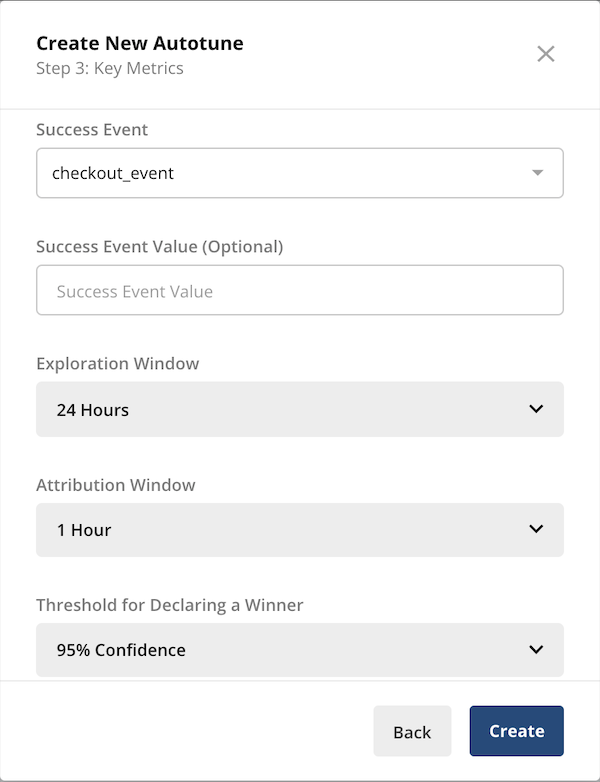
There are a few parameters you can specify:
- Exploration Window: The initial time period where Autotune equally splits traffic. This is useful for noisy or temporal metrics where hourly data swings can bias Autotune's initial measurements.
- Attribution Window: The maximum duration between the exposure and success event that counts as a success. 1 hour is recommended for most applications; adjust if you expect the success event to lag the exposure event by several hours.
- Winner Threshold: The "probability of best" threshold a variant must reach for Autotune to declare it the winner, stop collecting data, and direct all traffic. A lower value results in faster decisions but increases the probability of selecting the wrong winner.
Click Create to finalize the setup.
- As with Feature Gates and Experiments, Statsig provides a code snippet for the exposure check event to add to your code. Select Start when you're ready to launch your Autotune test.
Was this helpful?