Redshift Connection
Connect Amazon Redshift to Statsig Warehouse Native, including IAM roles, network access, user setup, and required schema permissions.
How Redshift connection works
To set up a connection with Redshift, Statsig needs the following information:
- Cluster Endpoint
- A service user Username
- A service user Password
- A staging schema that Statsig can write results to
SHA256 passwords aren't supported. Use MD5 to avoid issues.
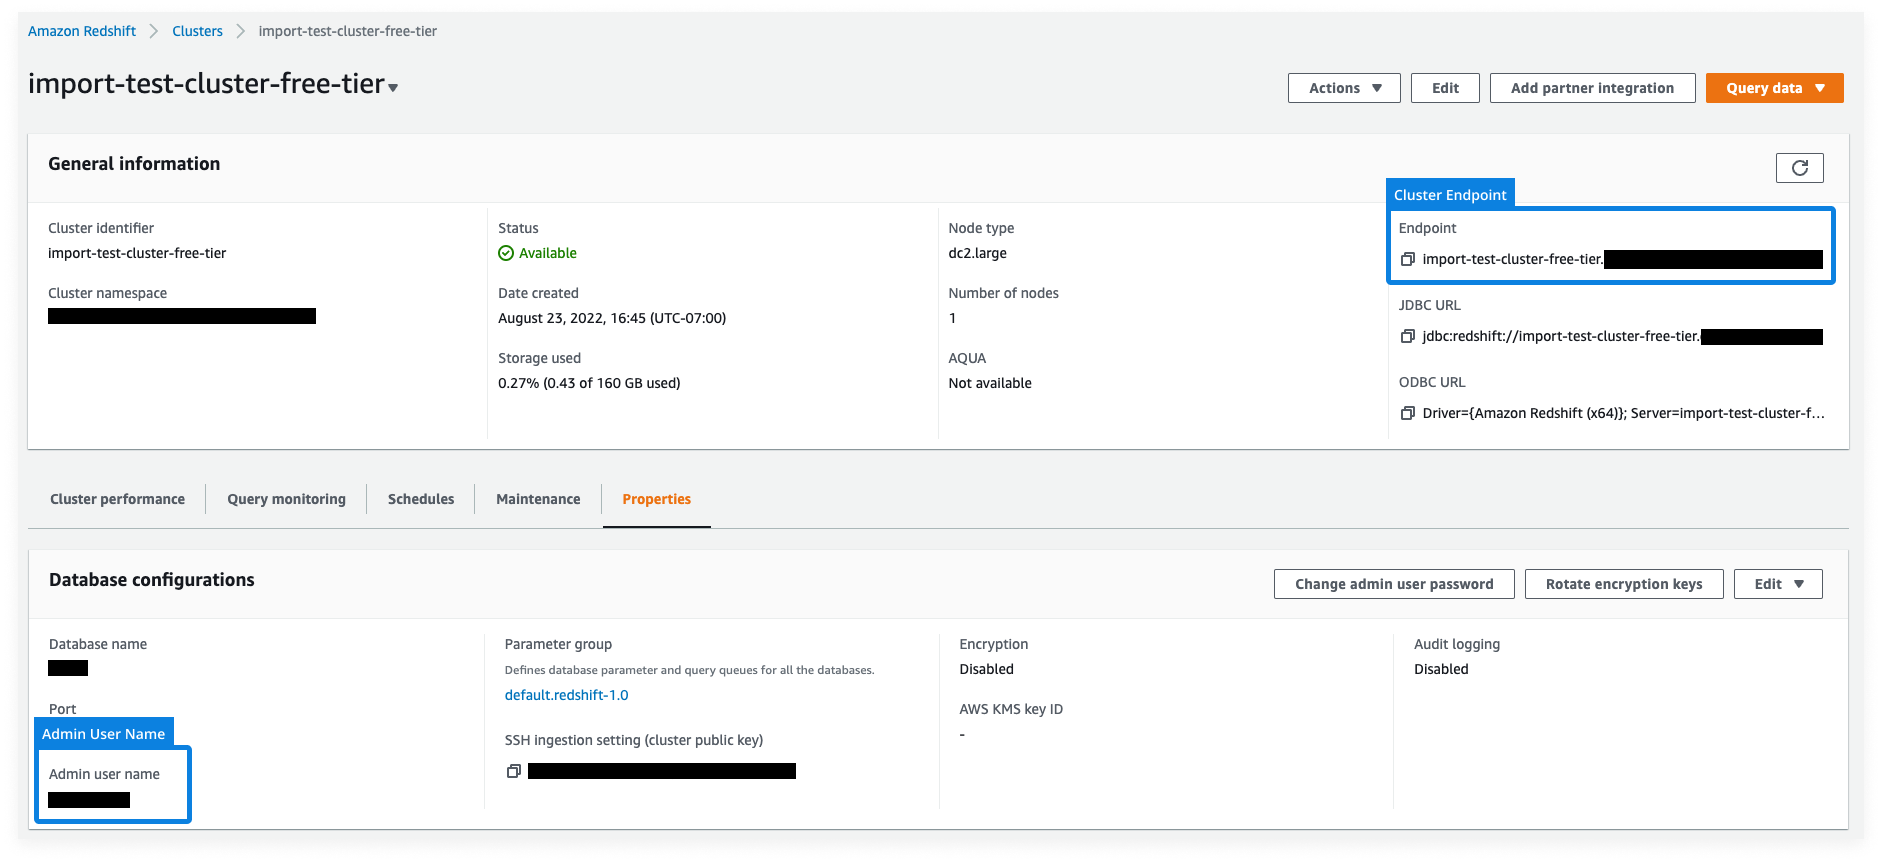
Find this information in your AWS console within your specific cluster, as shown in the image below. The service user must be able to read the required experiment data and write to the Statsig staging schema you specify.
When you save the connection, Statsig runs a series of test commands to validate permissions: for example, creating a temp table, running a select/delete statement on that table, and dropping the table.
The provided Service Account will require the following attributes: enable_case_sensitive_identifier, enable_case_sensitive_super_attribute. If these aren't already set, Statsig sets them to TRUE upon setup completion.
SSH tunneling
For Redshift connections, Statsig supports SSH tunneling into your Redshift cluster for more secure and private database access. To enable access, Statsig requires:
- SSH Host
- SSH Port
- SSH User
Statsig uses this information to generate an SSH key. Add this generated key to your ~/.ssh/authorized_keys file on your SSH proxy machine to enable SSH tunneling.
What IP addresses will Statsig access data warehouses from
If your data warehouse is IP protected, you must include allowlisting of Statsig IP ranges in your setup steps.
Additional setup for Warehouse Explorer
Warehouse Explorer lets you find and bring data from any table into Statsig for ad-hoc analysis.
To enable Warehouse Explorer, you may need to grant Statsig additional permission to query the pg_table_def metadata. Query results include only schemas that Statsig has read access to. A superuser or admin can grant access to additional relevant schemas and table metadata in pg_table_def by running:
  GRANT USAGE ON SCHEMA <RELEVANT_SCHEMA> TO <STATSIG_USER>;
  GRANT SELECT ON ALL TABLES IN SCHEMA <RELEVANT_SCHEMA> TO <STATSIG_USER>;
<STATSIG_USER> is the service user username you provided to Statsig. <RELEVANT_SCHEMA> is the name of the schema to include in Warehouse Explorer results.
Was this helpful?