Test your Feature Gate
Learn how to validate your feature gate using built-in tools, test apps, and live diagnostics in the Statsig console
There are three ways to test your feature gate and validate that it's working as expected with the rules you have created:
- Using the built-in Test Gate tool in the Statsig console
- Using the prototype Javascript Test App available in the Statsig console
- Using the Diagnostics tab in the Statsig console
Option 1: Use the Test Gate tool
To validate your feature gate using the built-in Test Gate tool:
- Log into the Statsig console at https://console.statsig.com
- On the left-hand navigation panel, select Feature Gates
- Select the feature gate that you want to validate
- At the bottom of the page, the Test Gate window lists all properties available in the rules you have created, as shown below:
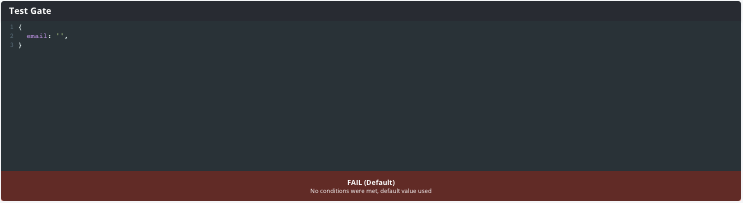
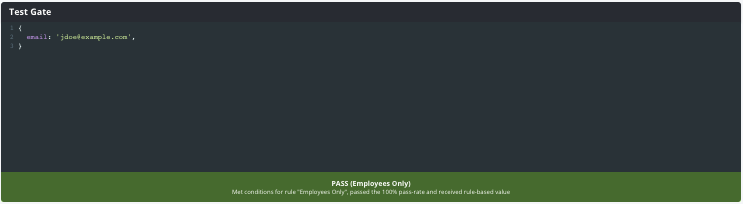
- Click in the window and edit the value of the Email property to include the users you want to target. For example, type jdoe@example.com as shown below. When the email domain matches "@example.com", the feature gate check succeeds and the window shows PASS. Otherwise, the gate fails and the window shows FAIL.
Option 2: Use the Statsig Test App
To validate your feature gate using the Test App:
- Log into the Statsig console at https://console.statsig.com
- On the left-hand navigation panel, select Feature Gates
- Select the feature gate that you want to validate
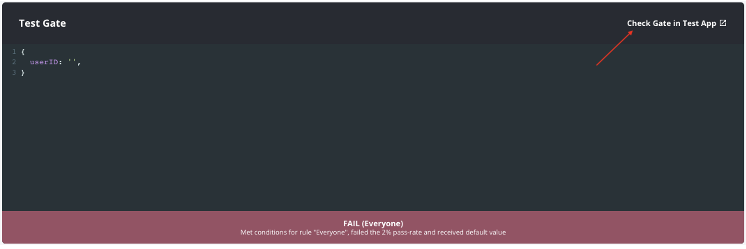
- At the bottom of the page, select Check Gate in Test App at the top right of the Test Gate window (shown by the red arrow). This opens a new browser window with a prototype JavaScript client that initializes and calls the Statsig
checkGateAPI.
Option 3: Use the Diagnostics tab
To validate your feature gate using a live log stream:
- Log into the Statsig console at https://console.statsig.com
- On the left-hand navigation panel, select Feature Gates
- Select the feature gate that you want to validate
- Click on the Diagnostics tab (next to the Setup tab)
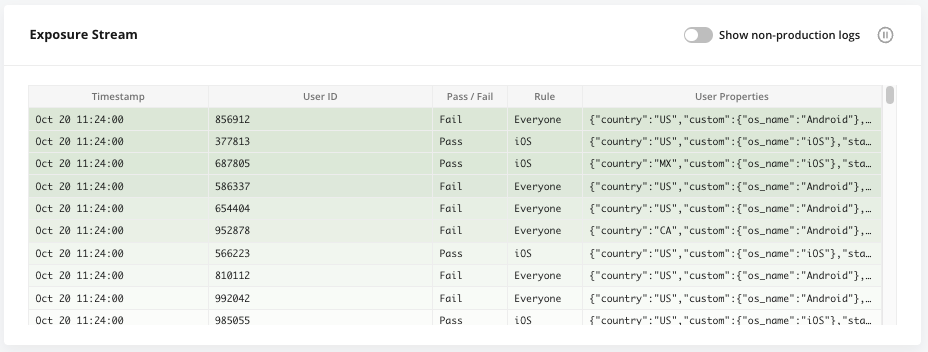
- Scroll down to the Exposure Stream panel, where you can see a live stream of gate check events as they happen:
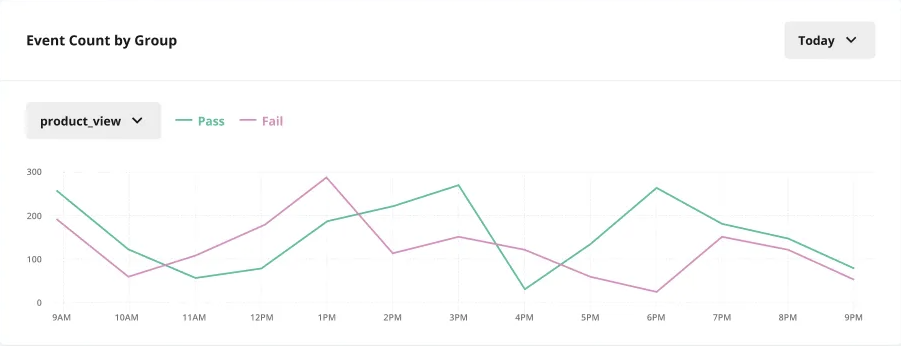
- In the Event Count by Group panel, you can also validate that your application records events as expected for users you expose to the new feature (or not). If you have started recording a new event type to test a new feature's impact, validate that these events appear as you expose more users to the feature.
Was this helpful?