Redshift
Configure Statsig data warehouse ingestion from Amazon Redshift, including authentication, scheduled queries, and mapping to events and properties.
Connect Redshift to Statsig
Statsig ingests your event and metric data from Amazon Redshift so it flows into your Statsig metrics and experiments. To set up a connection with Redshift, Statsig needs the following
- Cluster Endpoint
- Admin User Name
- Admin User Password
Statsig doesn't support SHA256 passwords. Use MD5 to avoid issues.
You can find this information in your AWS console within your specific cluster, as shown below.
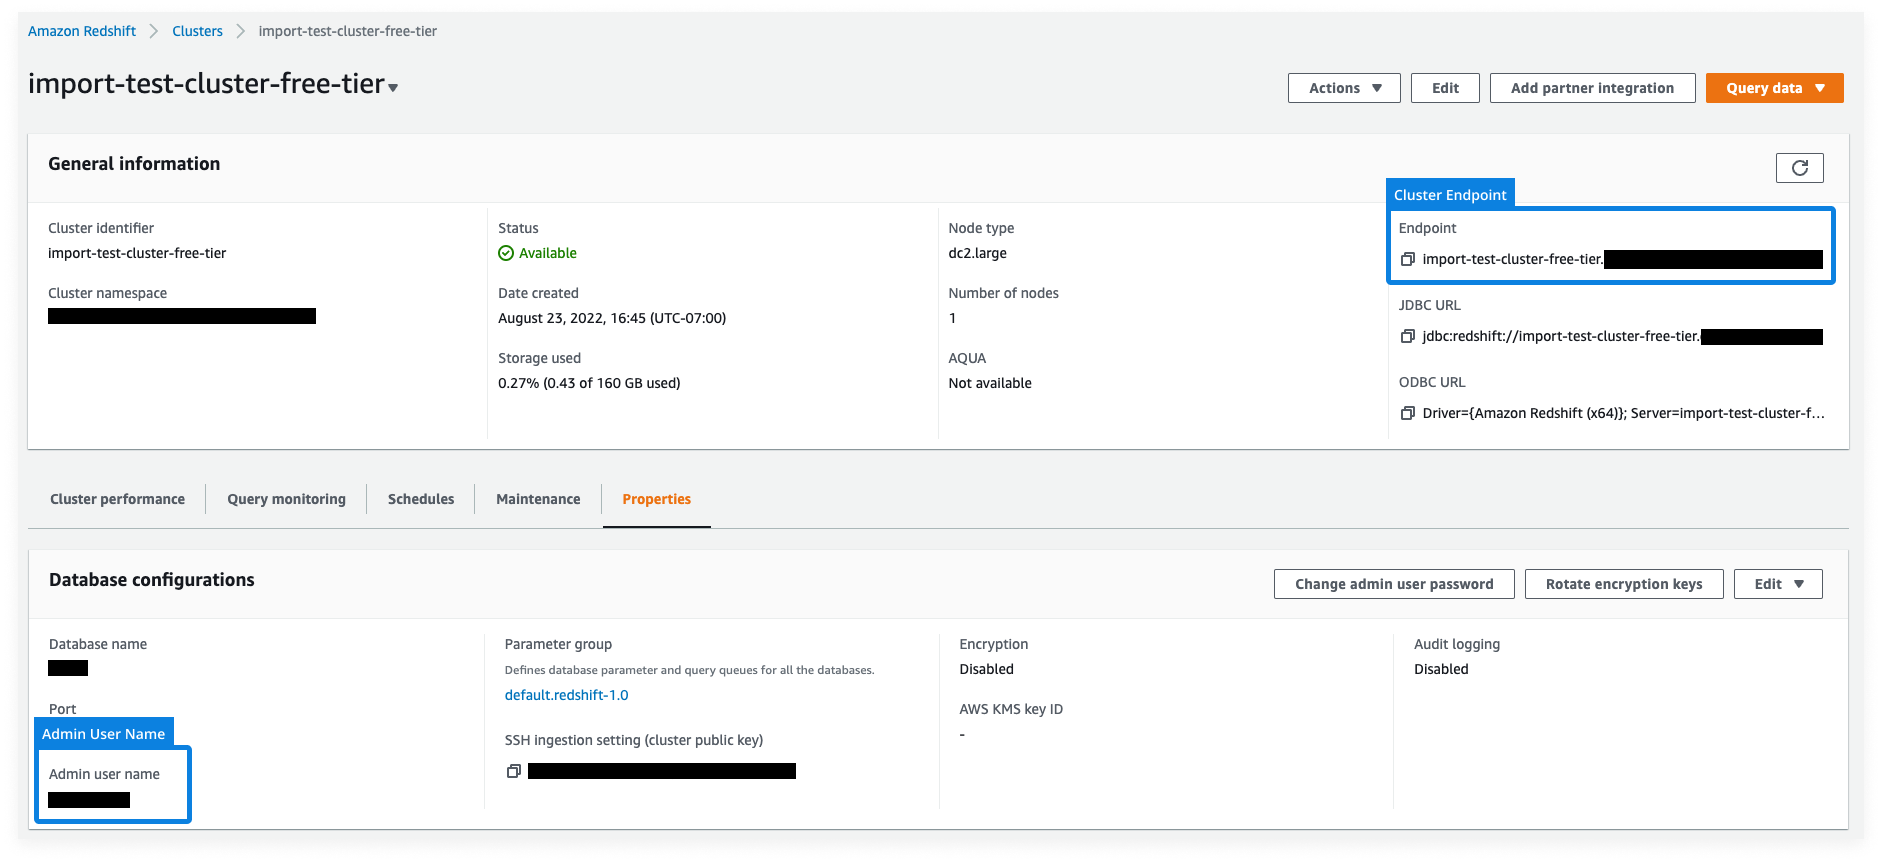
Statsig uses the admin user name and password to create a user with restricted access to query from your data warehouse.
SSH tunneling
For Redshift connections, Statsig supports creating an SSH tunnel into your Redshift cluster for more secure and private database access. To enable SSH tunneling, Statsig requires:
- SSH Host
- SSH Port
- SSH User
Statsig uses this information to generate an SSH key. Add this generated key to your ~/.ssh/authorized_keys file on your SSH proxy machine to enable SSH tunneling.
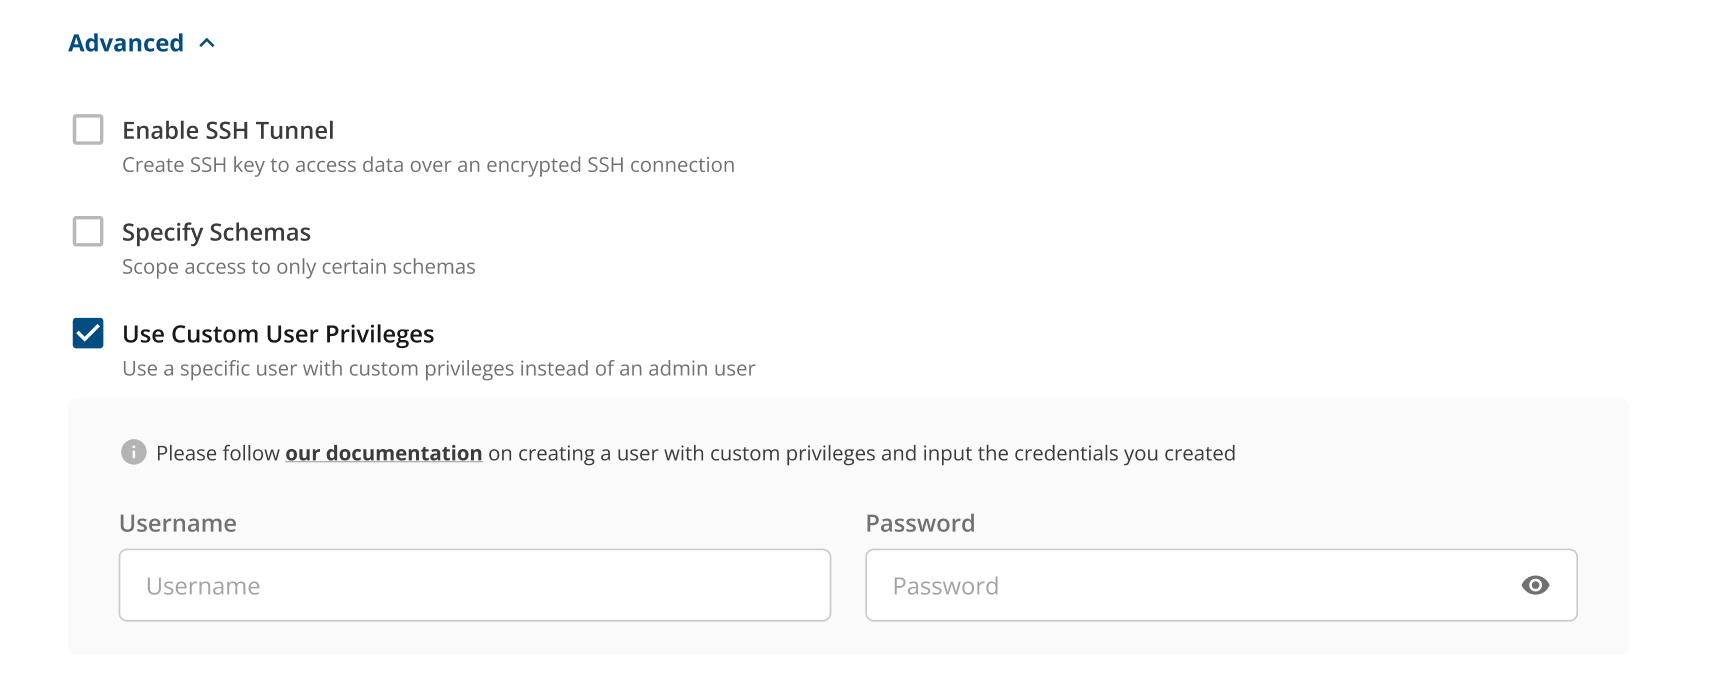
Custom user privileges
To create a custom user with specific privileges instead of using an admin user, run the following code in your Redshift cluster with your admin user. Replace <USER> and <PASSWORD> with your values, which you copy into the Statsig console.
# Create Statsig User
CREATE USER <USER> WITH PASSWORD <PASSWORD> SYSLOG ACCESS UNRESTRICTED;

# Give access to any Schemas that the Statsig User needs to read from
GRANT USAGE ON SCHEMA <SCHEMA> to <USER>;
GRANT SELECT ON ALL TABLES IN SCHEMA <SCHEMA> to <USER>;

# Create a Schema for Statsig User to write temporary data to
CREATE SCHEMA IF NOT EXISTS statsig_ingestion_staging;
GRANT ALL ON SCHEMA <SCHEMA> TO <USER>;
After running the script, enter the <USER> and <PASSWORD> you created in the Statsig console during the Connection Set Up stage, under the Advanced settings options.
Was this helpful?