Getting Started
Step 1: Install the SDK in your server app
Start by installing the Statsig Azure AI SDK. Depending on your language/framework you would use the right package manager to install the SDK in your project
- NodeJS
- Python
- .Net
npm i @statsig/azure-ai
pip install azureai-statsig
dotnet add package StatsigAzureAI
Step 2: Create a model deployment in Azure AI Studio
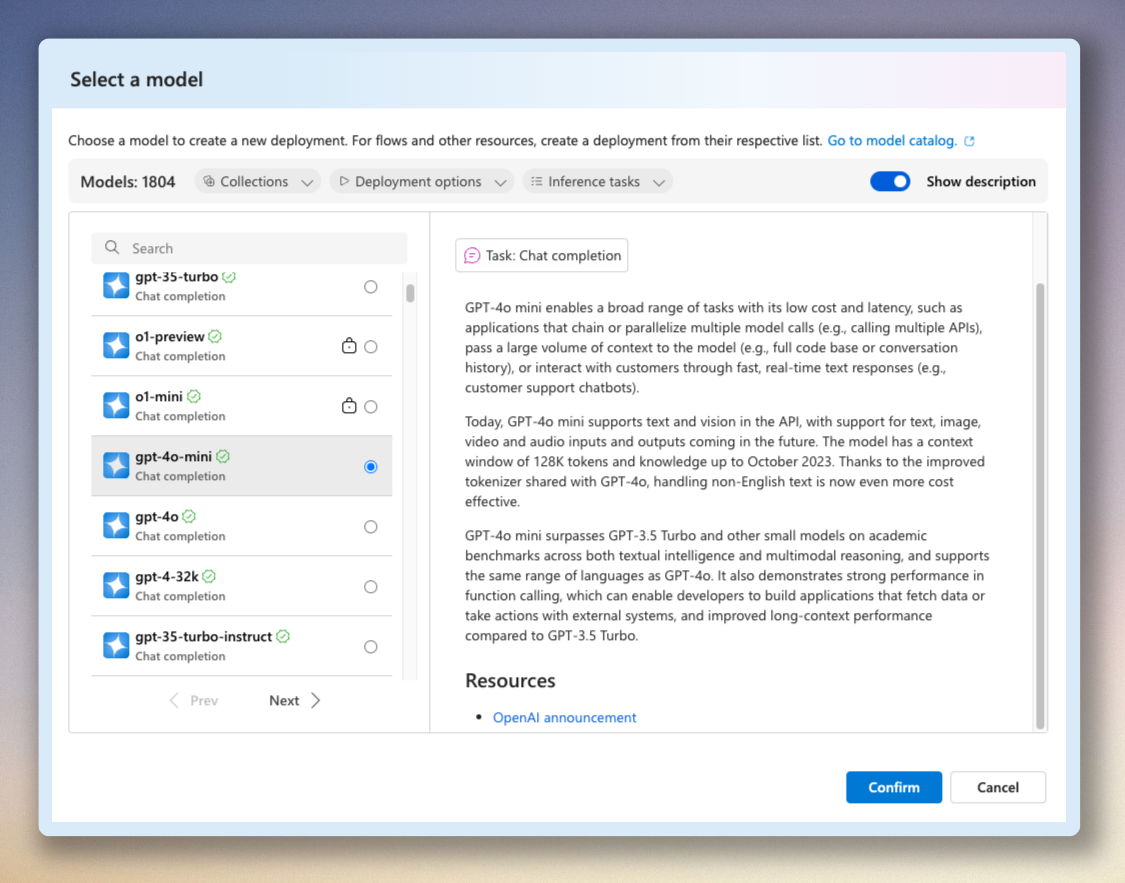
Log into your Azure AI Studio console and create a new deployment that you'd like to use.
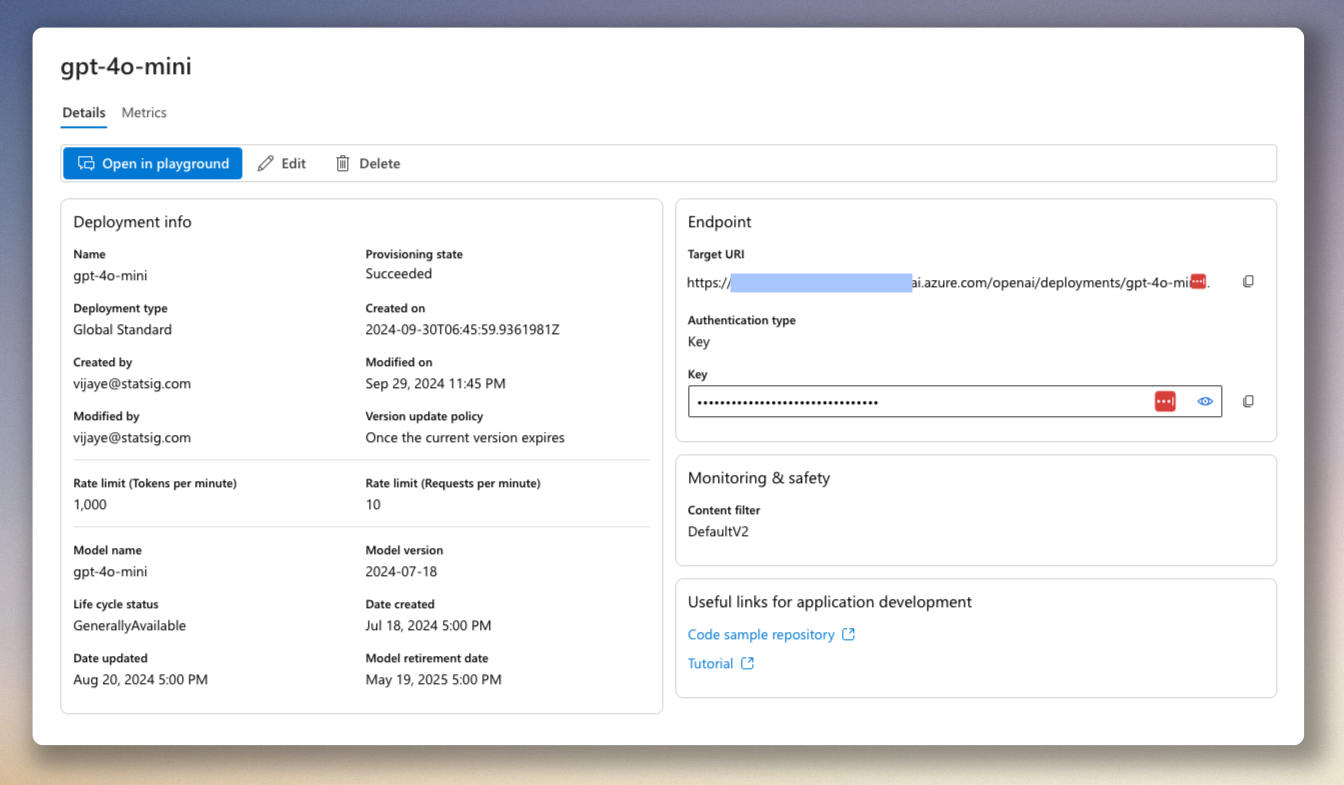
Once confirmed, you will be taken to the details page of that model.
Now, copy the Target URI (this will be your endpoint in code) and the Key - you'll need this in the SDK to call the APIs.
Step 3: Get Statsig server SDK key
This guide assumes you have an existing Statsig account. Please go here to create a new free account if you don't already have one: https://statsig.com/signup
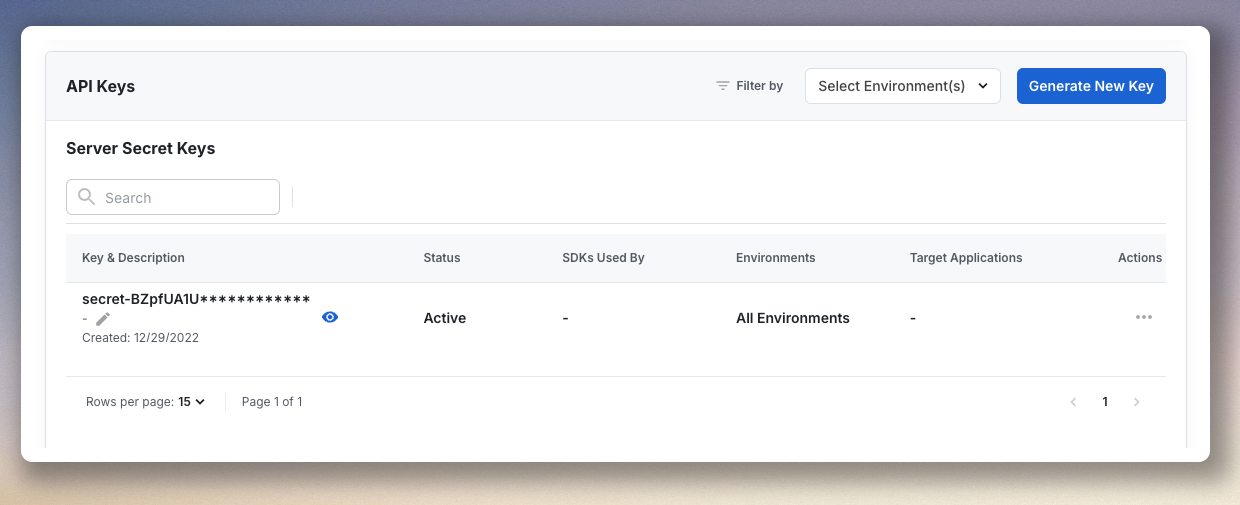
Go to your Project Settings and choose the Keys & Environments tab on the left. Scroll down to API Keys section and copy the Server Secret Key. If one doesn't exist, you will have to create one, or ask your project admin to create one for you.
Step 4: Initialize Azure AI Server
- NodeJS
- Python
- .Net
import { AzureAI } from "@statsig/azure-ai";
await AzureAI.initialize("<STATSIG_SERVER_KEY>");
AzureAI.initialize("<STATSIG_SERVER_KEY>")
using Statsig;
using Statsig.AzureAI;
await Server.Initialize("<STATSIG_SERVER_KEY>");