Open Source Script
Use the open-source Statsig migration scripts to move feature flags, experiments, and metrics from third-party platforms into your Statsig project.
Considerations
This script works by default. Start with a test environment of 5–10 flags. Before running the script at scale, consider the following:
- IMPORTANT: If you don't need to customize the import script, use Statsig's in-console tool instead.
The script uses a tag
Imported from LaunchDarklyto identify migrated flags in Statsig. Ensure this tag is unique and recognizable.The script includes a function to delete all Statsig feature gates with a specific tag. Use this with caution to clean up after a test or failed migration.
The script requires API keys for both LaunchDarkly and Statsig. Keep these keys secure.
Installation
To run the script, you need Node.js and npm installed on your system. Execute directly:
npx @statsig/migrations --from launchdarkly --launchdarkly-project-id default <more-arguments>
Configuration
- Provide your LaunchDarkly API key and Statsig Console API key in the script
- Map LaunchDarkly environments to Statsig environments that aren't already the same by using
--environment-name-mappingto the script. - Map LaunchDarkly context kind to Statsig's custom unit ids and custom fields.
Running the script
To execute the migration script, run the following command in your terminal:
node index.js
The script performs the following actions:
- Fetch all feature flags from LaunchDarkly.
- Translate each flag into Statsig's format.
- Create feature gates in Statsig.
- Write the migration status and details to a CSV file named
flag_migration_tracker.csv.
Example translations
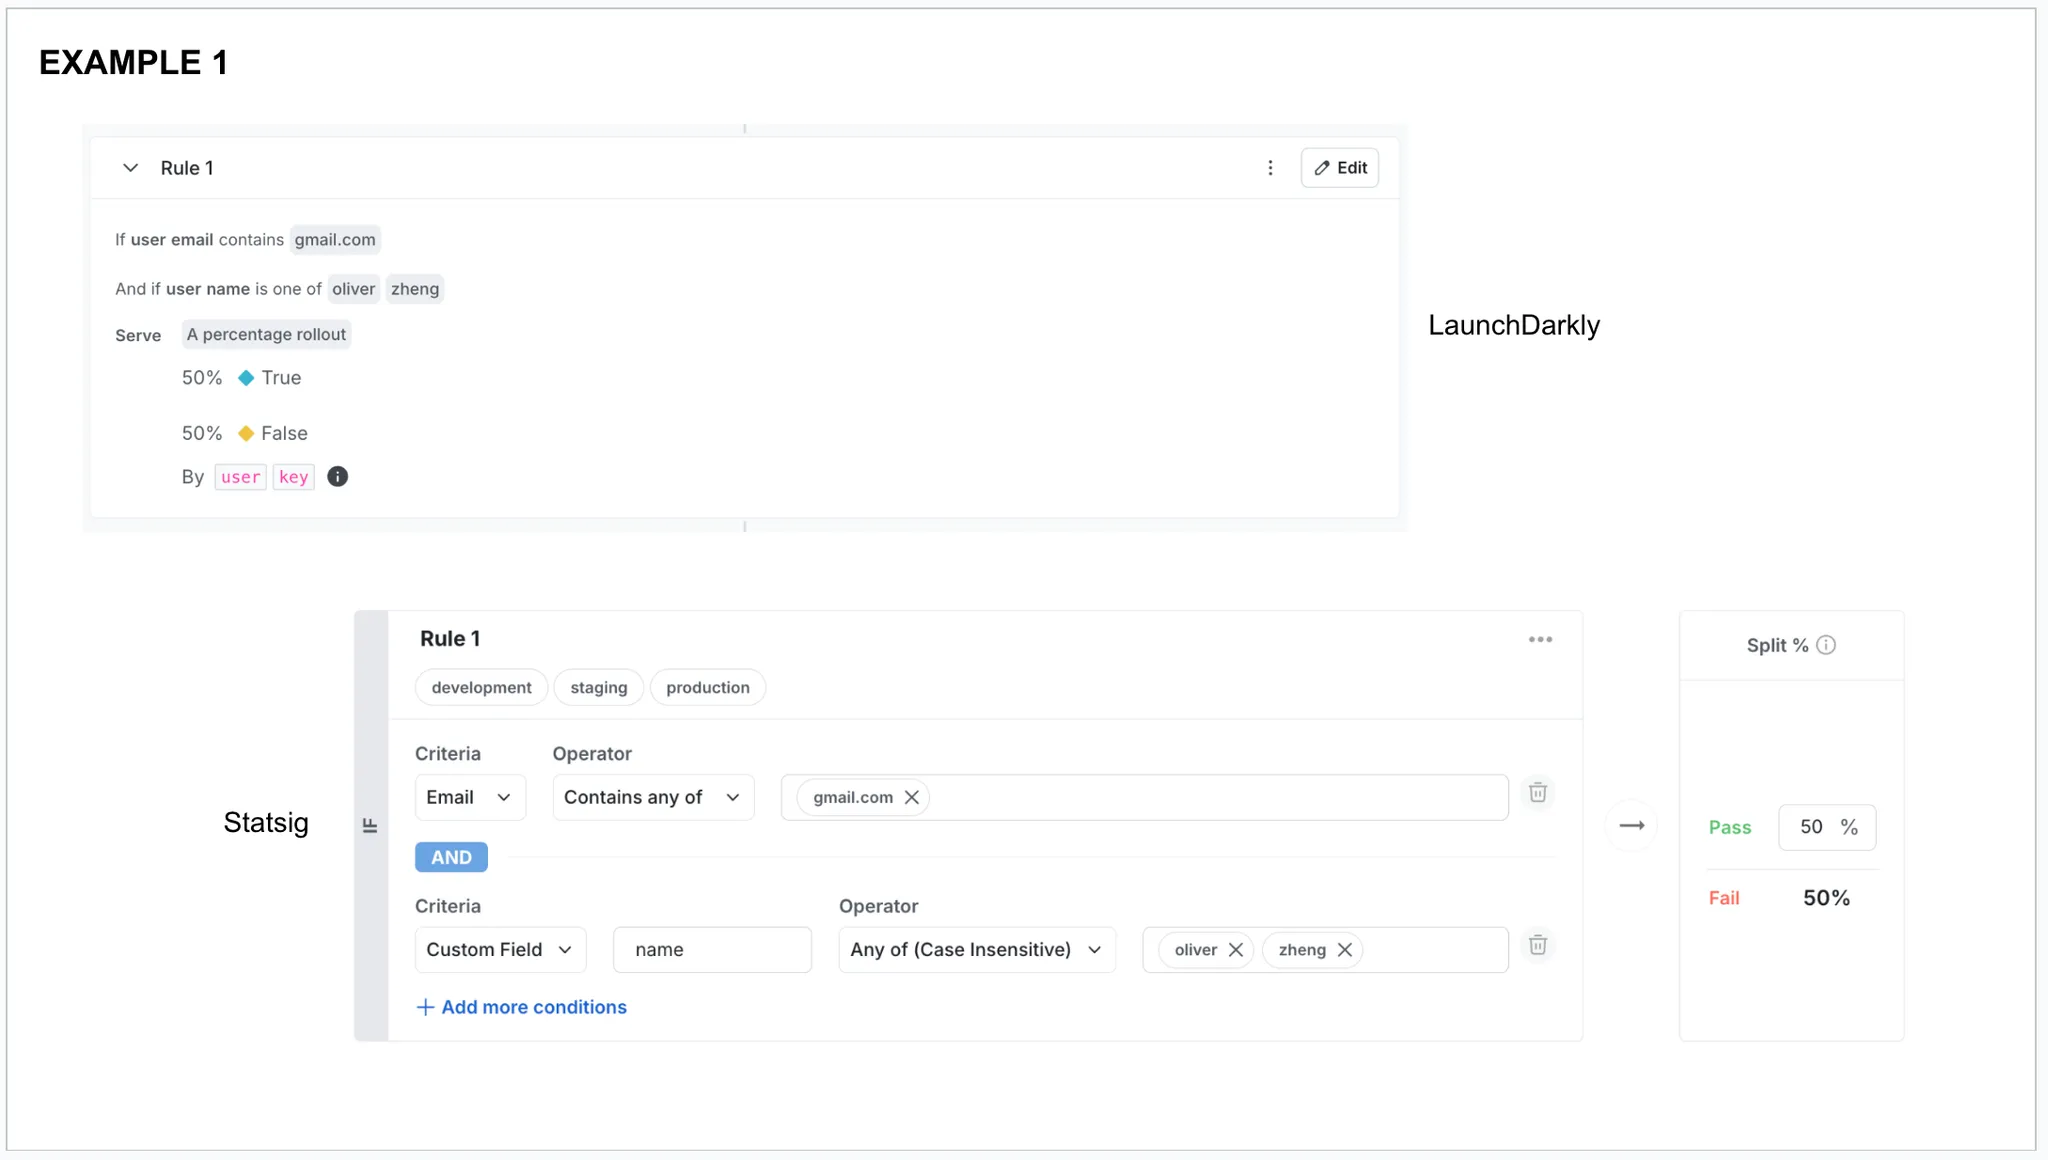
The following examples show how LaunchDarkly feature flags are translated into Statsig feature gates:
Example 1: LaunchDarkly flag with email and name targeting conditions
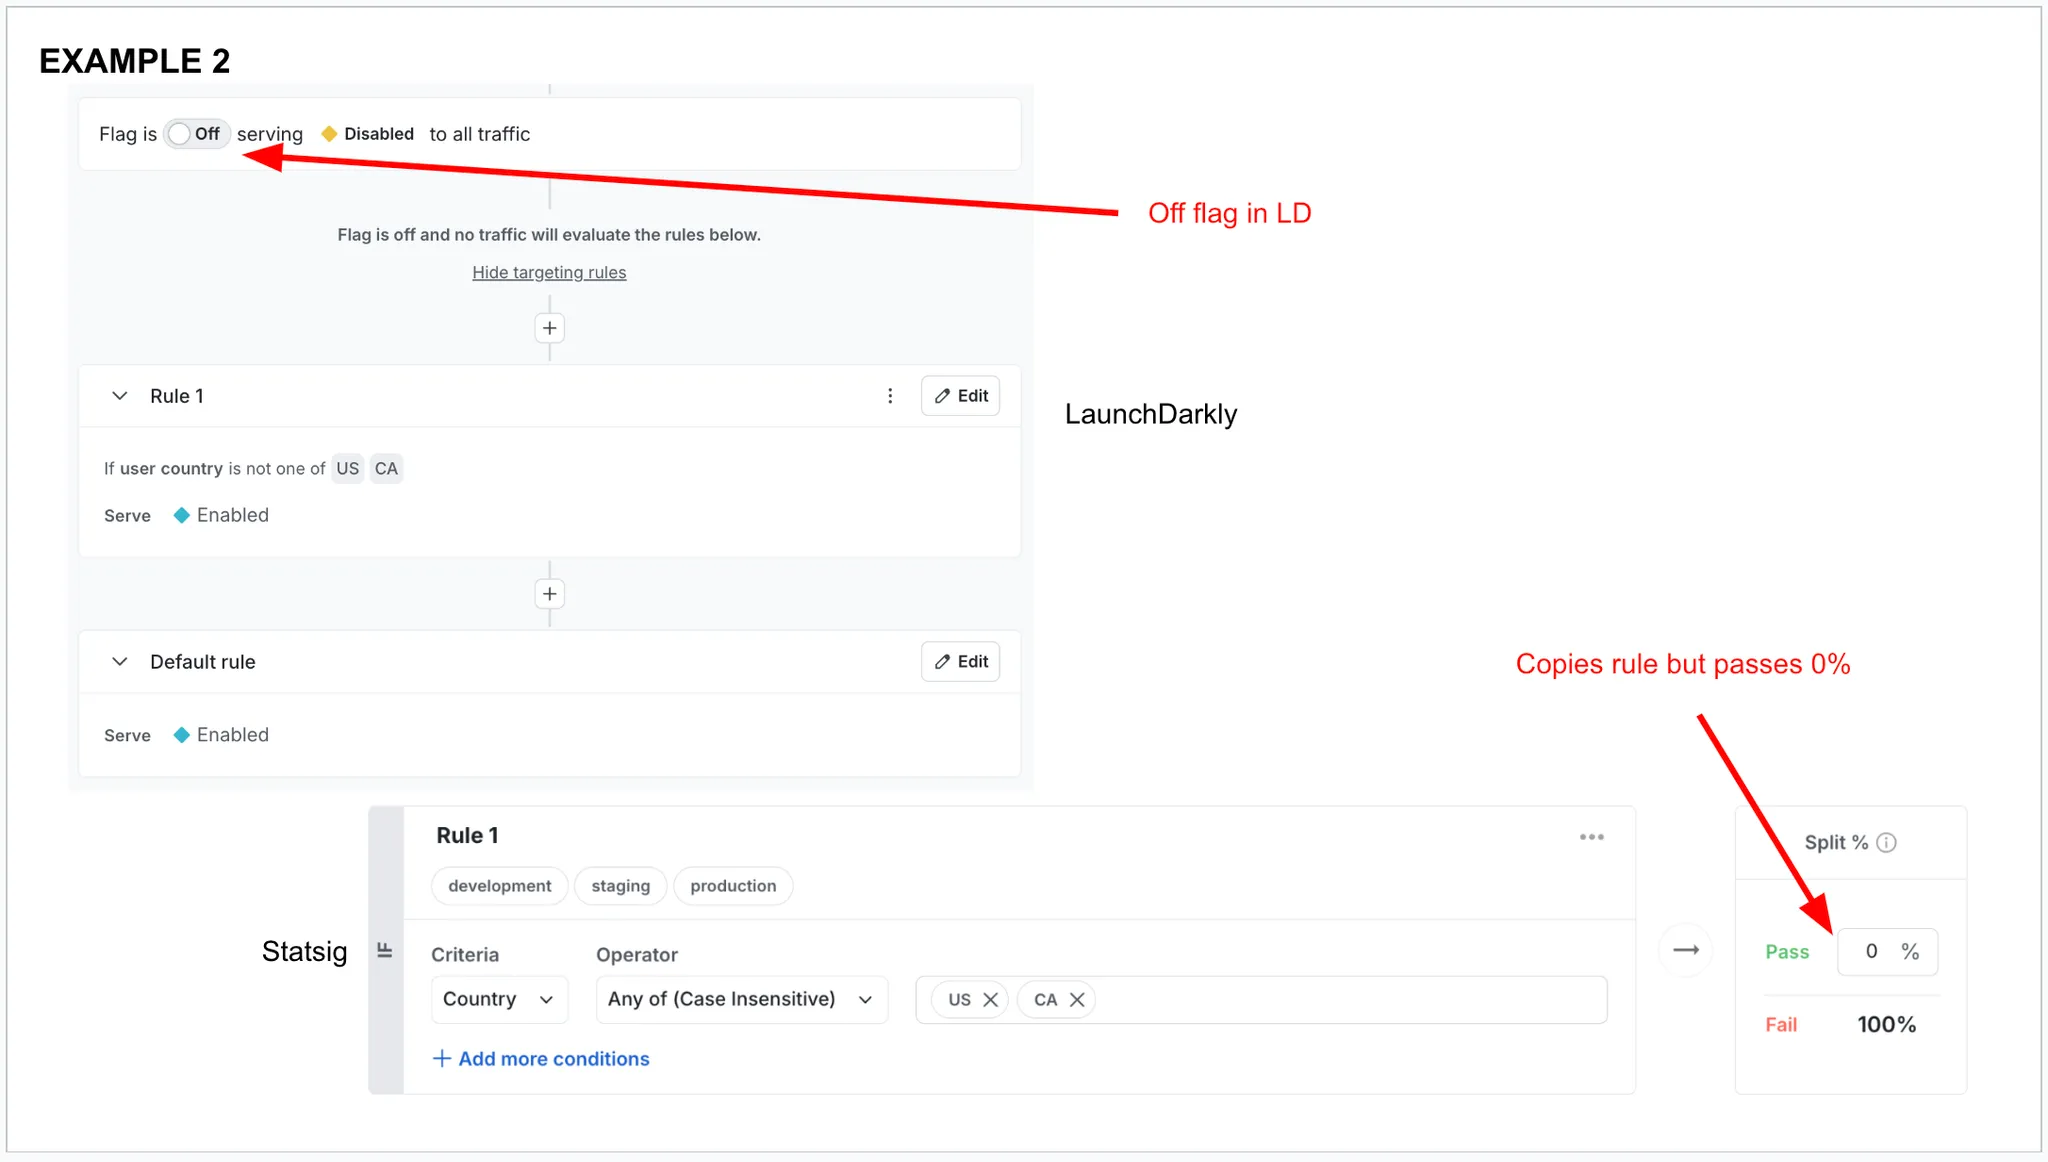
Example 2: LaunchDarkly flag with country-based targeting (off flag)
Troubleshooting
If you encounter issues during the migration, check the following:
- Confirm that the API keys are correct and have the necessary permissions.
- Review the error messages in the console to diagnose the problem.
Pull requests and feedback are welcome.
Was this helpful?