Guided Tutorial
A step-by-step tutorial to create your first dynamic config for building a flexible homepage banner
Dynamic Config stores configuration values, such as text, colors, or ranking parameters, that you update without shipping new code. It works for server-side rendered UI, rate limiting, ranking systems, algorithms, and more. This tutorial builds a flexible homepage banner and shows how to change what different users see directly from the Statsig console.
This guide focuses on a client-side example, as it's easier to illustrate how Dynamic Configs work and how to use them. You can and still should use Dynamic Config on the server side as well.
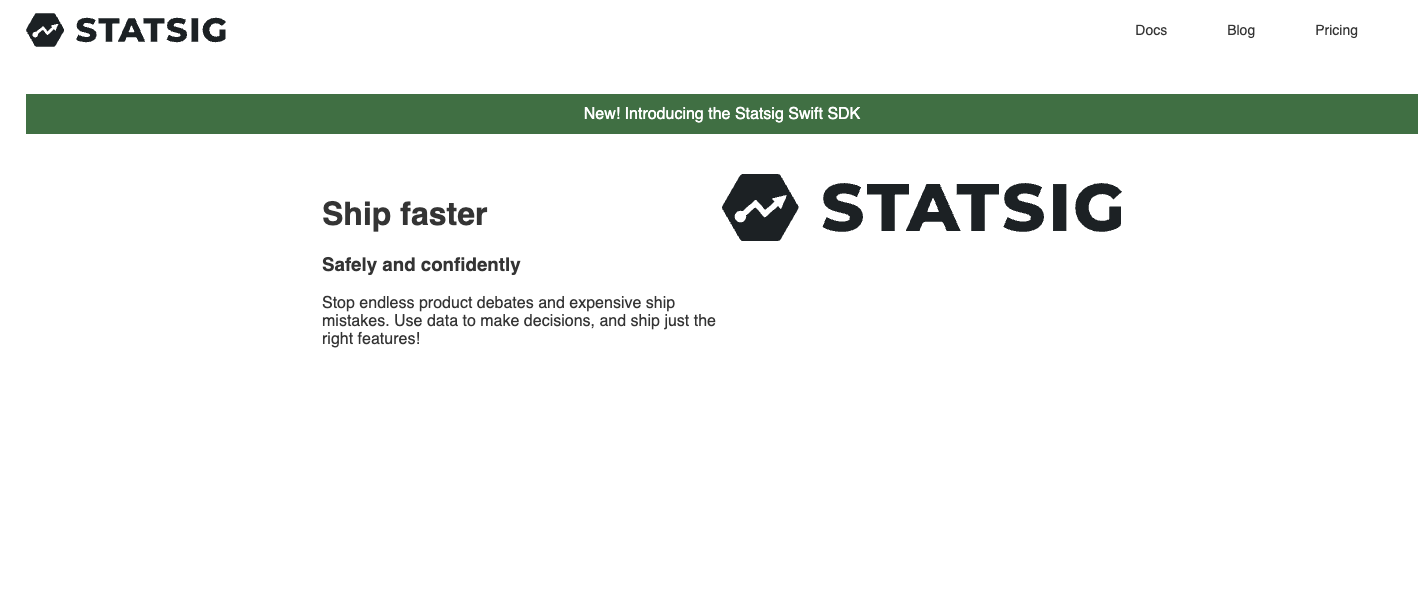
This guide builds a front-page banner, the kind that appears on an ecommerce site to advertise an upcoming sale. The example applies it to a stripped-down version of the Statsig homepage. The result looks like this green banner:
Codepen Example
Find this example in a codepen where you can see the actual code, or fork it to quickly test your own Dynamic Configs.Step 1 - Create a new Dynamic Config
Create a new Dynamic Config. Dynamic Configs live under the "Feature Management" tab in the Statsig Console. Choose a name related to the set of variables this config holds. For a homepage banner, name it "Banner Config":
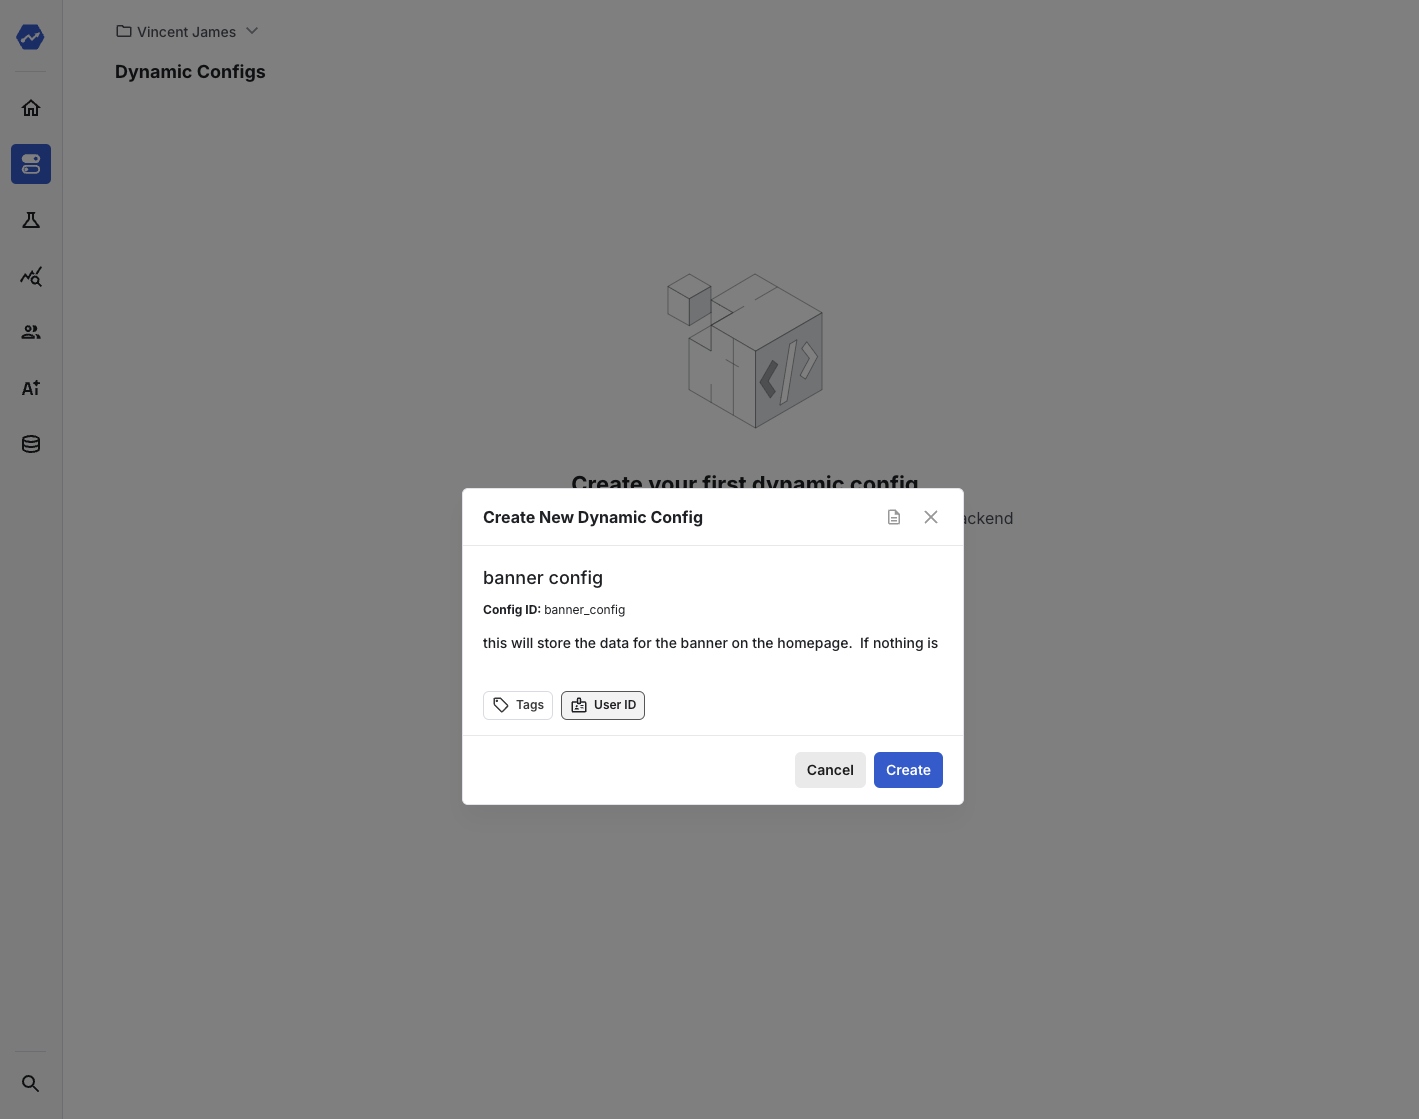
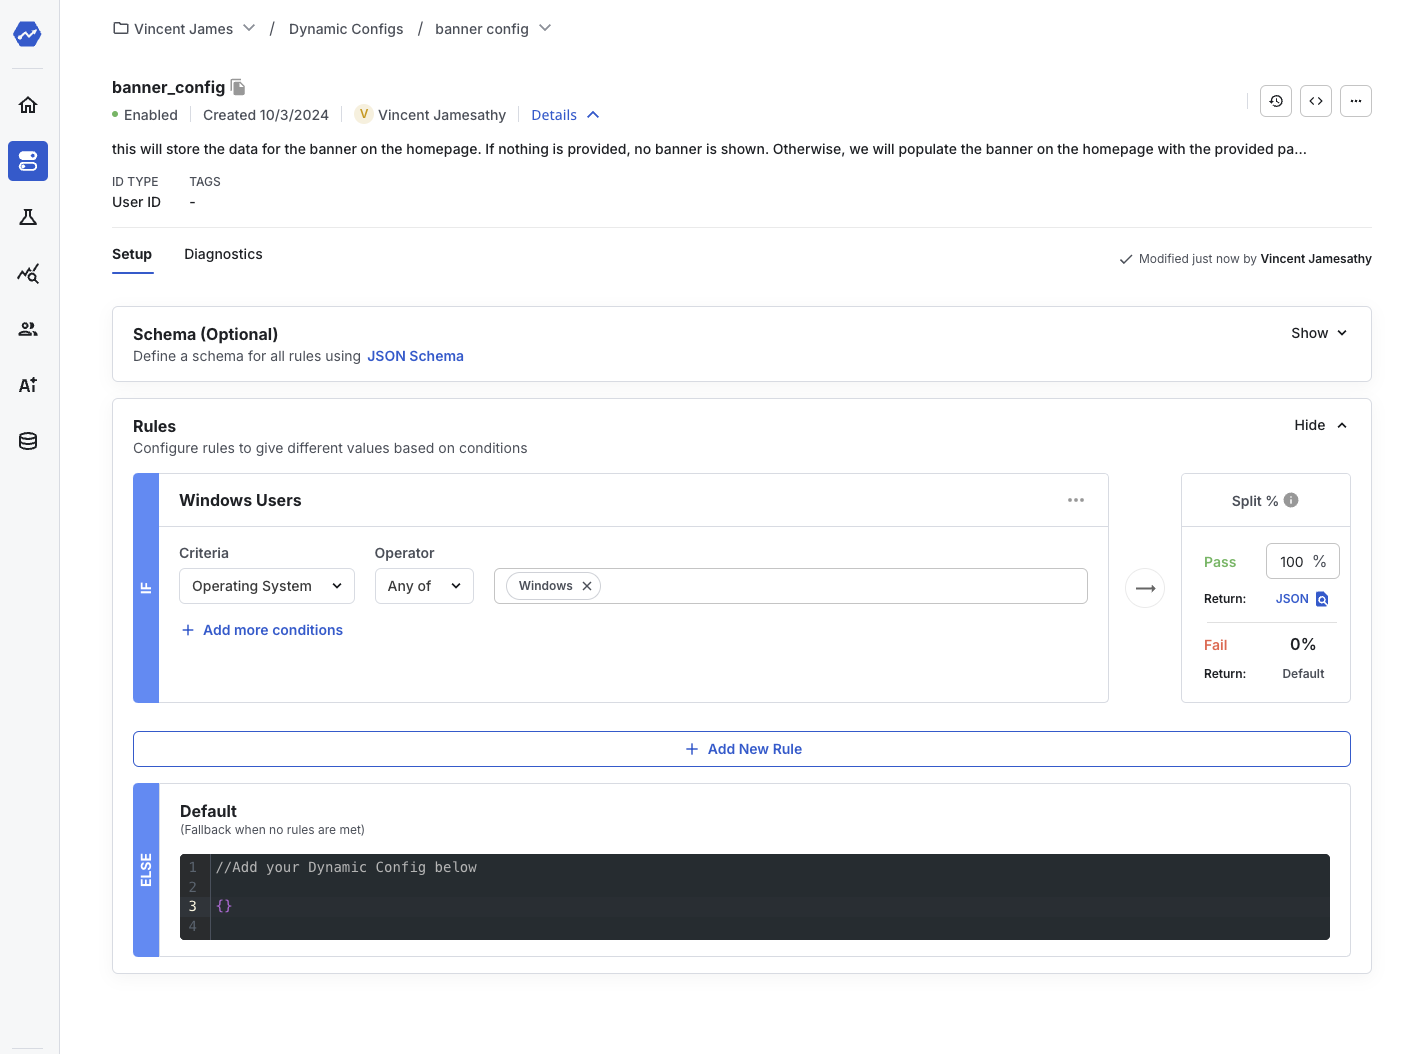
The new Dynamic Config is empty. It returns the default value (an empty JSON object) when you evaluate it. The next steps add options to populate a homepage banner. The goal is to show a targeted banner to two groups of developers: those likely to use a .NET SDK, and those likely to use a Swift SDK. The targeting is simple: promote the .NET SDK to users browsing on Windows, and the Swift SDK to users browsing on macOS.
Step 2 - Create targeting rule(s) and conditions
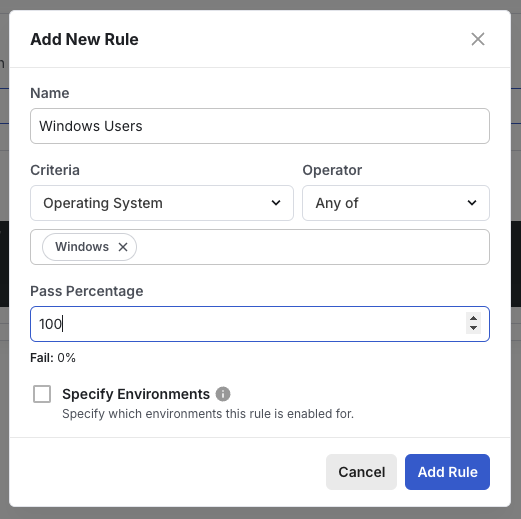
First, add the Windows rule. Select "Add Targeting", and then "Add new Rule":
Feature Gates and Dynamic Config share the same user segmentation and targeting tools, but differ in what they return. Feature Gates are lightweight and return only a boolean indicating whether the user matched a rule. Dynamic Configs return a different JSON object for each rule.
Step 3 - Update the return value for users matching each rule
This is the rough schema to return:
{
  text,
  backgroundColor,
  color,
  fontSize,
  isCloseable,
}
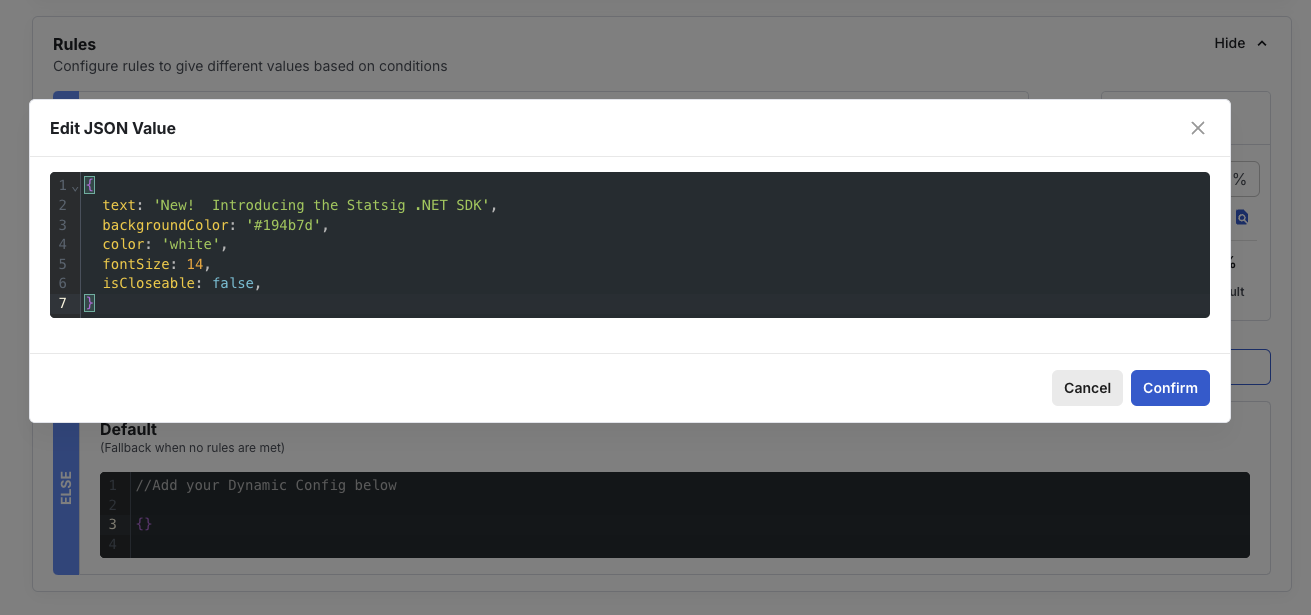
Edit the return value for the Windows rule. Under "Return" on the right-hand side, select "edit" and paste the following:
{
  text: 'New!  Introducing the Statsig .NET SDK',
  backgroundColor: '#194b7d',
  color: 'white',
  fontSize: 14,
  isCloseable: false,
}
Select "Save" in the bottom right.
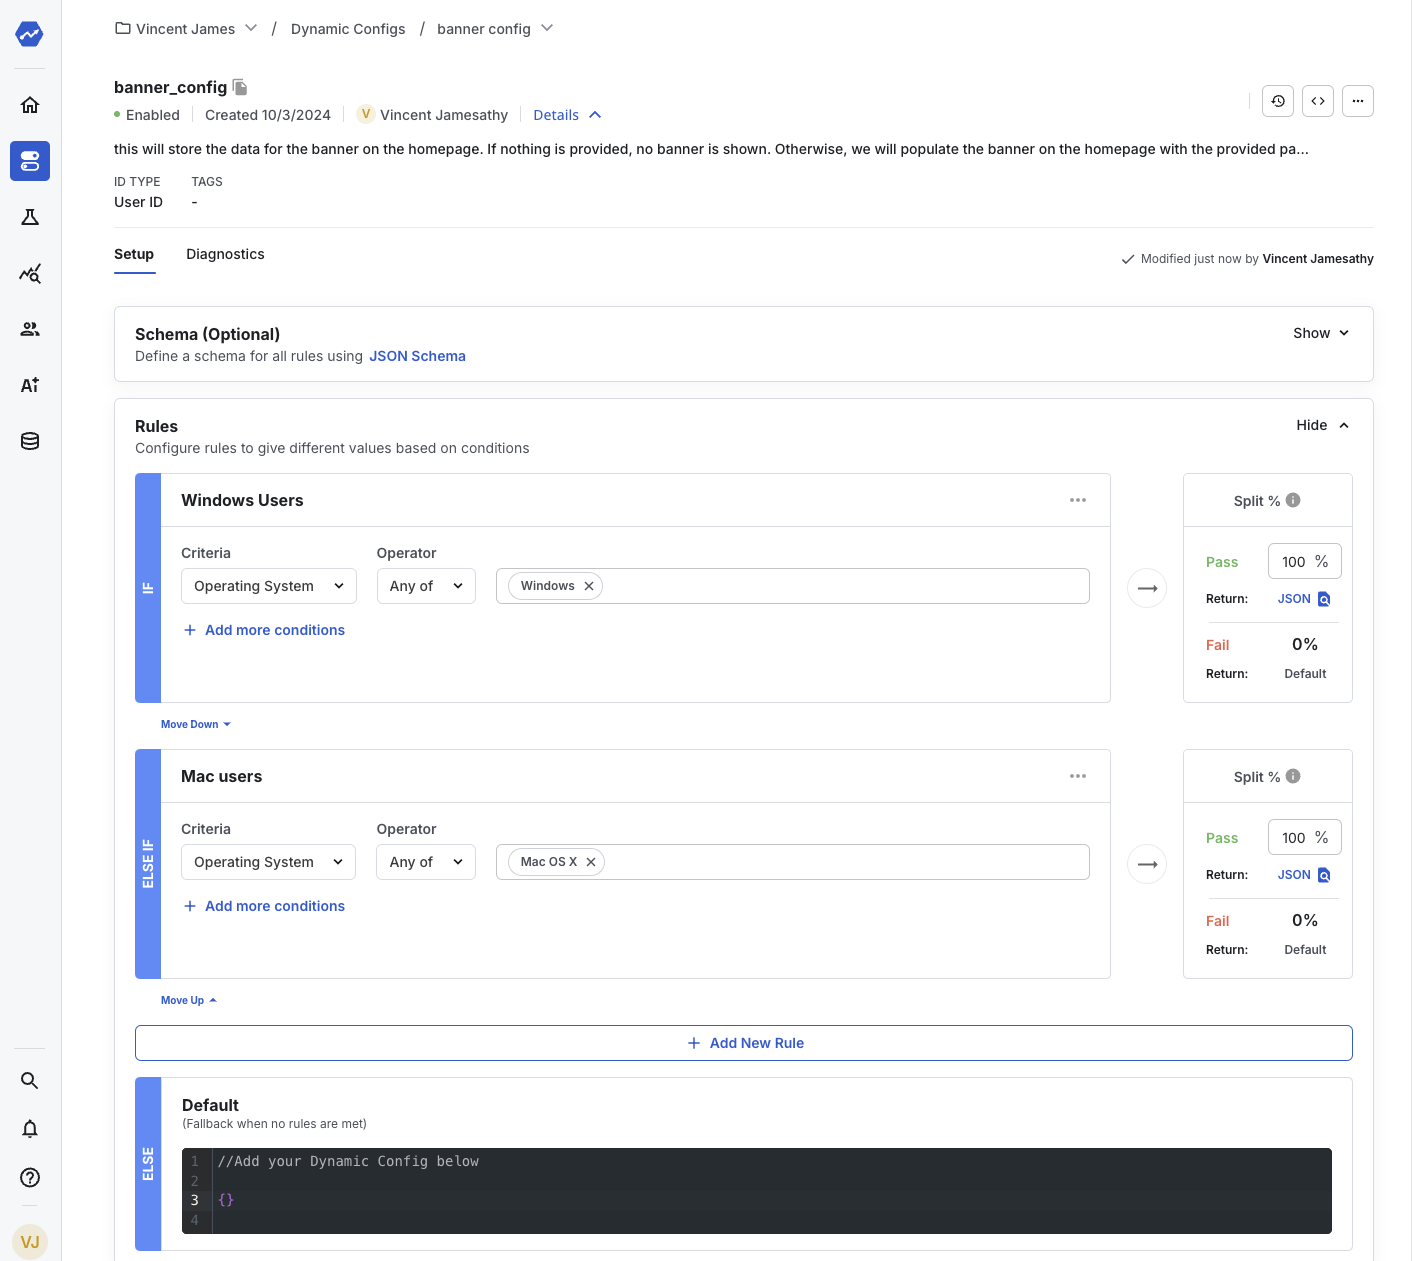
Repeat this process for users on macOS. Add the same OS rule, but this time select "Mac OS X".
Then update the return value:
{
  text: 'New!  Introducing the Statsig Swift SDK',
  backgroundColor: '#197d4b',
  color: 'white',
  fontSize: 16,
}
Click "Save" to apply these rules to your config. The Dynamic Config should now look like this:
Step 4 - Call getDynamicConfig in your app
This is a specific guide for creating a Dynamic Config using the Statsig JavaScript SDK. For other SDKs, go to the Statsig SDK quickstart guides and select the SDK you're using. You can also find the code snippet for a particular dynamic config by selecting the code snippet button on the dynamic config page and choosing the target SDK.
const client = new window.Statsig.StatsigClient("<CLIENT-SDK-KEY>", {});
Now, fetch the config and construct the banner:
const bannerConfig = client.getDynamicConfig("banner_config");
const text = bannerConfig.get("text", null);
const backgroundColor = bannerConfig.get("backgroundColor", "black");
const color = bannerConfig.get("color", "white");
const fontSize = bannerConfig.get("fontSize", 14);
if (text == null) {
  return;
}
const banner = document.getElementById("homepageBanner");
const bannerText = document.createElement("p");
banner.style.display = "block";
bannerText.innerHTML = text;
banner.style.color = color;
banner.style.fontSize = fontSize + "px";
banner.style.backgroundColor = backgroundColor;
banner.appendChild(bannerText);
This JavaScript relies on the HTML page having a homepageBanner div:
<div id="homepageBanner"></div>
With a small amount of JavaScript, this example integrates with the Statsig SDK and uses the Dynamic Config. You can now add a new rule to the Dynamic Config and return a different banner to a different group of users without updating the website.
Here is an example of the result when viewing the webpage in Chrome on a Mac:
This example shows one approach to using Dynamic Config with your app, website, or backend service.
Was this helpful?