Get Started With Autotune
Set up a Statsig Autotune experiment, including selecting a goal metric, defining variants, configuring traffic allocation, and launching to users.
How to set up Autotune
- To create a new Autotune experiment, navigate to the Autotune section on the Statsig console.
- Click Create and enter the name and description for the Autotune experiment.
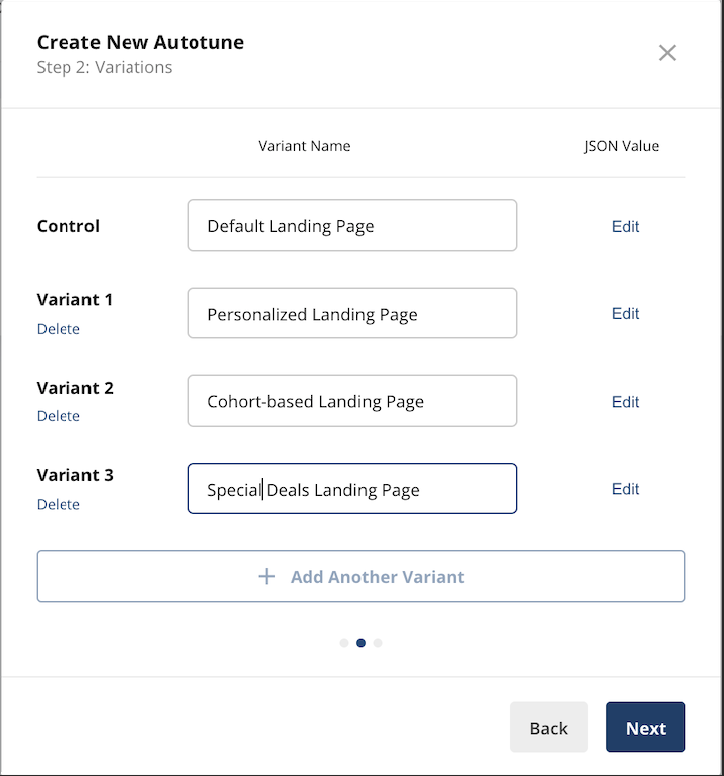
- Provide the variants to test in the Autotune experiment. Each variant needs a name, and a corresponding JSON value. Statsig returns the variant listed as Control/Default when the Autotune experiment isn't running.
- Select the success event to optimize for. You can further specify an optional event value.
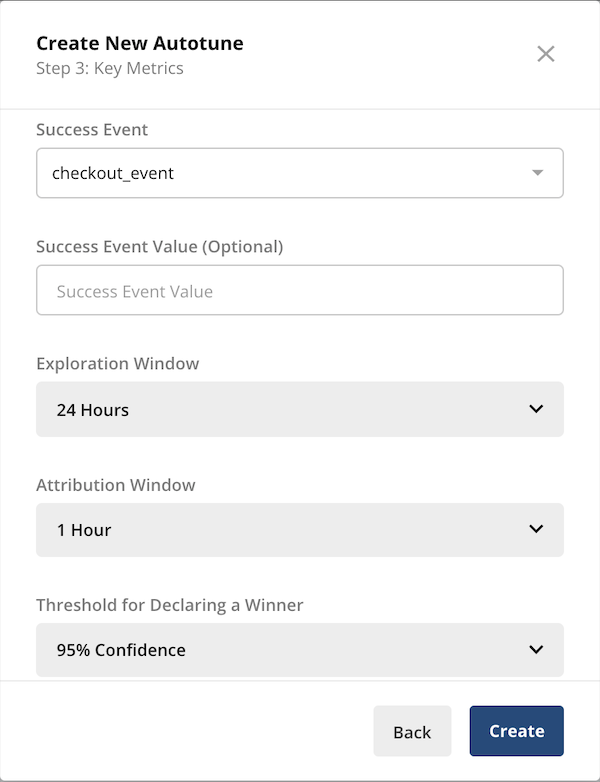
You can specify a few parameters:
| Parameter | Description |
|---|---|
| Exploration Window | The initial time period where Autotune equally splits traffic. This is useful for noisy or temporal metrics where hourly data swings can bias Autotune's initial measurements. |
| Attribution Window | The maximum duration between the exposure and success event that counts as a success. Statsig recommends 1 hour for most applications; adjust if you expect the success event to lag the exposure event by several hours. |
| Winner Threshold | The "probability of best" threshold a variant must reach for Autotune to declare it the winner, stop collecting data, and direct all traffic. A lower value results in faster decisions but increases the probability of selecting the wrong winner. |
Click Create to finalize the setup.
- As with Feature Gates and Experiments, Statsig provides a code snippet for the exposure check event to add to your code. Select Start when you're ready to launch your Autotune test.
Schedule the start time
Instead of launching an Autotune right away, you can schedule it to start at a specific time. This is useful when you want a test to begin during a particular window, such as after a holiday, without having to start it manually.
To schedule the start:
- Select Start to open the start dialog.
- Turn on Schedule Autotune Start Time.
- Choose the date and time you want the Autotune to begin. You can schedule a start up to one year in advance, and times snap to the nearest 15-minute interval. The picker uses your local time zone.
- Select Schedule Start.
The Autotune shows a Scheduled status until the start time, when it launches automatically. To change or remove a scheduled start before it begins, use the Edit Scheduled Start or Cancel Scheduled Start option on the Autotune.
Was this helpful?