Visual Editor Setup & Usage
Overview of Statsig Sidecar v3, a no-code Chrome extension for running A/B tests directly on any website without engineering involvement.
This feature is in Early Access. During this time, aspects of the functionality may still be developed, and this documentation may not always be up to date. If you have any questions, contact Statsig Support.
How Visual Editor v3 works
Visual Editor v3 is a no-code Chrome extension for building and running A/B tests directly on any website. You create the experiment in the Statsig Console, then edit variants on top of the live page with a point-and-click editor. Sidecar still runs through a JavaScript script tag, though the package name has changed from earlier versions.
Prerequisites
1. Installing the Sidecar script
For experiments to take effect, the visual editor ("sidecar") script must run on your website, on any page you want to experiment on:
<script src="https://cdn.jsdelivr.net/npm/statsig-sidecar-v2-beta/dist/index.min.js?apikey=client-key" ></script>
client-key with a client key from your Statsig project. You can find it at Settings > Keys & Environments.Most website builders also support adding script tags on your website, like: Webflow, Wordpress, Wix, Squarespace, Weebly.2. Installing the Chrome extension (for editing)
To create edits for experiment variants, install the Statsig Visual Editor Chrome Extension.You also need to be a project admin or have permissions to access console API keys to use all Sidecar functionality.
Creating an experiment
Create experiments in the console by opening the Create Experiment dialog and changing the experiment type to "Visual Editor".
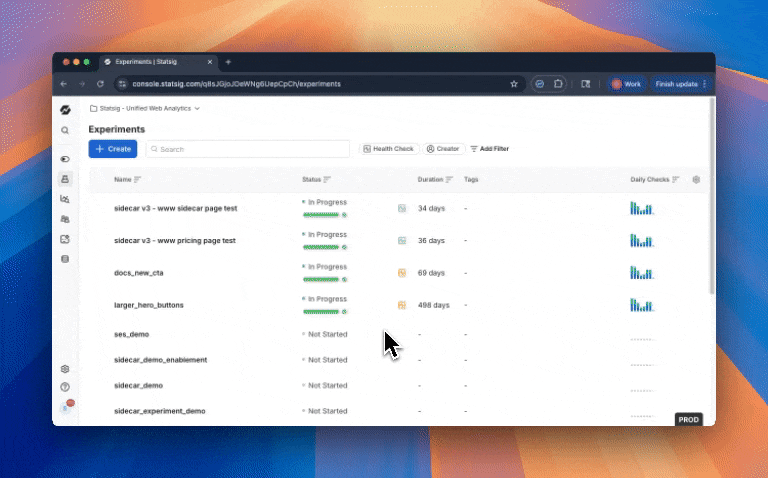
Setting up an experiment
Metrics
When you add the Statsig Visual Editor script to your website, Statsig automatically tracks events like clicks, page views, Core Web Vitals, and more. Statsig calls these autocapture metrics. Go to Metrics for more information.You can add any of these metrics to your experiment. You can also customize them to filter to certain attributes (e.g. clicking a certain button, visiting a certain page) by creating a new metric in the Metrics Catalog tab. You must add at least one metric to your experiment before continuing.URL filters
To limit an experiment to a subset of pages on your website, configure which URLs the experiment runs on:
- All Pages: anywhere you install the Sidecar client
- Contains: The page URL must contain the value you enter, for example "pricing".
- Exact Match: The page URL must match the exact value you specify here.
- Regex: Regular expressions, for example
(http|https):\/\/www.statsig.com\/pricingmatches pageshttp://www.statsig.com/pricingor `https://www.statsig.com/

Audiences
Statsig infers information about each user, including country, device type, browser type, and a unique identifier called StableID. You can target based on any of these attributes using the "audiences" targeting section. You can also target custom attributes you add to the Window.statsigUser object, though adding custom attributes requires a small amount of code.
Visual Editor starting URL
Before editing experiment variants, add a Visual Editor URL. The editor opens at this URL when you begin editing. Add a URL starting with "https://", then click Save.
To set up an experiment, enter your metrics and any targeting (on URL, or other user attributes from the StatsigUser object), and the starting URL. The URL must begin with "https://". Click Save, then click Open in Editor. An editor bar appears along the bottom of the page: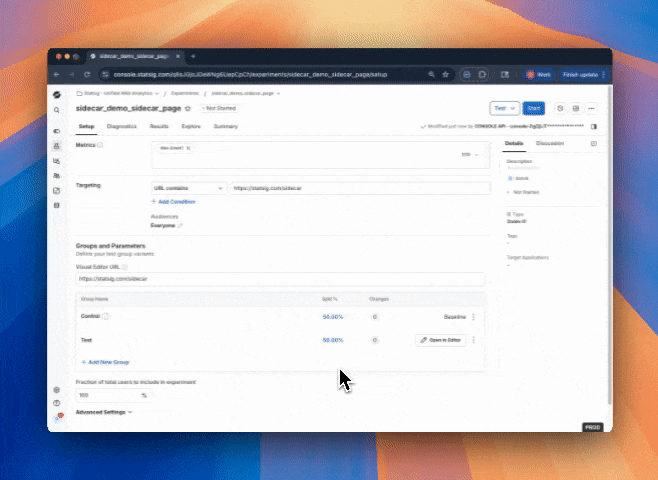
Runtime settings
For more advanced experiment flows, you can also configure runtime settings on the experiment setup page before opening the editor.
- Disable Auto Run prevents the experiment from applying automatically on page load.
- Prerun Script lets you run custom JavaScript before the experiment starts. The Prerun Script is useful for SPAs or other advanced flows where you need to bind listeners or evaluate custom logic before manually activating the experiment with
StatsigSidecar.activateExperiment("experiment_name").
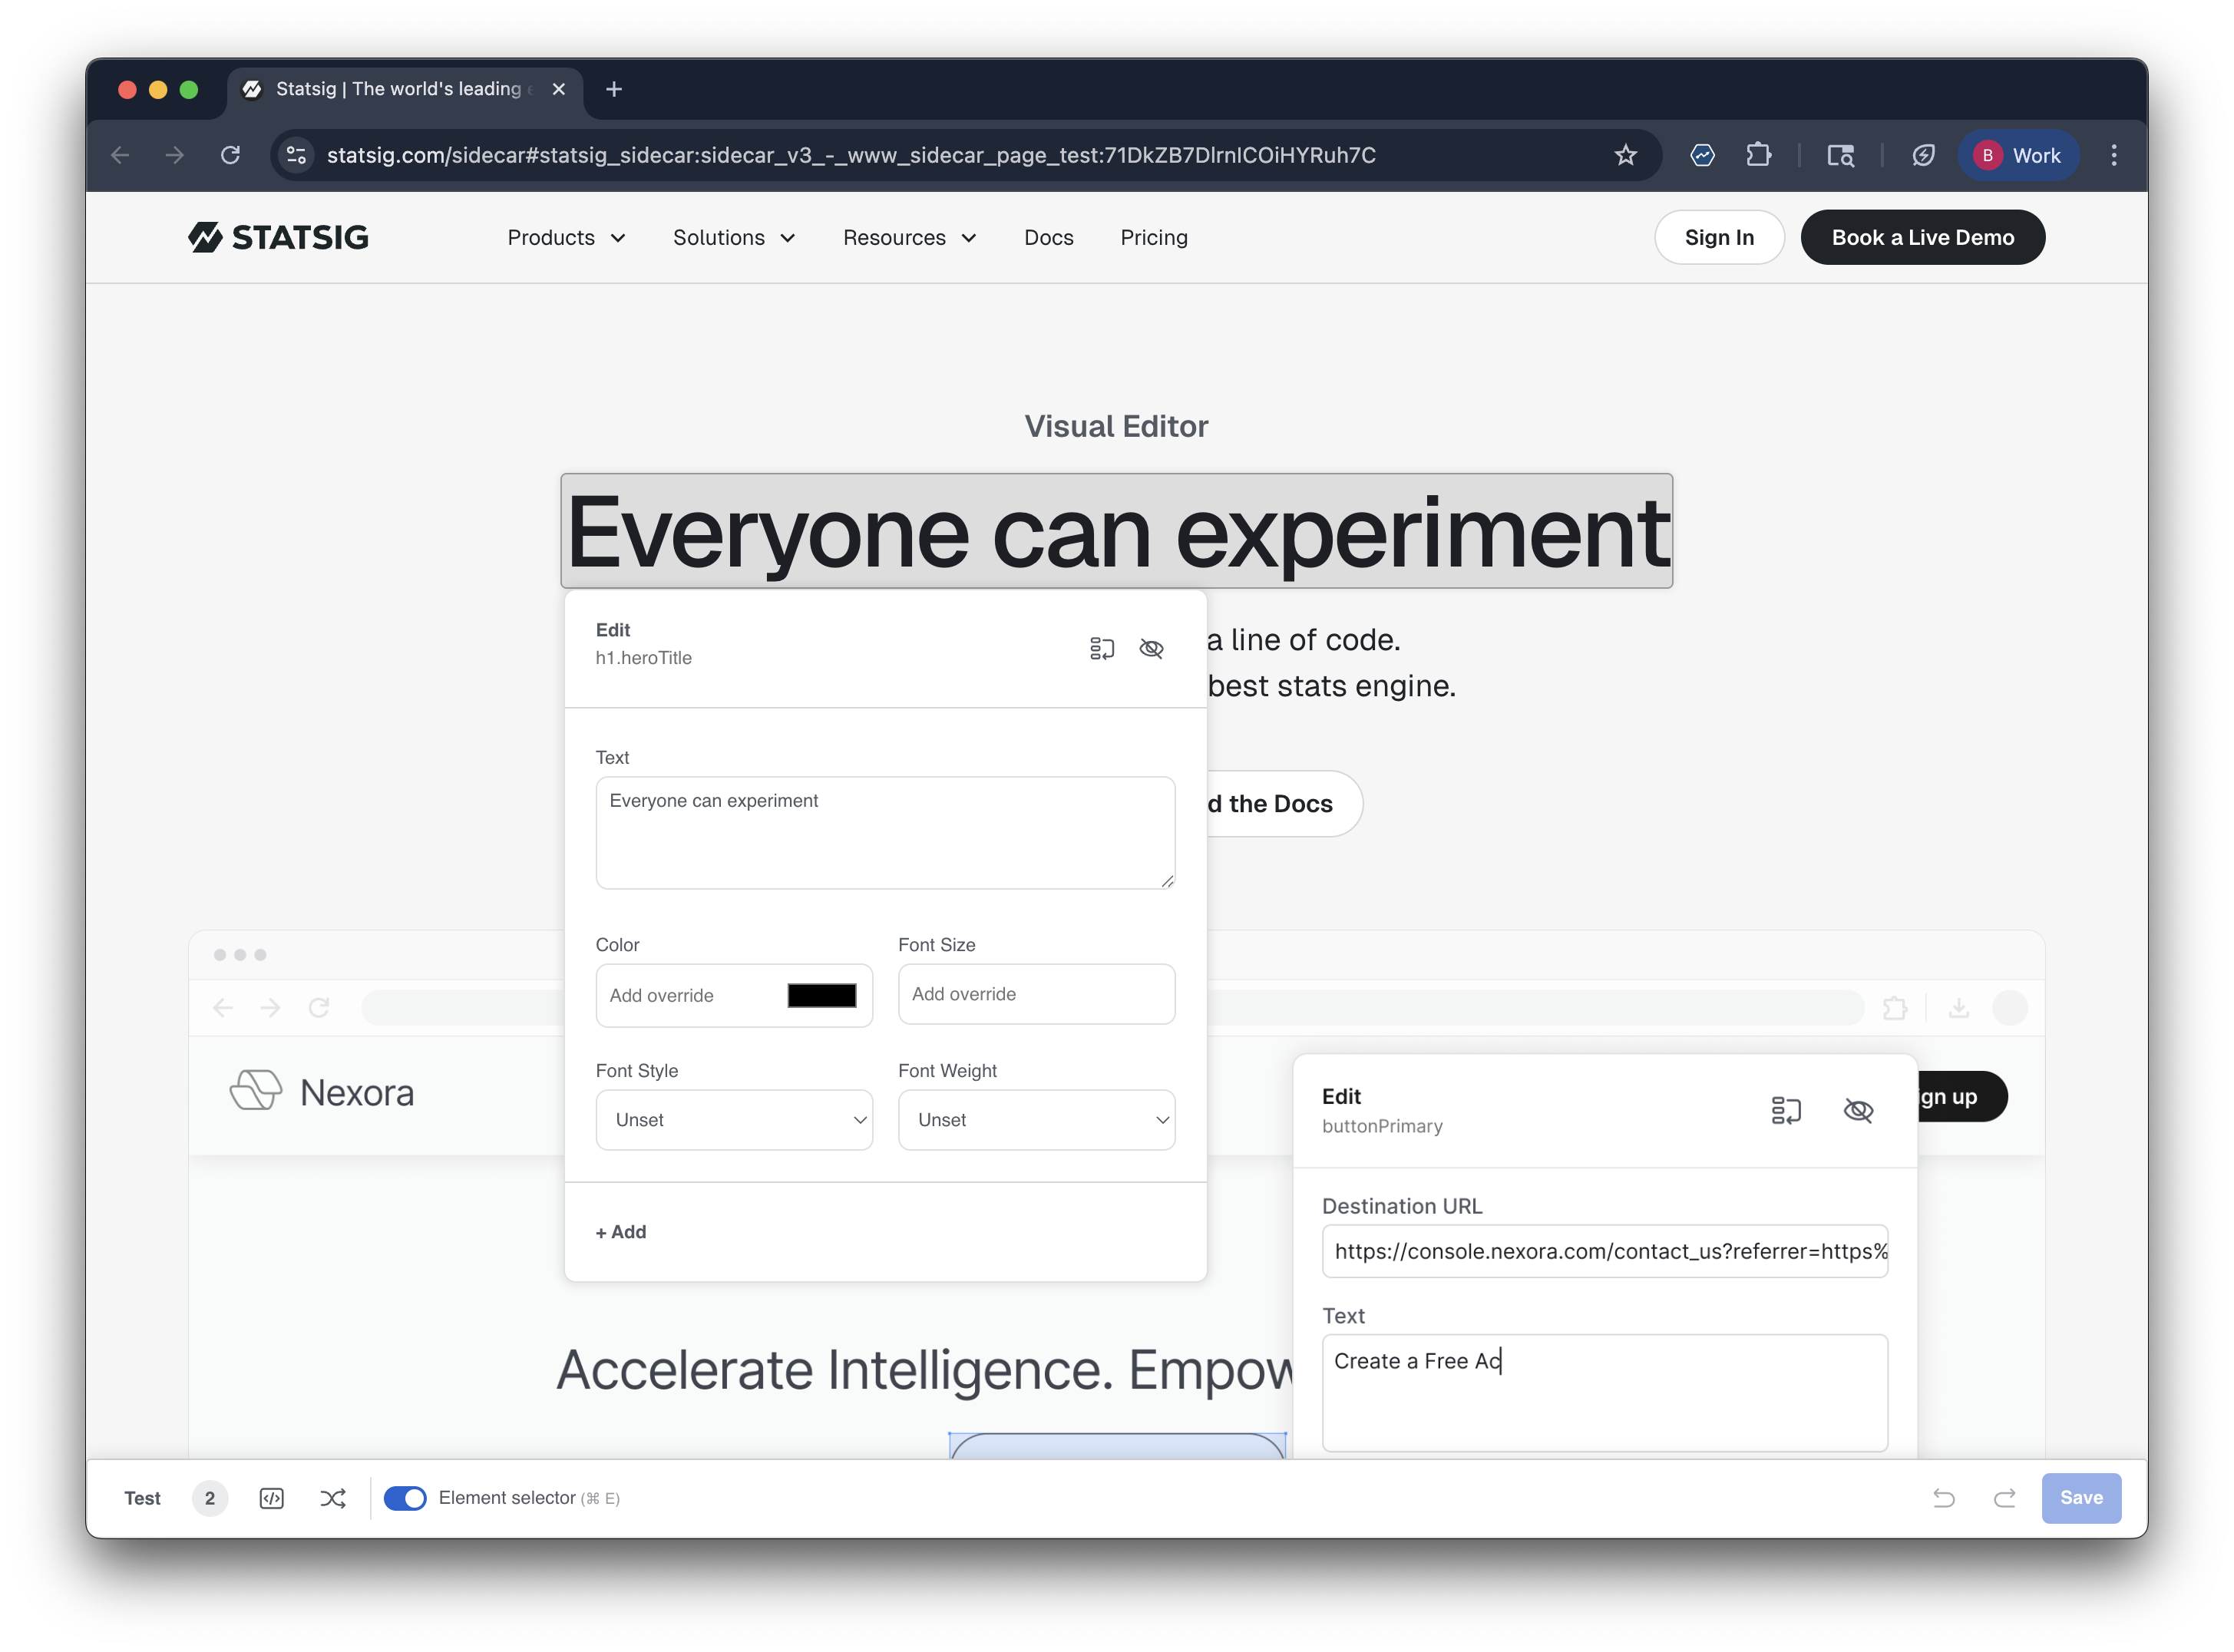
Making your edits
Click Element selector or press command + E to enable the element editor. The editor provides a preset set of editable attributes depending on the selected element, for example:
- Text: Text, Font attributes
- Button: Text, target link
- Image: Image source
All elements also support rearranging or hiding attributes.
Starting your experiment
Click Save in the bottom-right of the visual editor to save changes to the console. Return to the console page and refresh to see your changes listed. Preview the experiment by clicking the three dots in the variant table. When ready, launch the experiment by clicking Start in the top-right corner. After starting, the experiment appears for end users and Statsig collects metrics.
Advanced script setup
Add these query string parameters to the Sidecar script URL for additional controls over Sidecar client behavior.
&reduceflicker=0disables the brief hiding of the<body>tag while the client initializes.
Advanced configurations
For more advanced Sidecar controls after the basic setup is working:
- Go to Advanced Configurations for runtime settings, manual activation, prerun scripts, script URL tuning, consent, and identity configuration.
- Go to Measuring Experiments for outbound analytics callbacks and other measurement patterns.
Was this helpful?