Single Sign-On With Entra ID/Azure AD/Office 365
Configure Single Sign-On for Statsig with Azure AD (Microsoft Entra ID) using OIDC, including app registration, claims, and group-based role assignments.
Microsoft Entra ID, formerly known as Azure AD, is a supported IdP for SSO into Statsig.
Requirements
- You must be the
Adminof the Statsig Project you intend to add SSO with Azure AD to. - You must be the Administrator of the Azure AD tenant you want to link.
Supported Features
You can enable Service Provider (SP)-Initiated Authentication for Single Sign-On (SSO) using OIDC on Statsig to connect your Azure AD account to your Statsig Projects.
Configure SSO with Azure AD
Adding the Statsig OIDC Application in Azure AD
- Navigate to App Registrations in the Azure portal.
- Click on the "New Registration" button to register the Statsig App.
- Provide a name (for example, Statsig Console) and finish creation. For the Redirect URI, use https://console.statsig.com/sso/oidc.
- Select Certificates and secrets for this app from the left nav and create a new client secret. Save the value; you can't retrieve this value after creation.
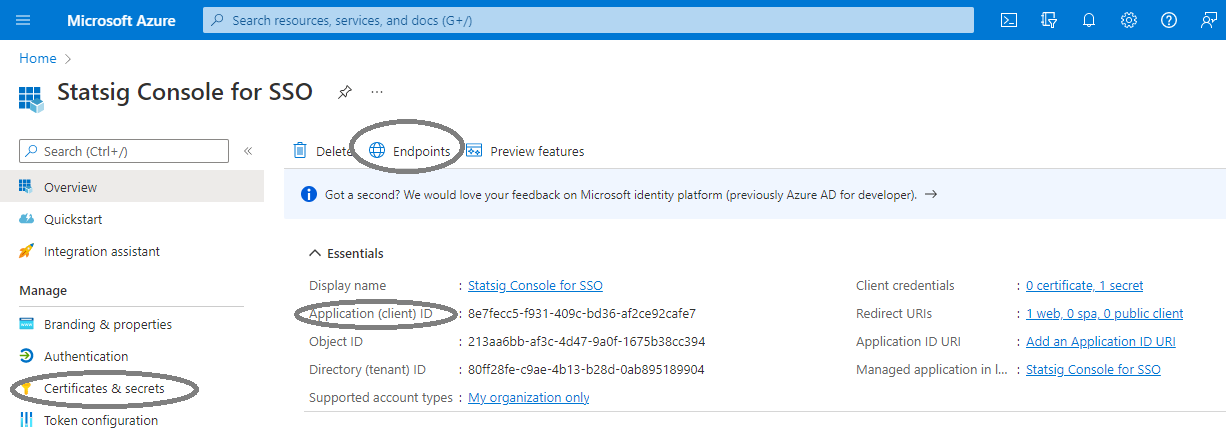
Enter three items in the Statsig SSO configuration:
- Find the Azure AD OIDC URL for this app under Overview -> Endpoints -> OpenID Connect metadata document. Truncate the string to end at "/v2.0".
- Get the client ID for this app from Overview -> Application (client) ID.
- Get the client secret value you saved after creating a new client secret.
Was this helpful?