Documentation Index
Fetch the complete documentation index at: https://docs.statsig.com/llms.txt
Use this file to discover all available pages before exploring further.
Overview
Instead of sending API requests directly to Statsig, you can set up your own environment that proxies requests from your custom domain name to Statsig. This makes it less likely for tracking blockers to intercept your APIs, and allows you to capture more data. There are many ways to set up custom proxies. We are showing instructions for a few common service providers here.Approaches
AWS CloudFront
Prerequisites
- Write access to your DNS settings.
- Write access on your AWS CloudFront and Lambda console.
- Access to a SSL certificate for your custom domain.
Setup
On your AWS CloudFront console,- Click on Create distribution.
-
In the Origin section,
- Set the Origin Domain to
api.statsig.com. - Set the Protocol to
HTTPS only.
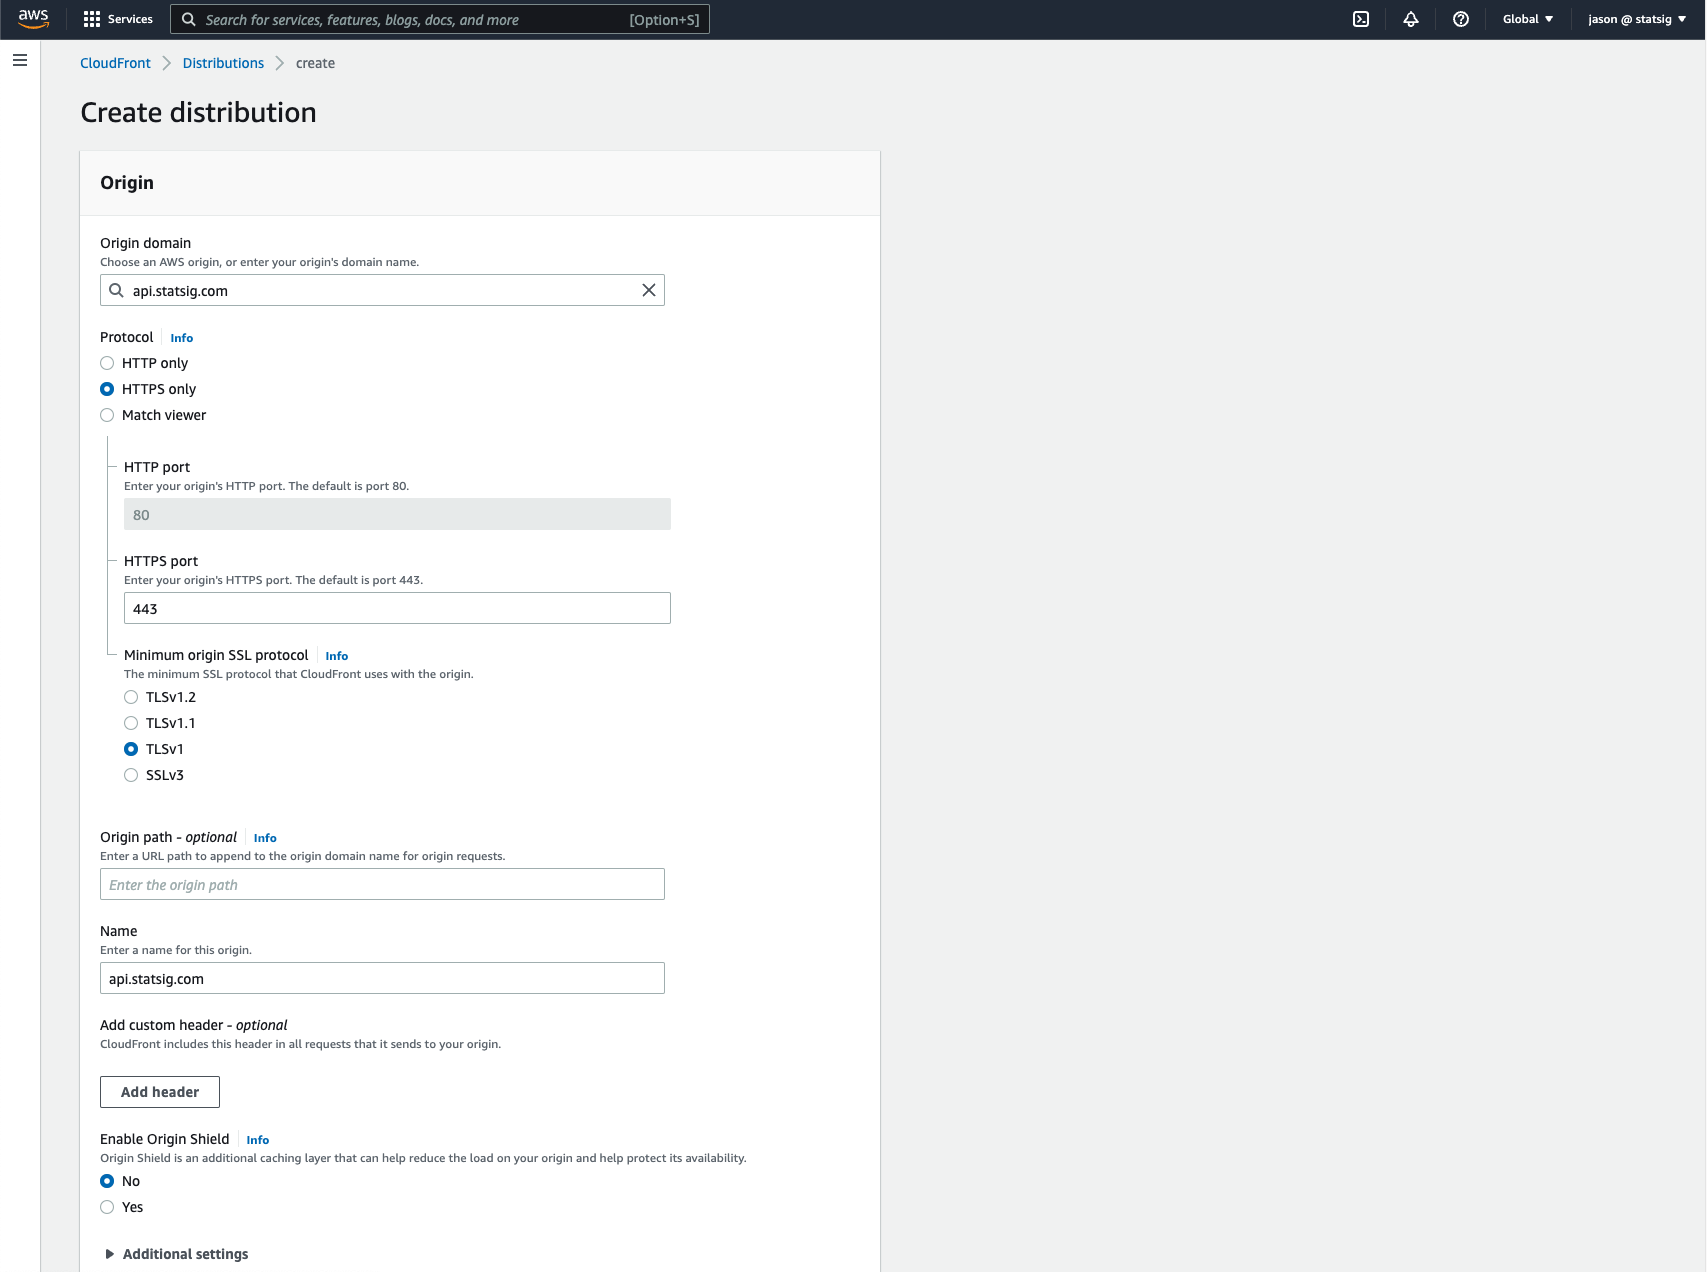
- Set the Origin Domain to
-
In the Default cache behavior section,
- Set Viewer protocol policy to
Redirect HTTP to HTTPS. - Set Allowed HTTP methods to
GET, HEAD, OPTIONS, PUT, POST, PATCH, DELETE. - In the Cache Key and origin requests subsection, allow all headers and parameters to be forwarded to the Origin, and allow CORS requests for the Origin.
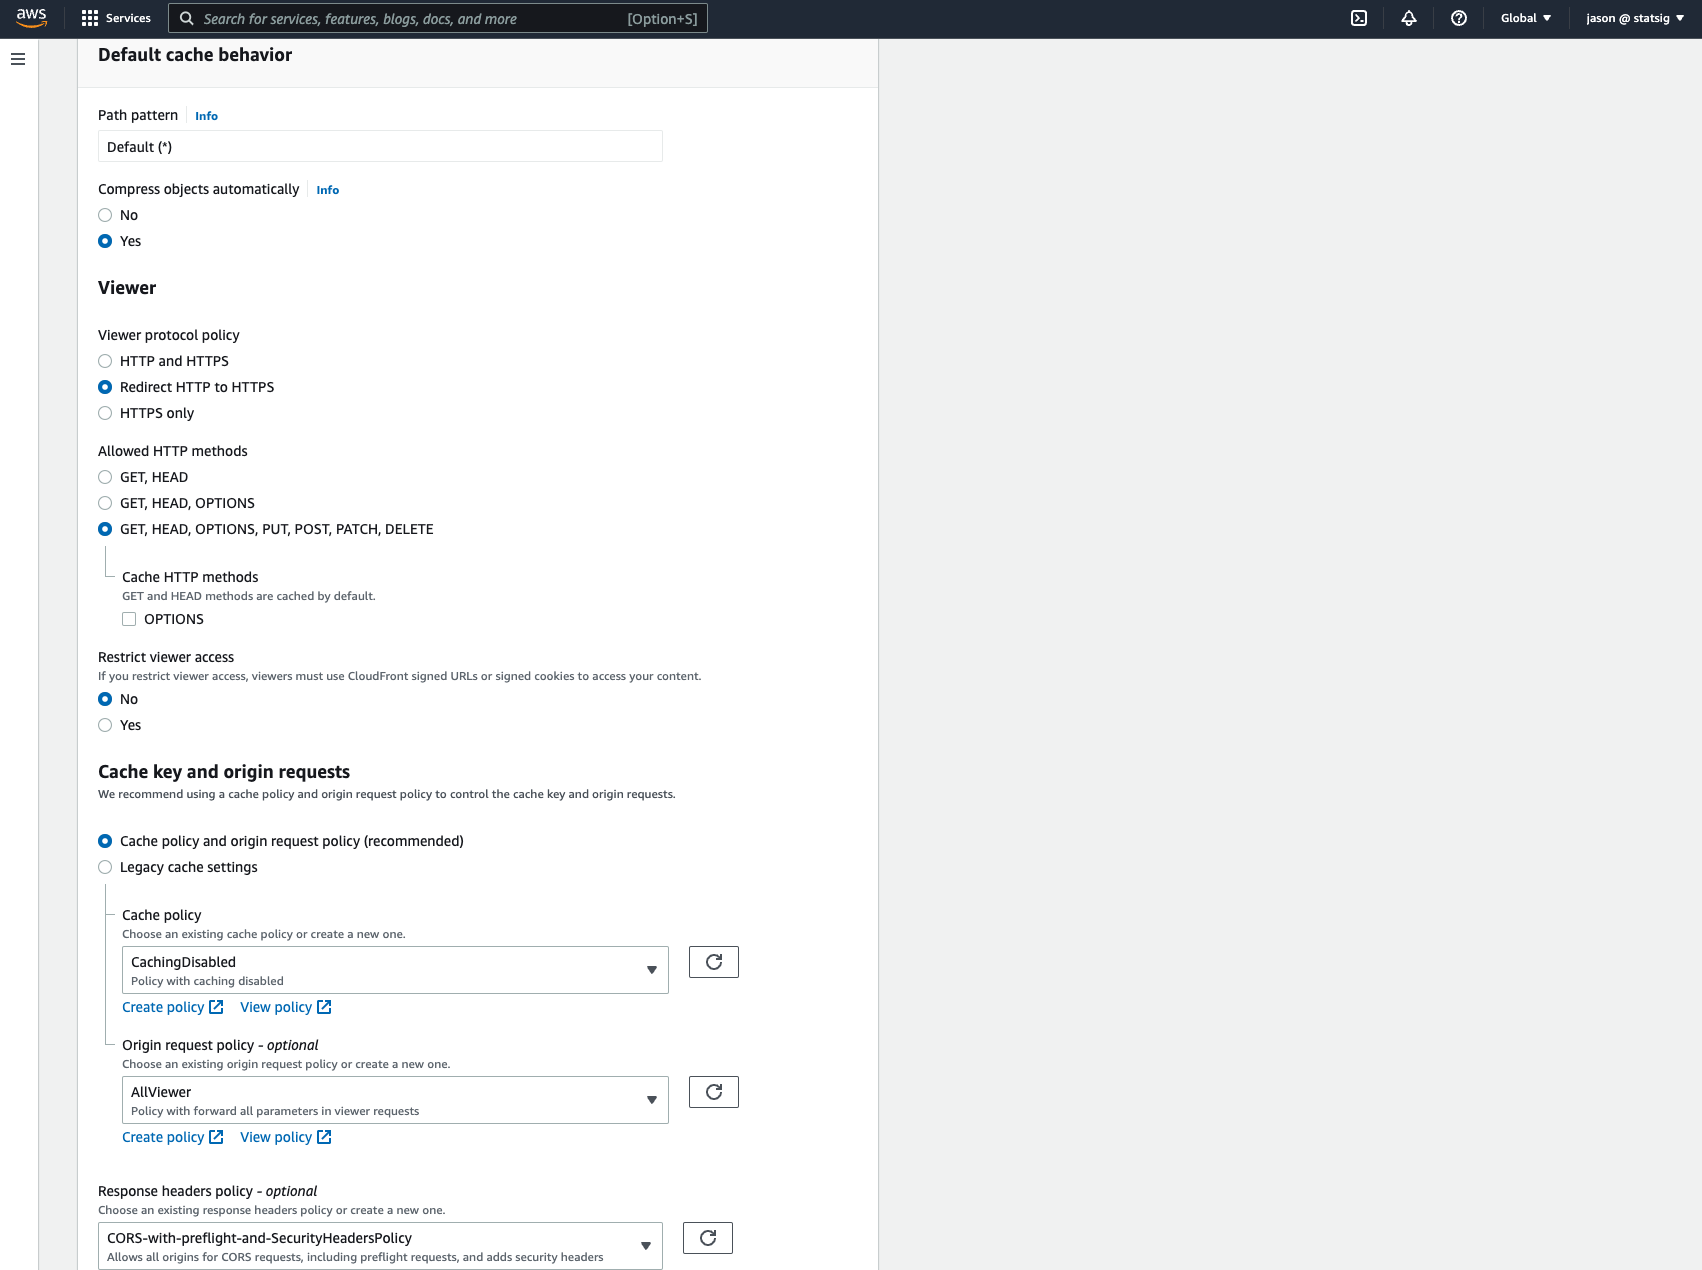
- Set Viewer protocol policy to
-
In Function associations section,
- Add a Lambda@Edge function to Origin request to rewrite the
Hostheader toapi.statsig.comand rewrite custom endpoint paths to Statsig endpoints. Please refer to the AWS tutorial on creating a Lambda@Edge function.
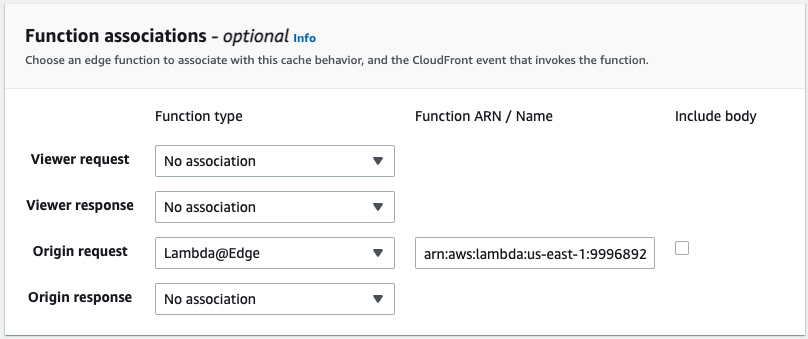
- Add a Lambda@Edge function to Origin request to rewrite the
/v1/my-product-data to the Statsig endpoint /v1/log_event:
-
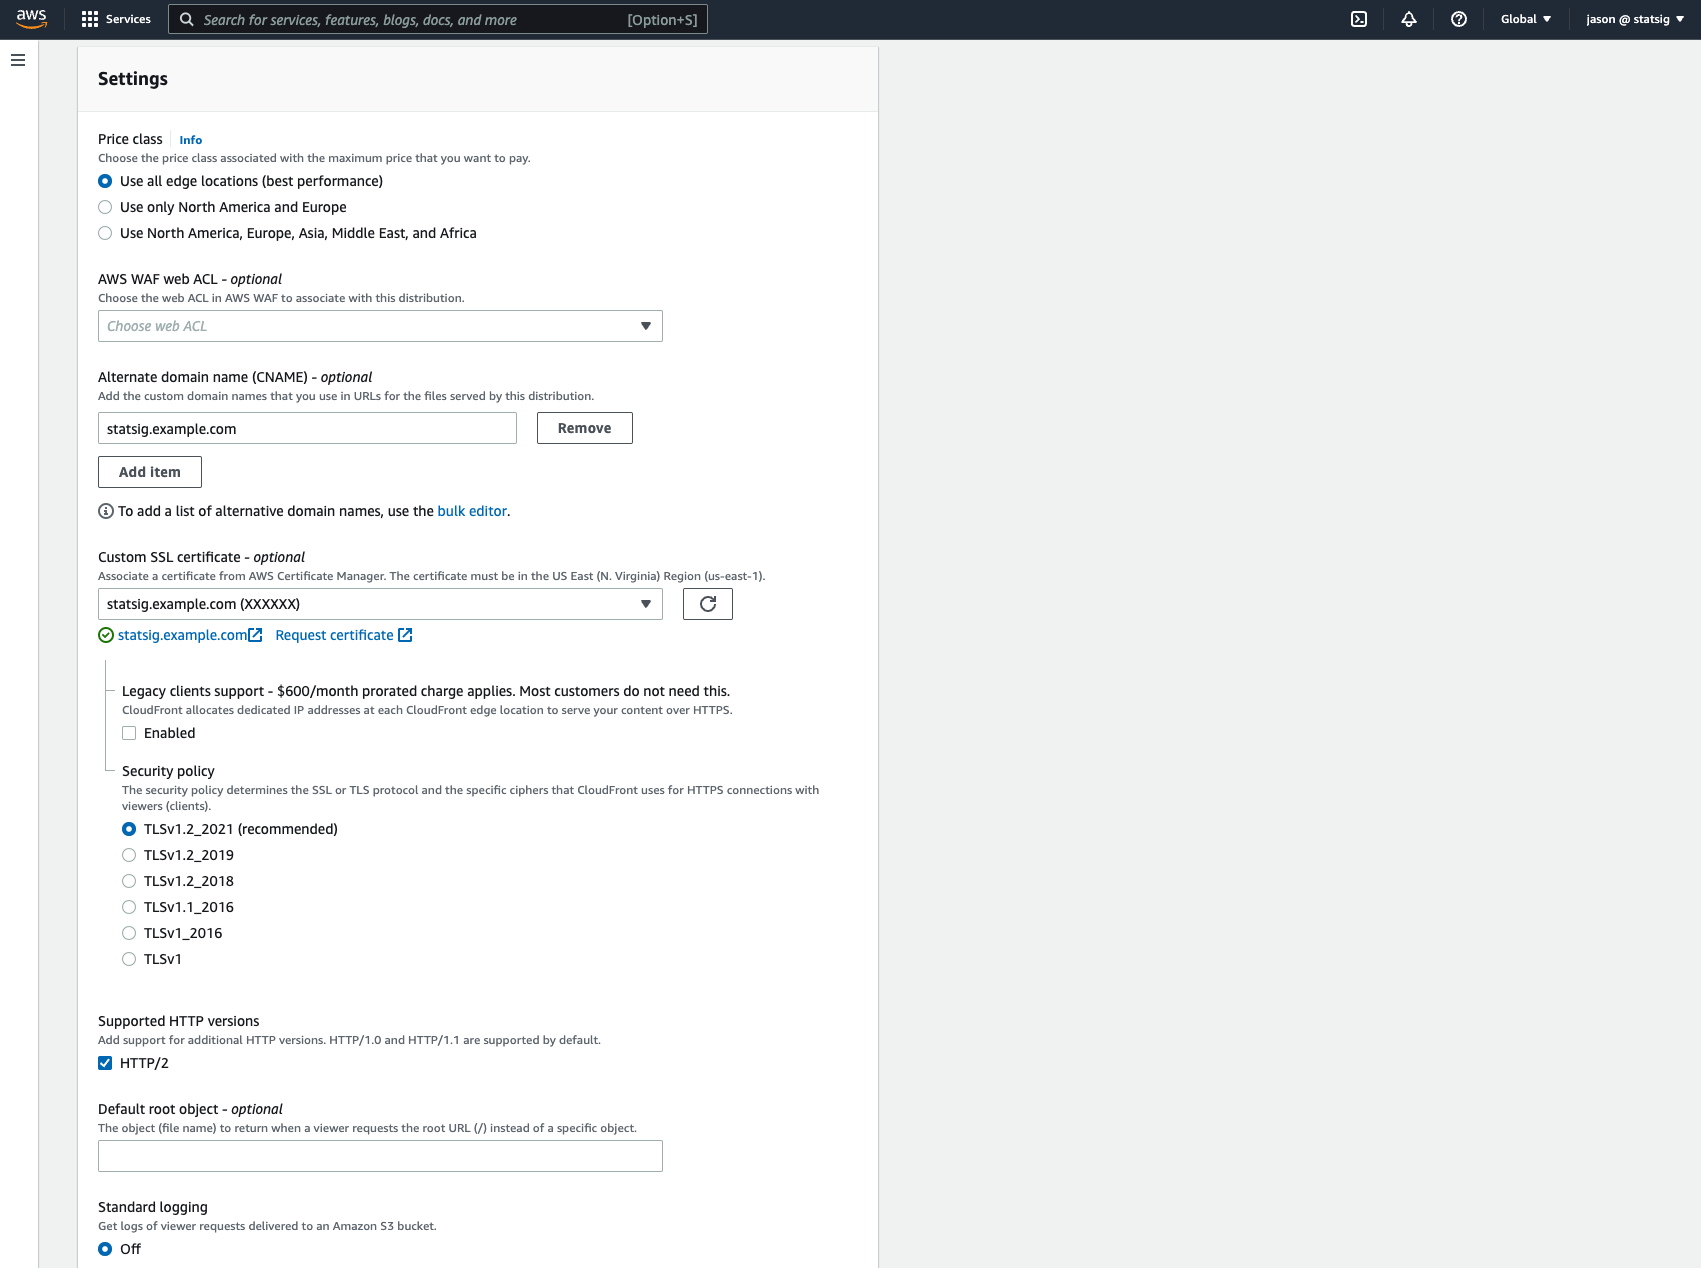
In Settings,
- Add an Alternate domain name (CNAME) to be your preferred domain name to use for the custom proxy, e.g.
statsig.example.com. - Add a Custom SSL certificate. You will need to follow the AWS guide for Alternate domain name to add a SSL certificate.
- Click on Create distribution.
- Add an Alternate domain name (CNAME) to be your preferred domain name to use for the custom proxy, e.g.
- You will get a Distribution domain name (e.g.
d111111abcdef8.cloudfront.net) once it is provisioned.
-
Add a CNAME record in your custom DNS record:
- Host name:
statsig.example.com - Type:
CNAME - Data:
d111111abcdef8.cloudfront.net(The Distribution domain name from AWS)
- Host name:
- Your proxy should now be setup. See Using Your Proxy for instructions on how to configure your Statsig SDK.
Cloudflare Worker
Prerequisites
You will need a Cloudflare account. Visit https://www.cloudflare.com to set one up.Setup
Once you are logged into Cloudflare. You can follow these steps:-
Navigate to “Workers & Pages > Overview” in the left rail to create a new worker.
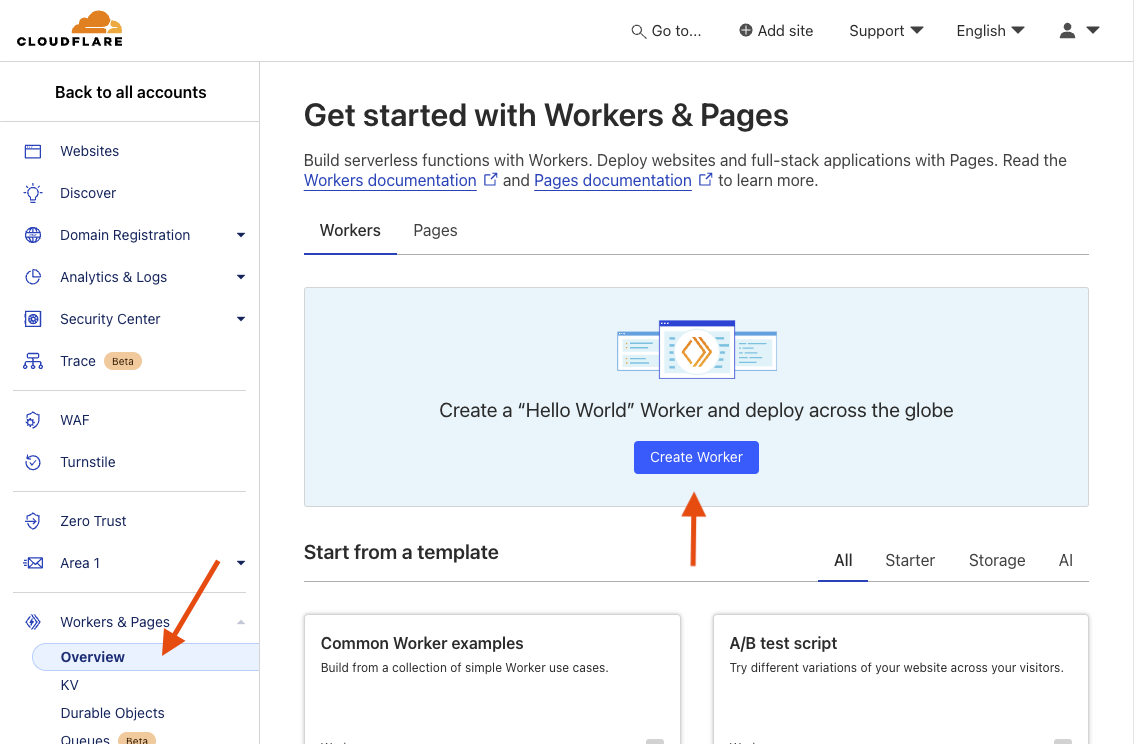
You may see a different experience if you already have workers on your account.
-
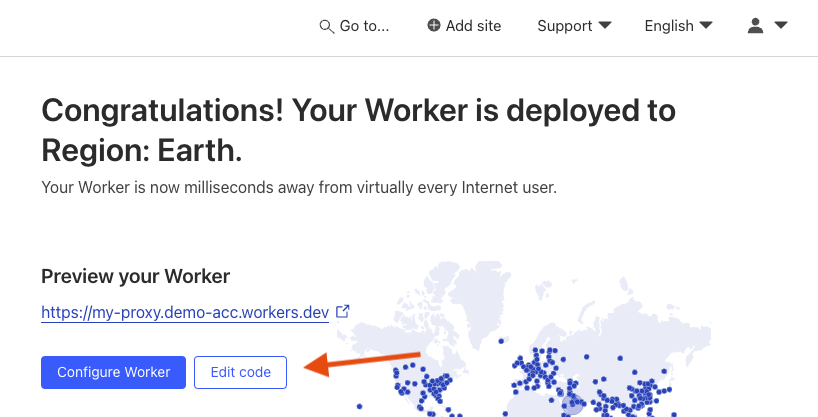
Name you new worker whatever you would like and then click “Deploy”.

-
Once deployed, click “Edit Code”.
-
Copy and paste the following snippet into the
worker.jsfile, then hit “Deploy”. This example rewrites a custom endpoint/v1/my-product-datato the Statsig endpoint/v1/log_event: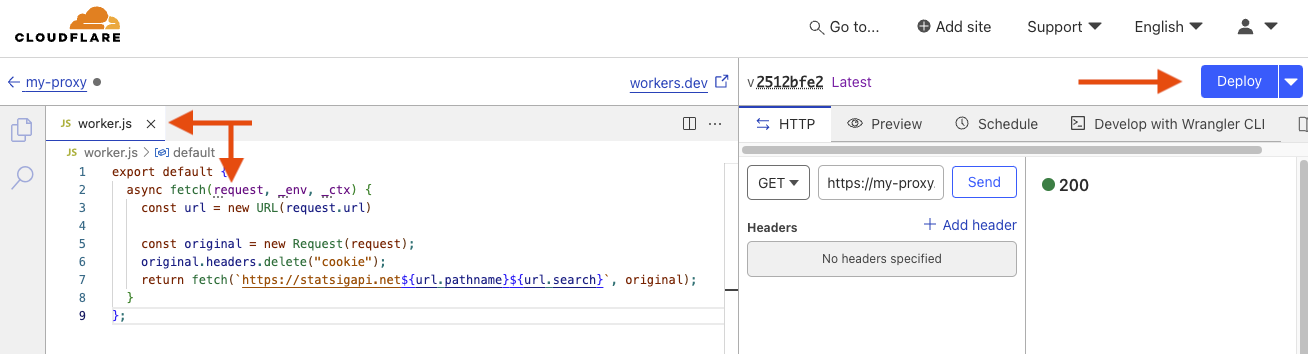
- Your worker should now be deployed and ready to use. See Using Your Proxy for instructions on how to configure your Statsig SDK.
Using Your Proxy
Once you have a proxy setup, you will need to take its URL and apply it to the SDK. For JavaScript client SDKs, useStatsigOptions.networkConfig.api. You can visit Statsig Options to read about the JavaScript-specific options. Other SDKs may expose the proxy base URL differently, but the goal is the same: point the SDK at your proxy instead of Statsig’s default domains.
The following is what initializing with a proxy looks like in JavaScript:
In JavaScript,
networkConfig.api is a base URL. The SDK appends endpoint paths like /initialize and /rgstr automatically. Use initializeUrl only when you want to override initialization independently of the other endpoints. There is no generic api fallback option; failover is configured per endpoint with initializeFallbackUrls and logEventFallbackUrls.Depending on the SDK type, version, and proxy approach you are using, you may not need to append
'/v1' to the end of your api string, for example "https://my-statsig-proxy.com/".JavaScript Failover Example
If you want JavaScript clients to use your proxy as the primary endpoint and a second endpoint as failover, configure fallback URLs per endpoint:Configuring Custom Endpoints
If you’ve configured your proxy to use custom endpoint names (recommended to avoid tracking blockers), you’ll need to configure the SDK to use those custom endpoints. The SDK will append the endpoint path to your base URL. For example, if your proxy rewrites/v1/my-product-data to /v1/log_event, you would configure: