Okta SCIM User and Project/Role Management
Manage Statsig users from Okta using SCIM provisioning so accounts are created, updated, and deactivated automatically when Okta state changes.
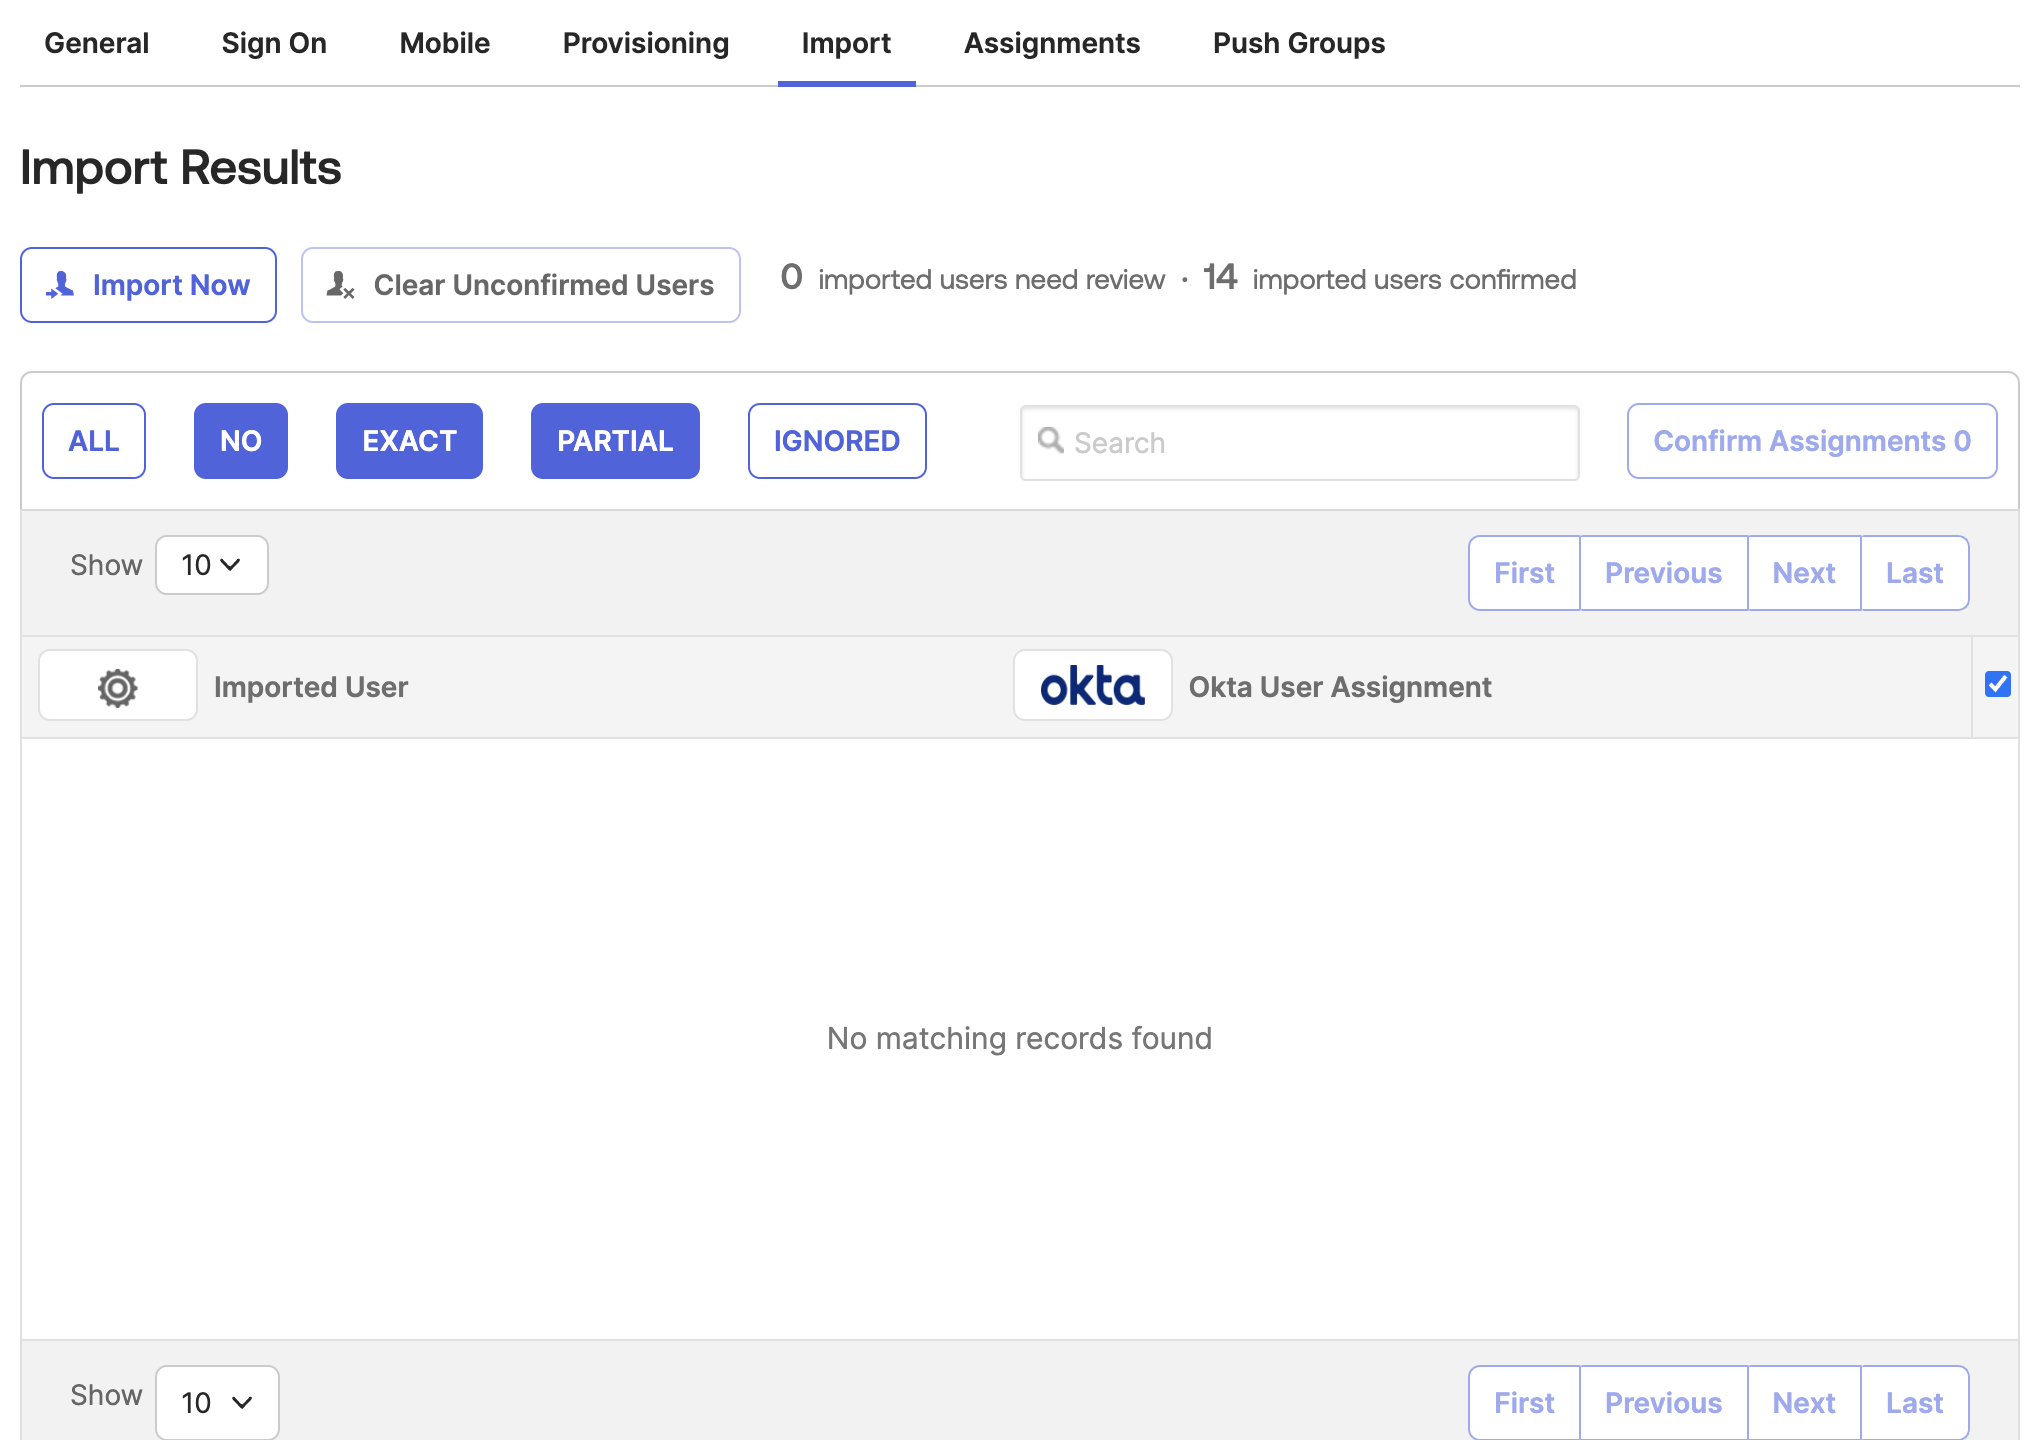
Import existing Statsig users and groups
You can't push users into groups unless they're assigned to the integration.
- In Okta, go to the Statsig app's "Import" tab
- Click "Import Now" to fetch existing Statsig users and groups
- Process the imported users as needed
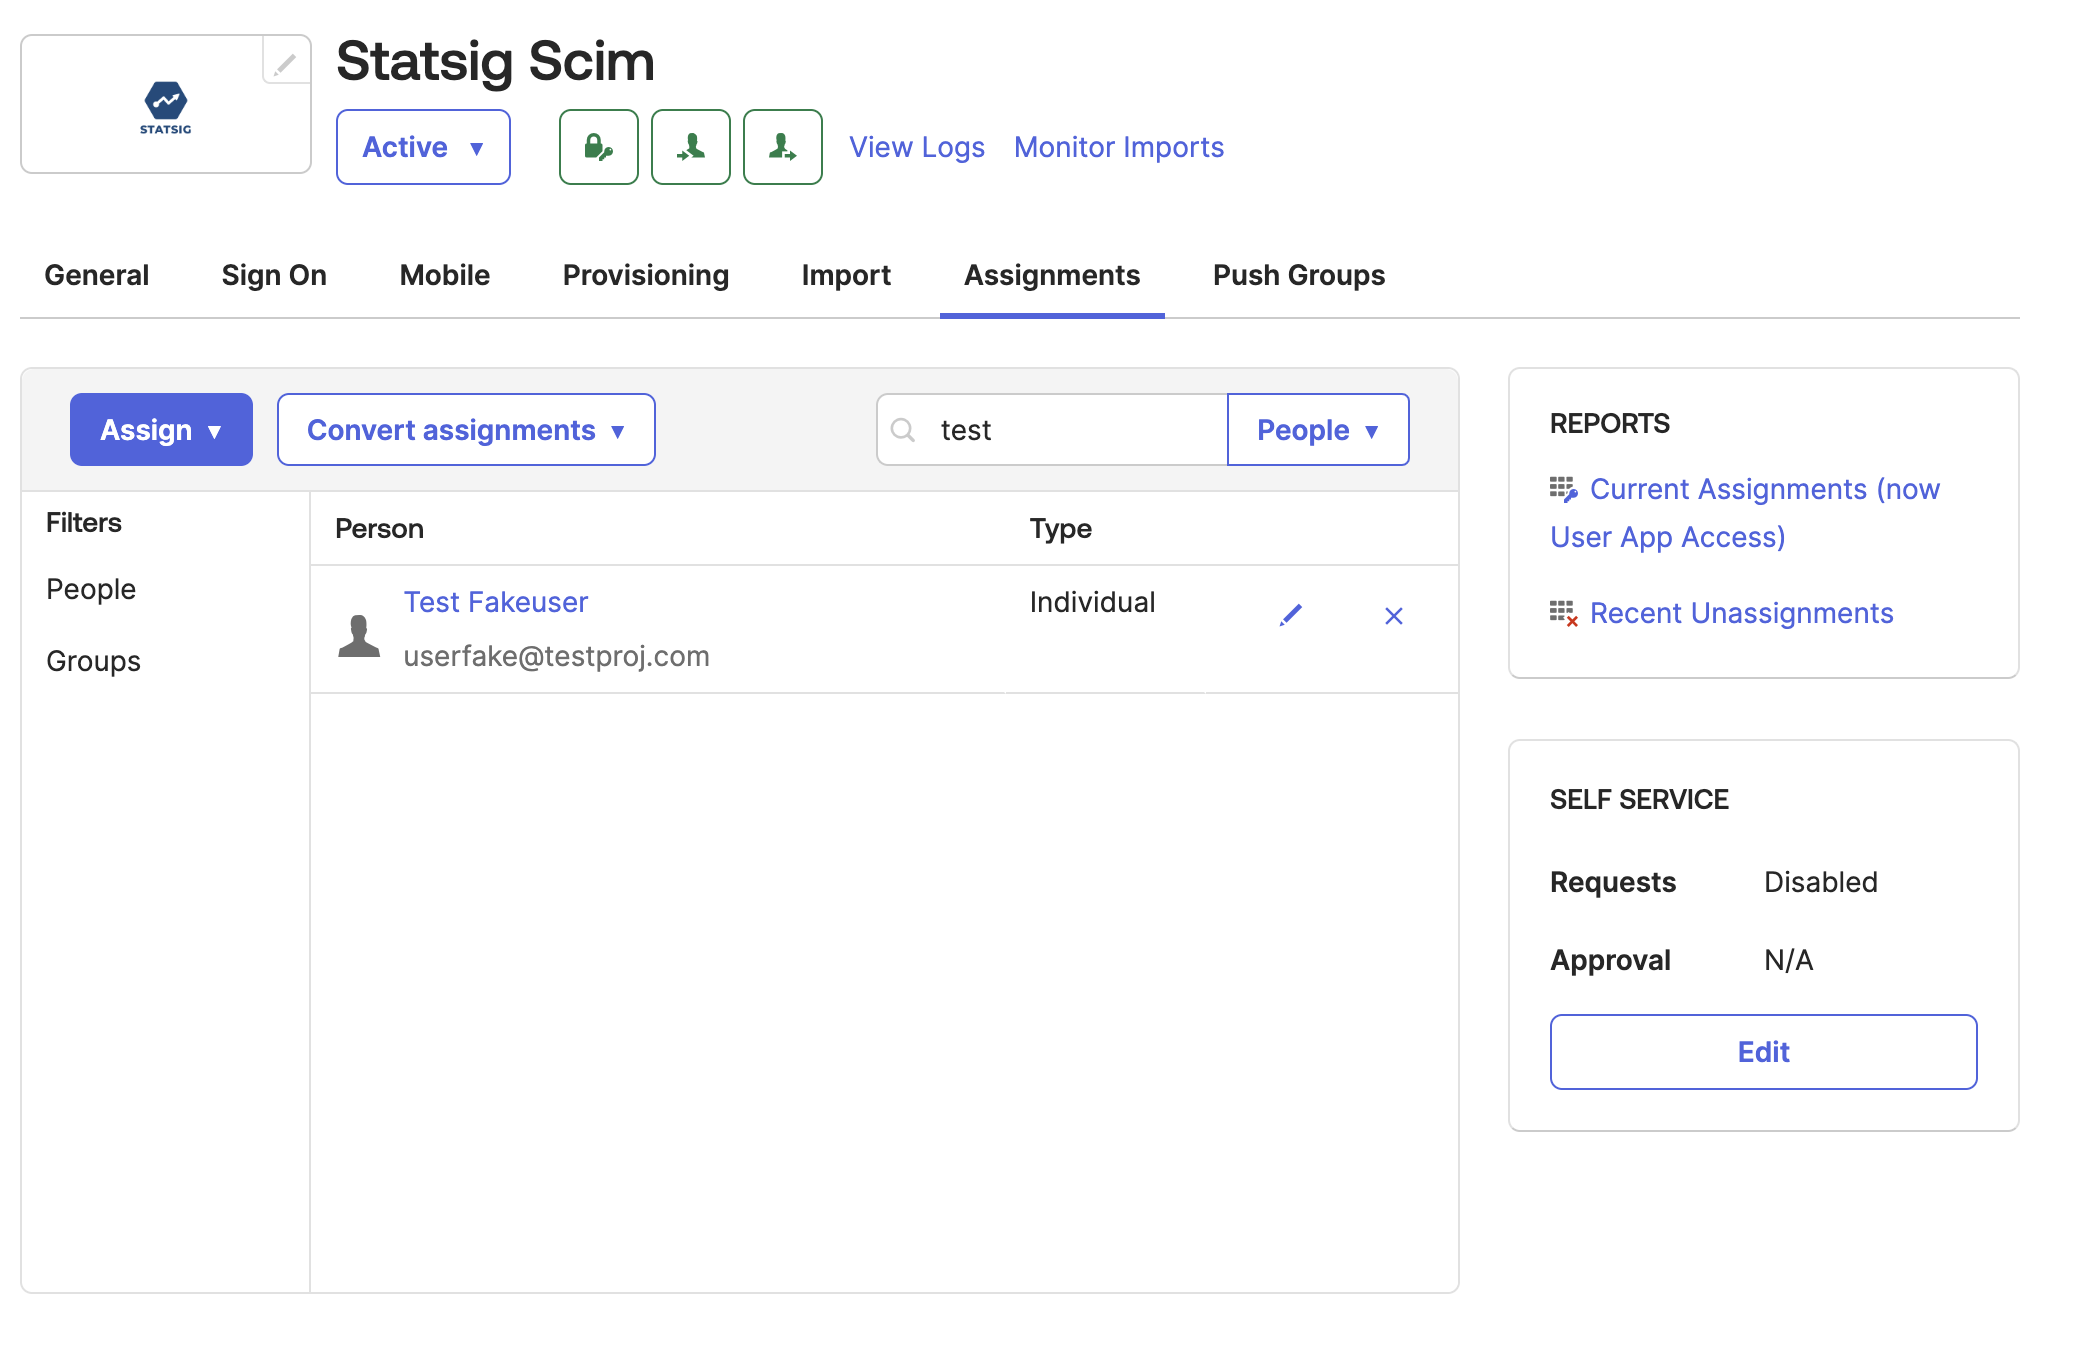
Manage user assignments
- Use the "Assignments" tab in Okta to add or remove users from Statsig
- Adding a user assignment in Okta creates the user in Statsig. Removing the assignment deactivates their Statsig account.
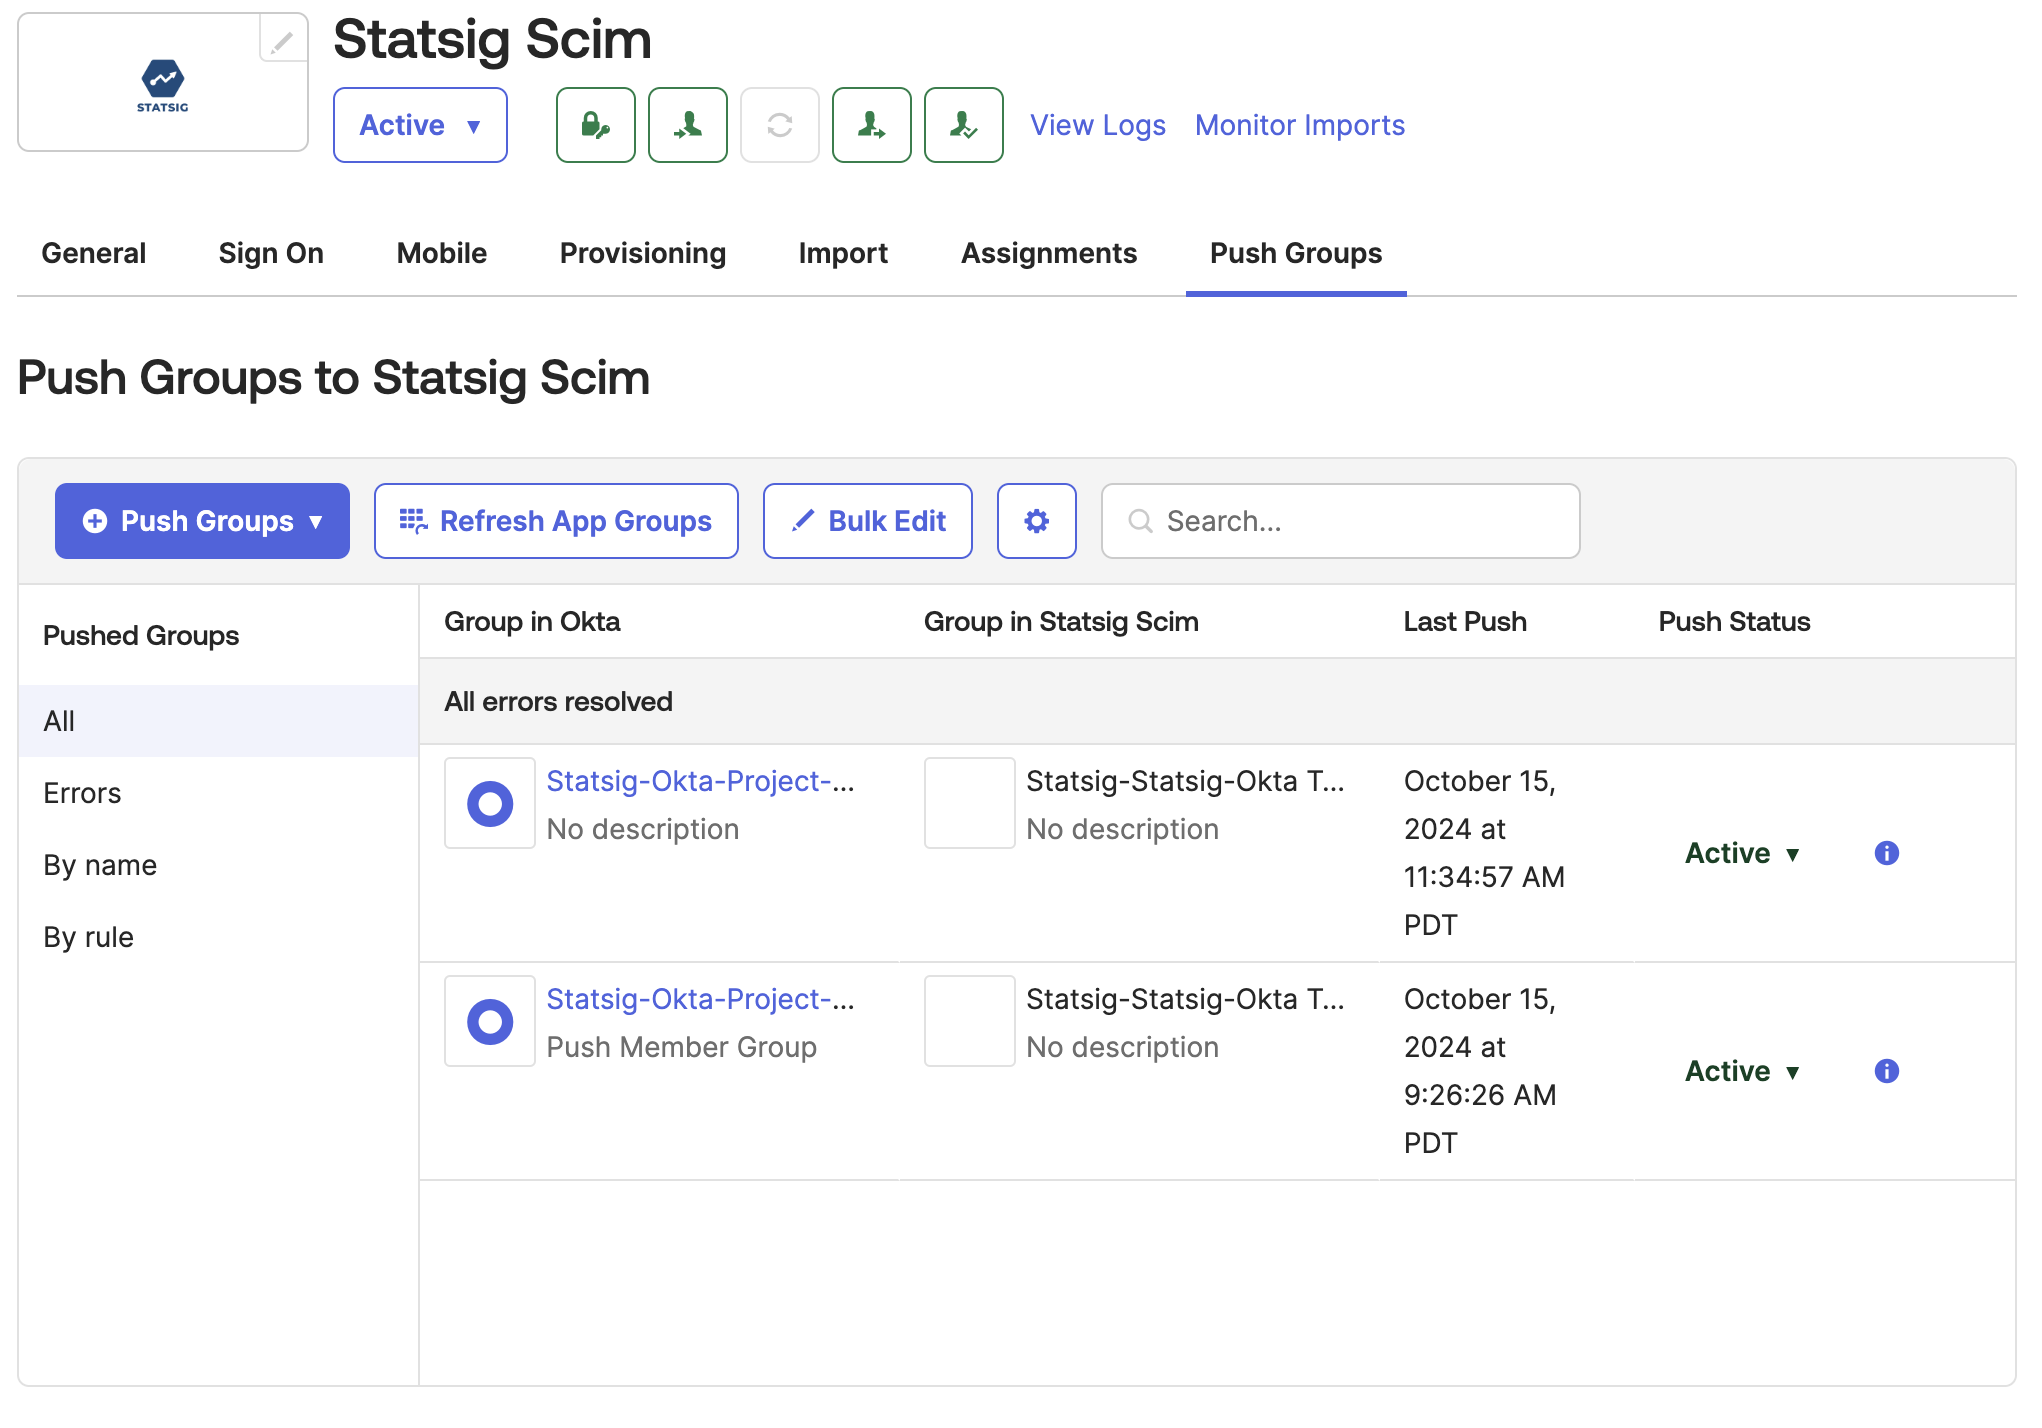
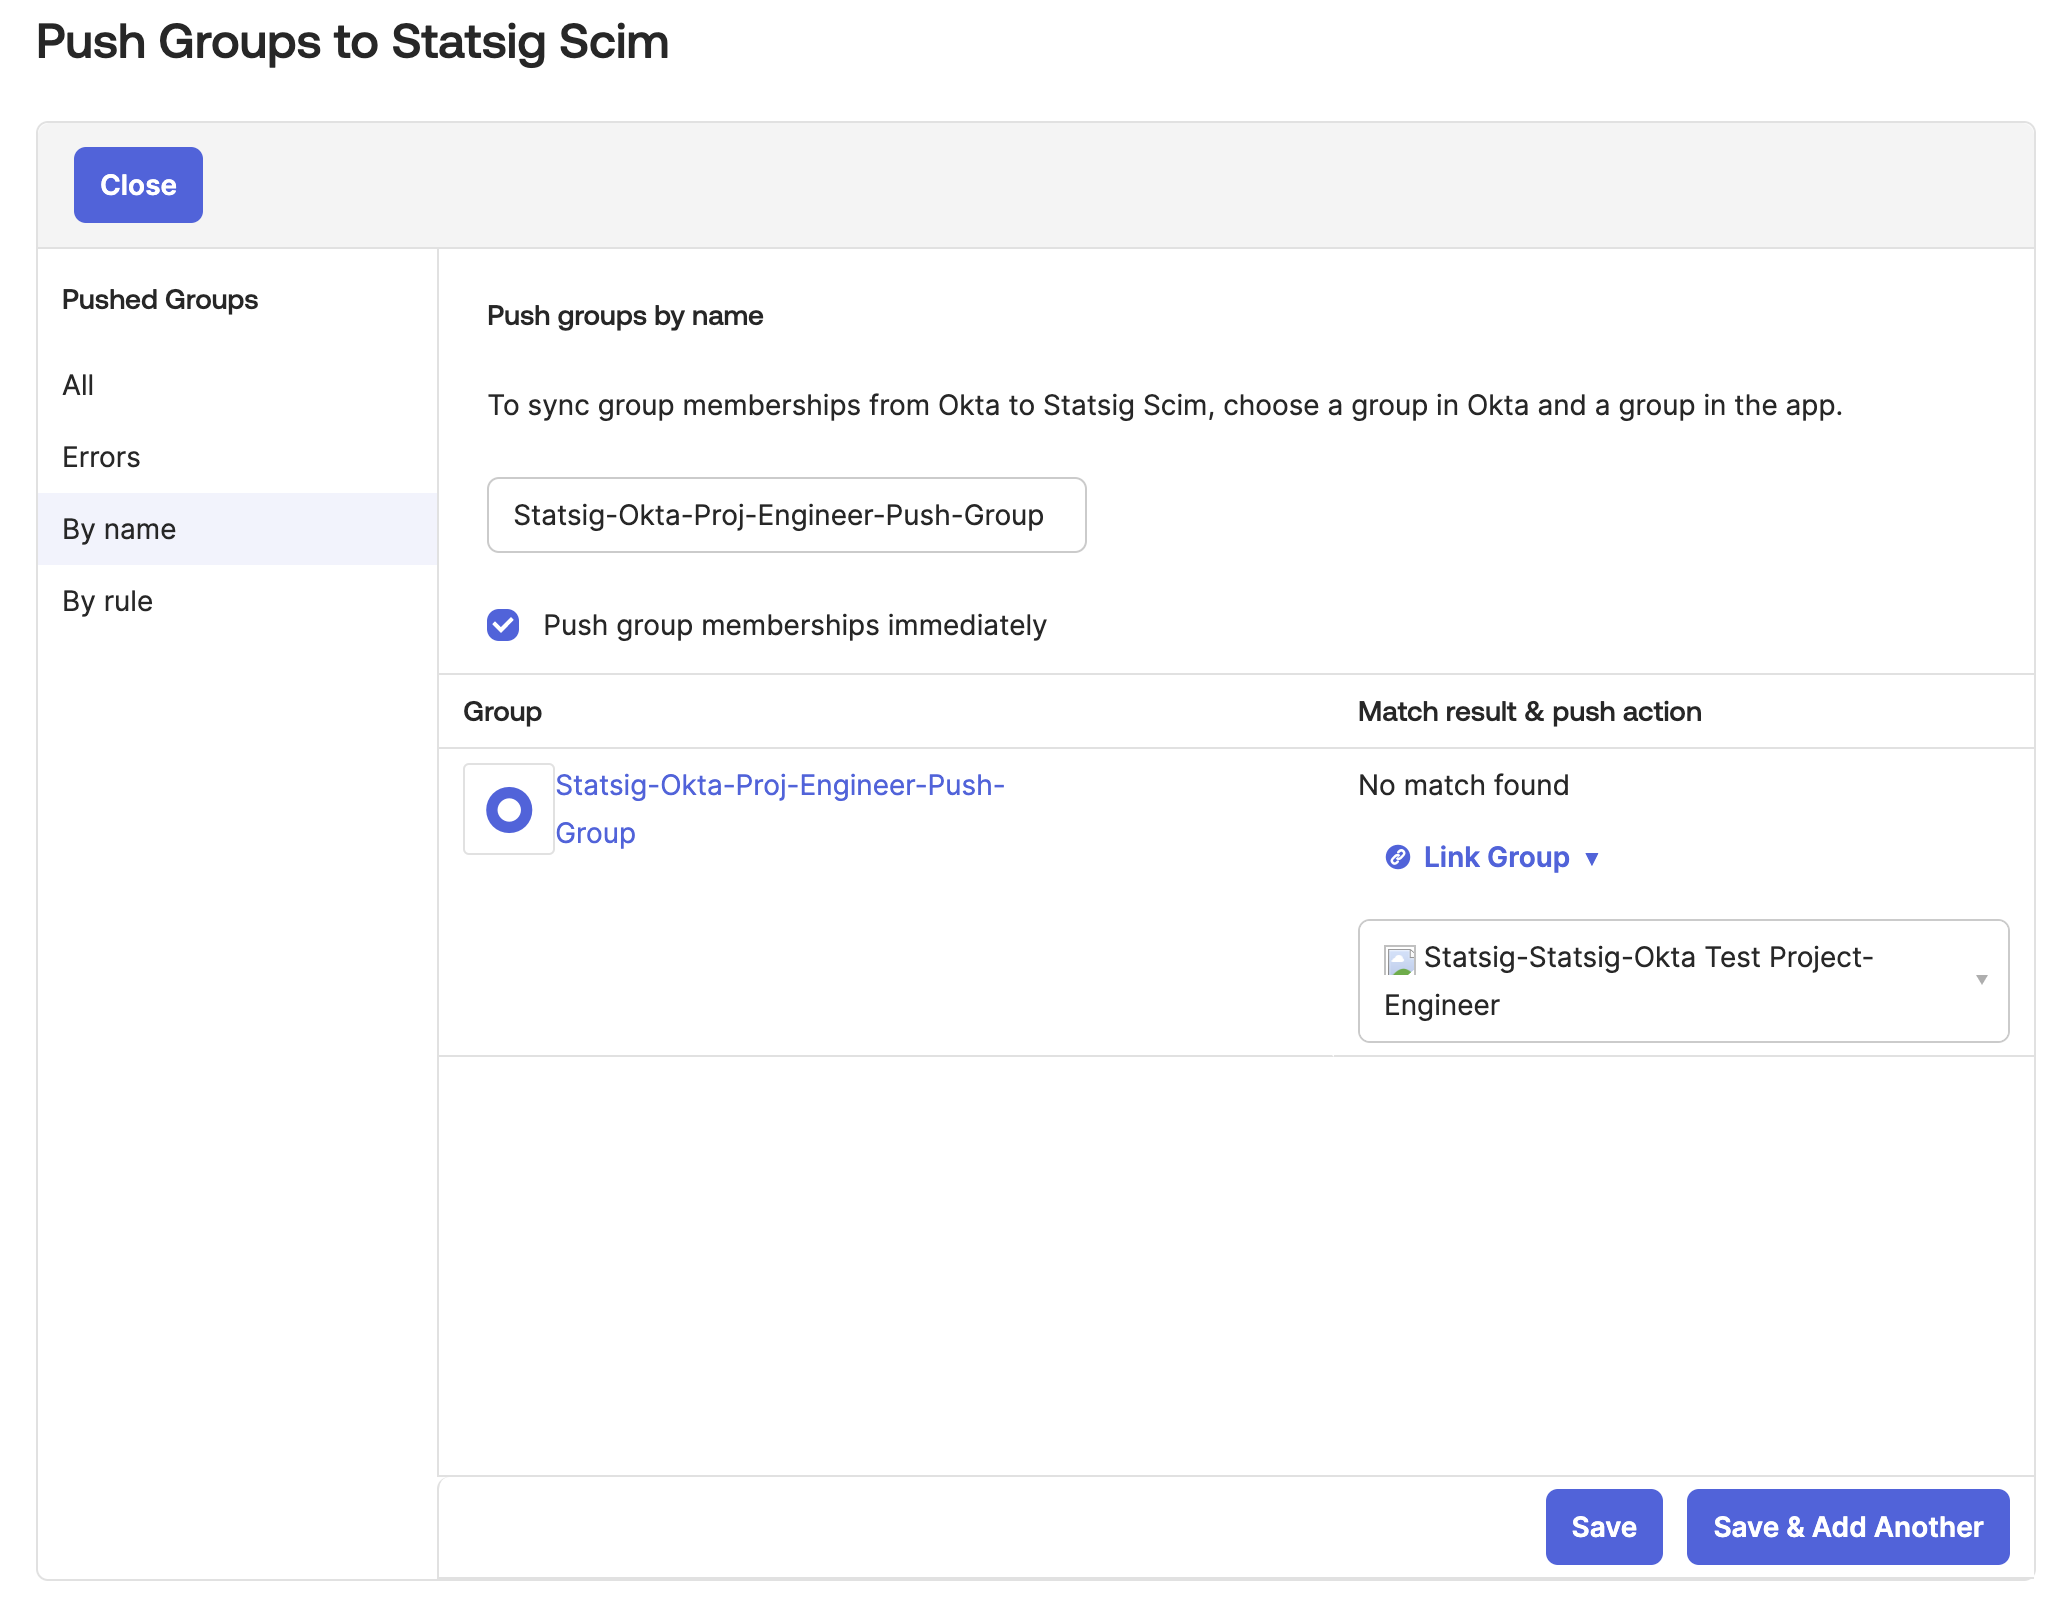
Push groups to Statsig
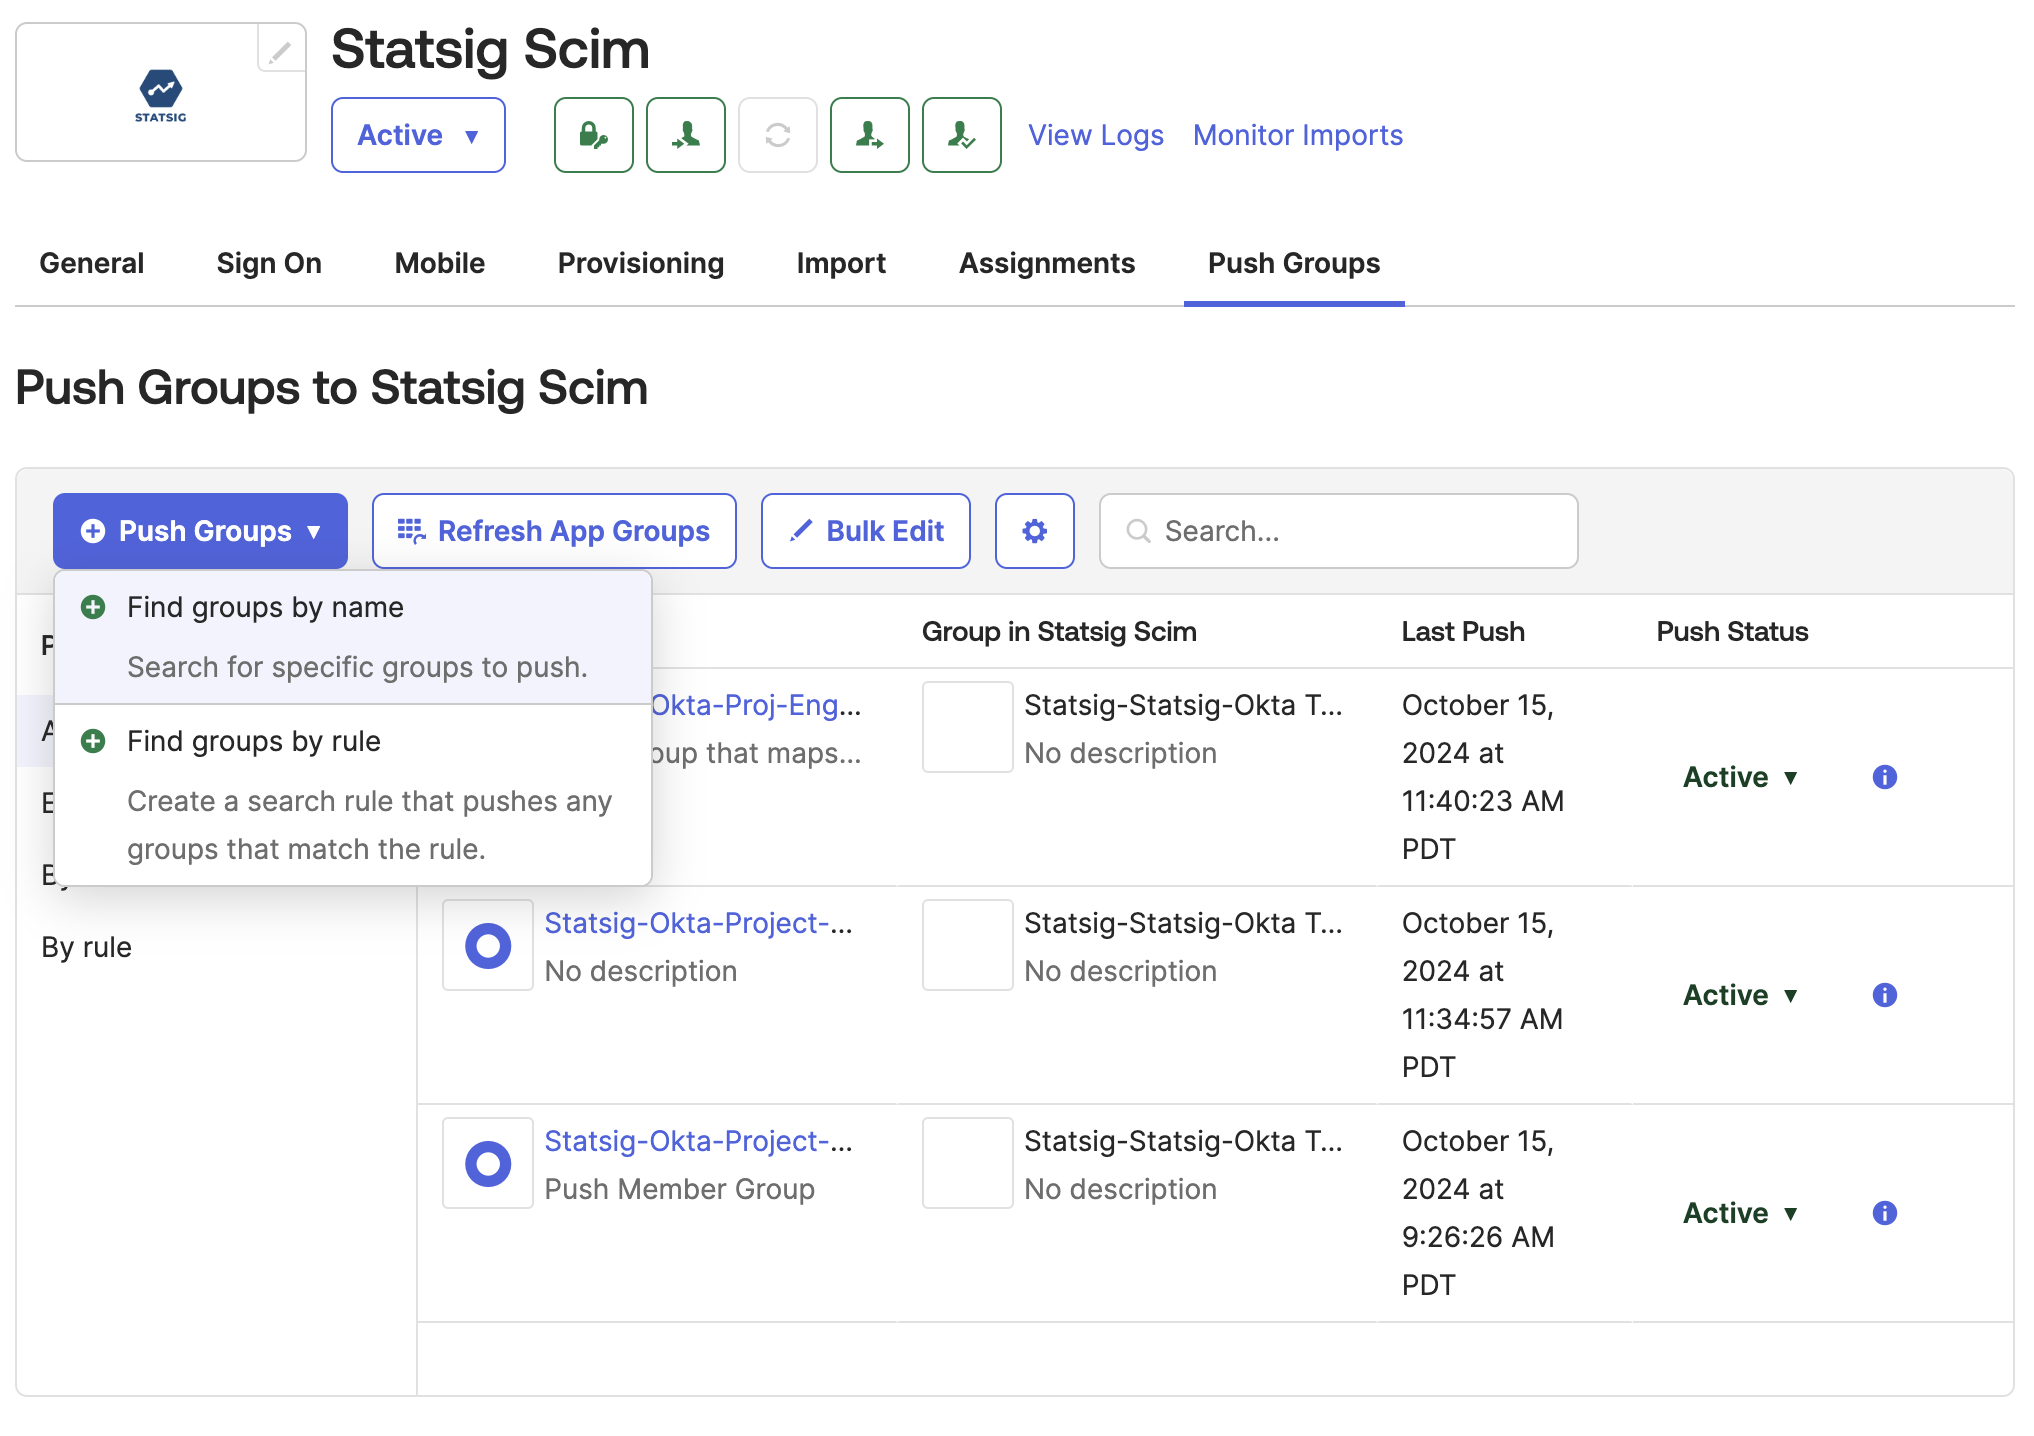
In Okta, go to the Statsig Integration's "Push Groups" tab
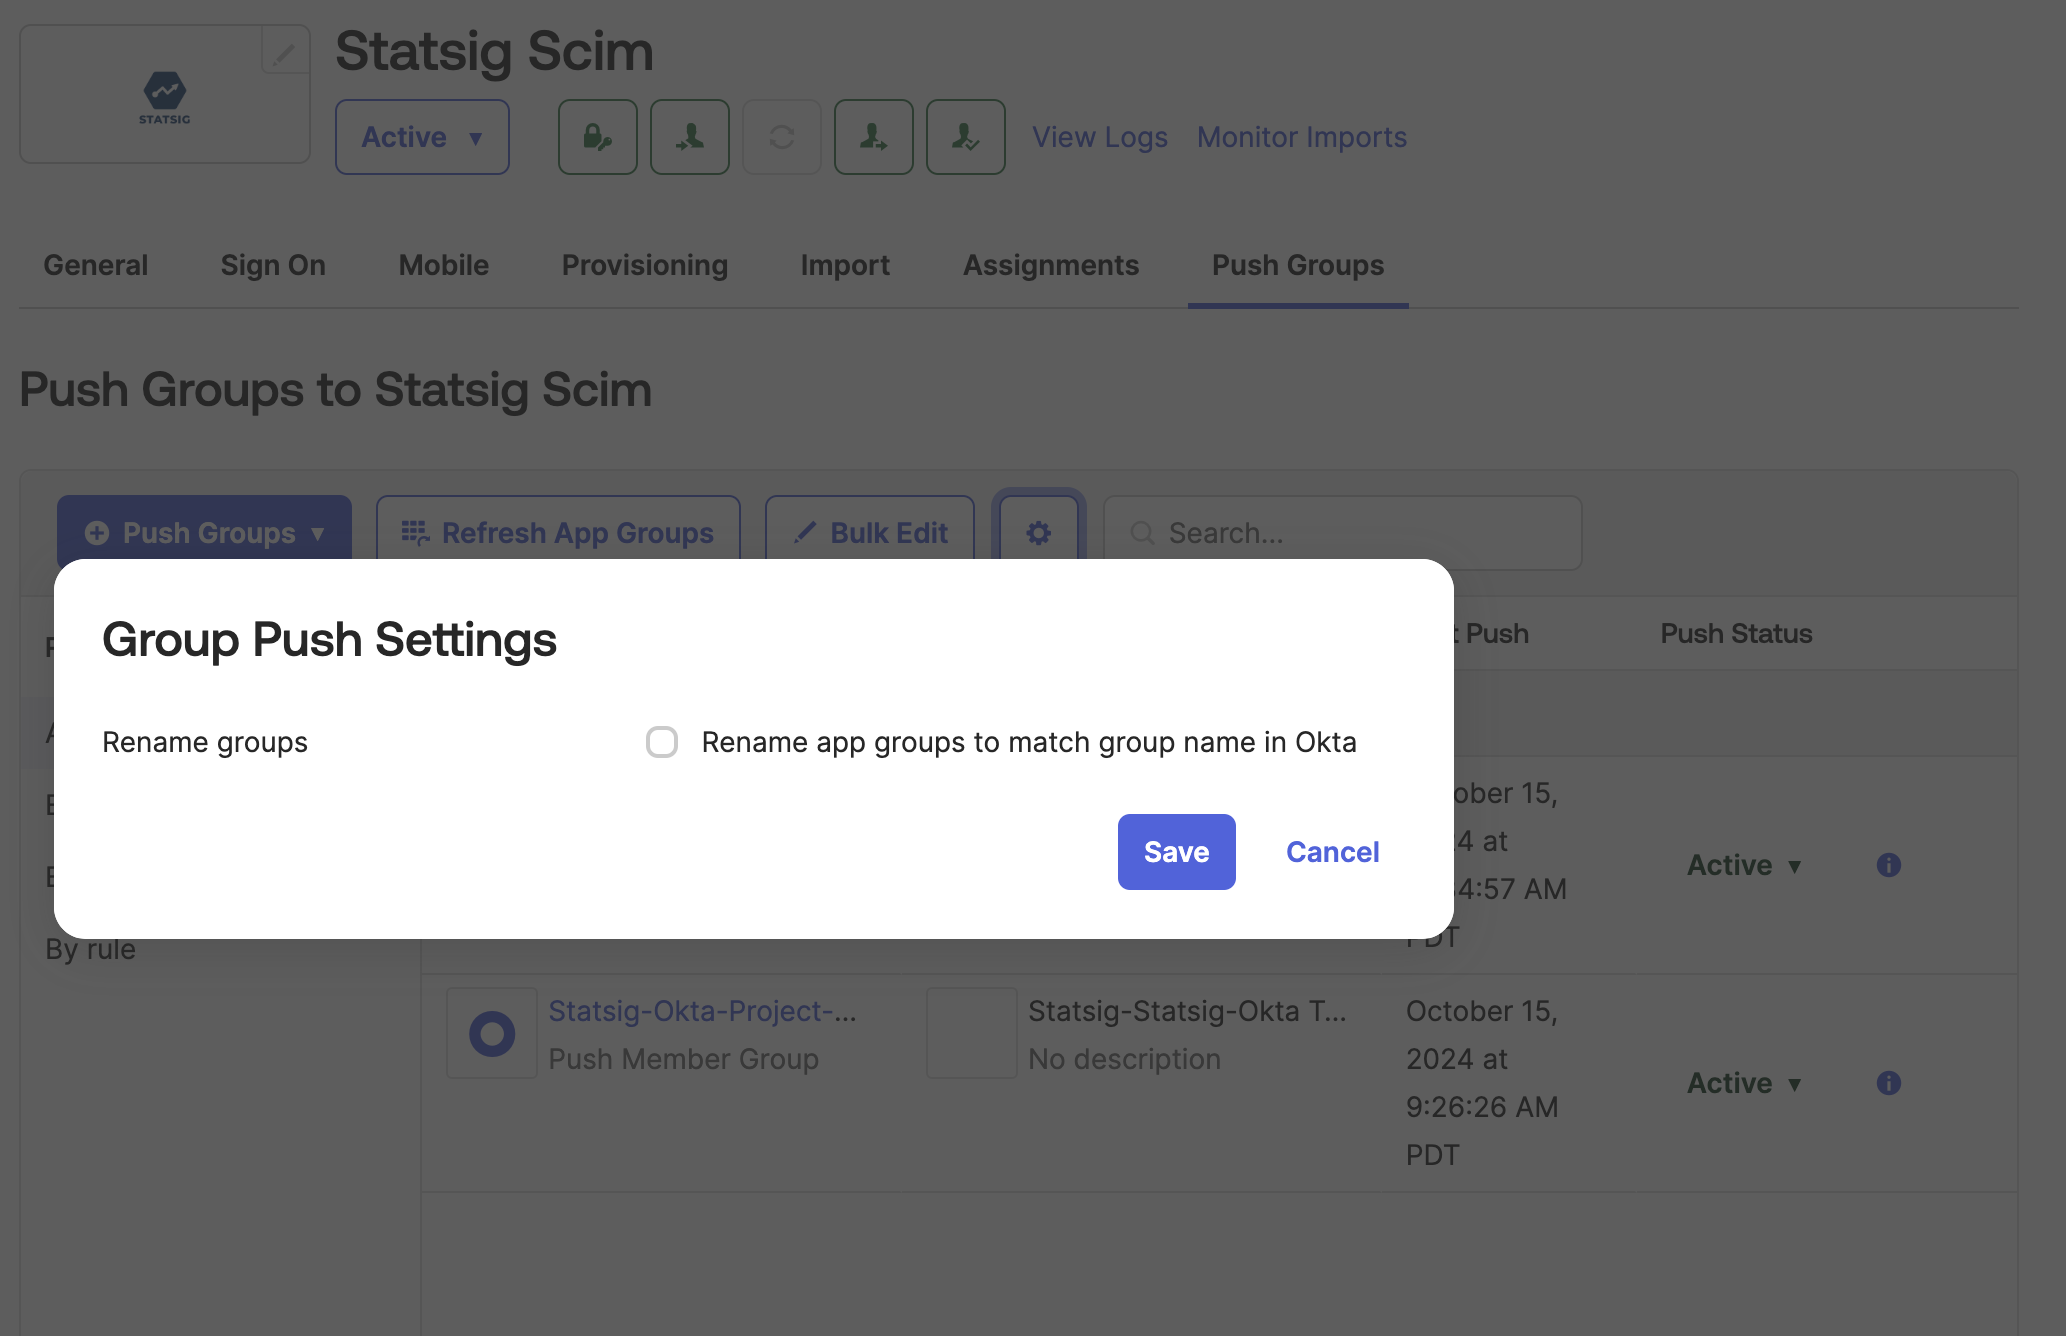
Click the settings button and disable "Rename Groups"
Click "Push Groups" and select the method for finding groups in Okta.
Type in and select the Okta group to push to a Statsig Project x Role Group.
- Find groups under
Directory > Groupsin the Okta left nav. You will see groups created from Okta and groups created by Statsig. - The required groups are those you created in Okta. Filter by setting
Group source typetoOkta groups. If you have no Okta groups, create one and add members.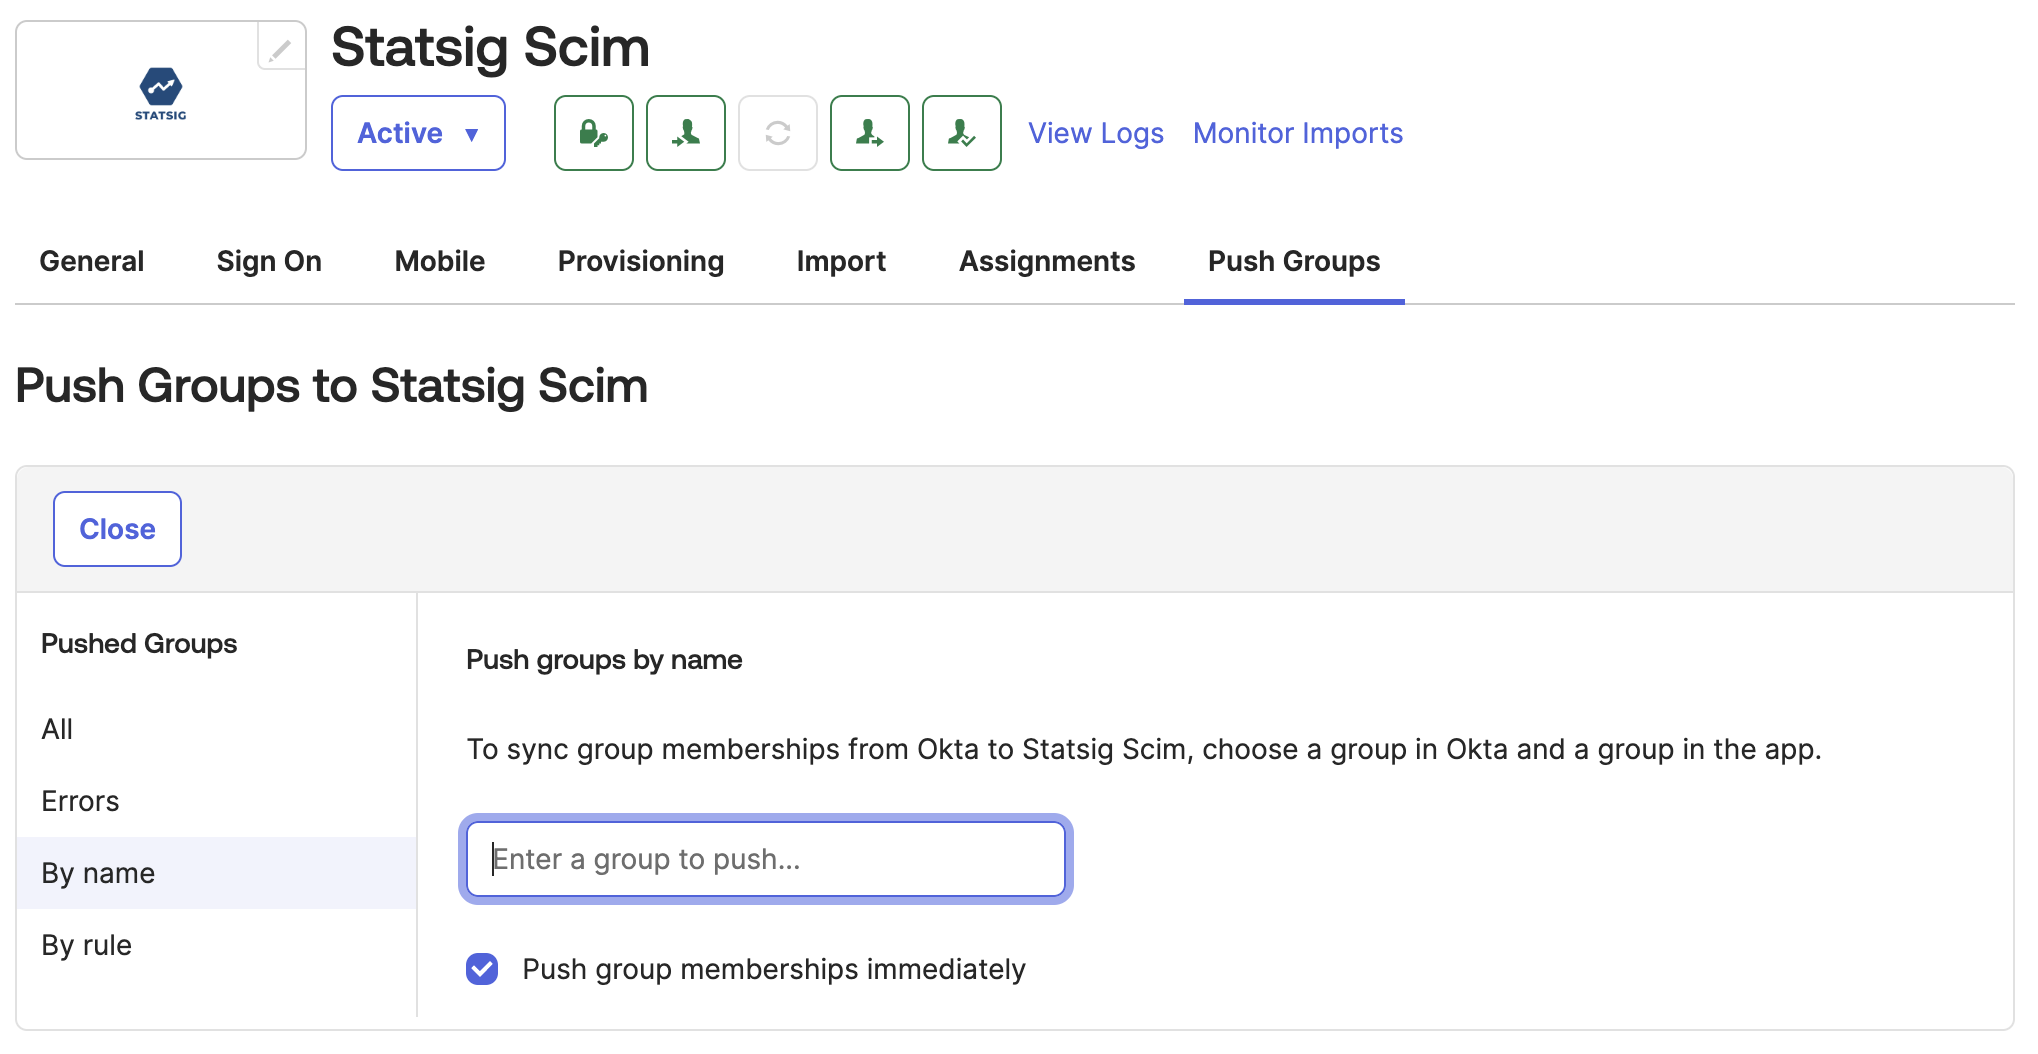
- Link the Okta group to the Statsig group with the role you want.
- Change
Match Result & Push ActiontoLink Group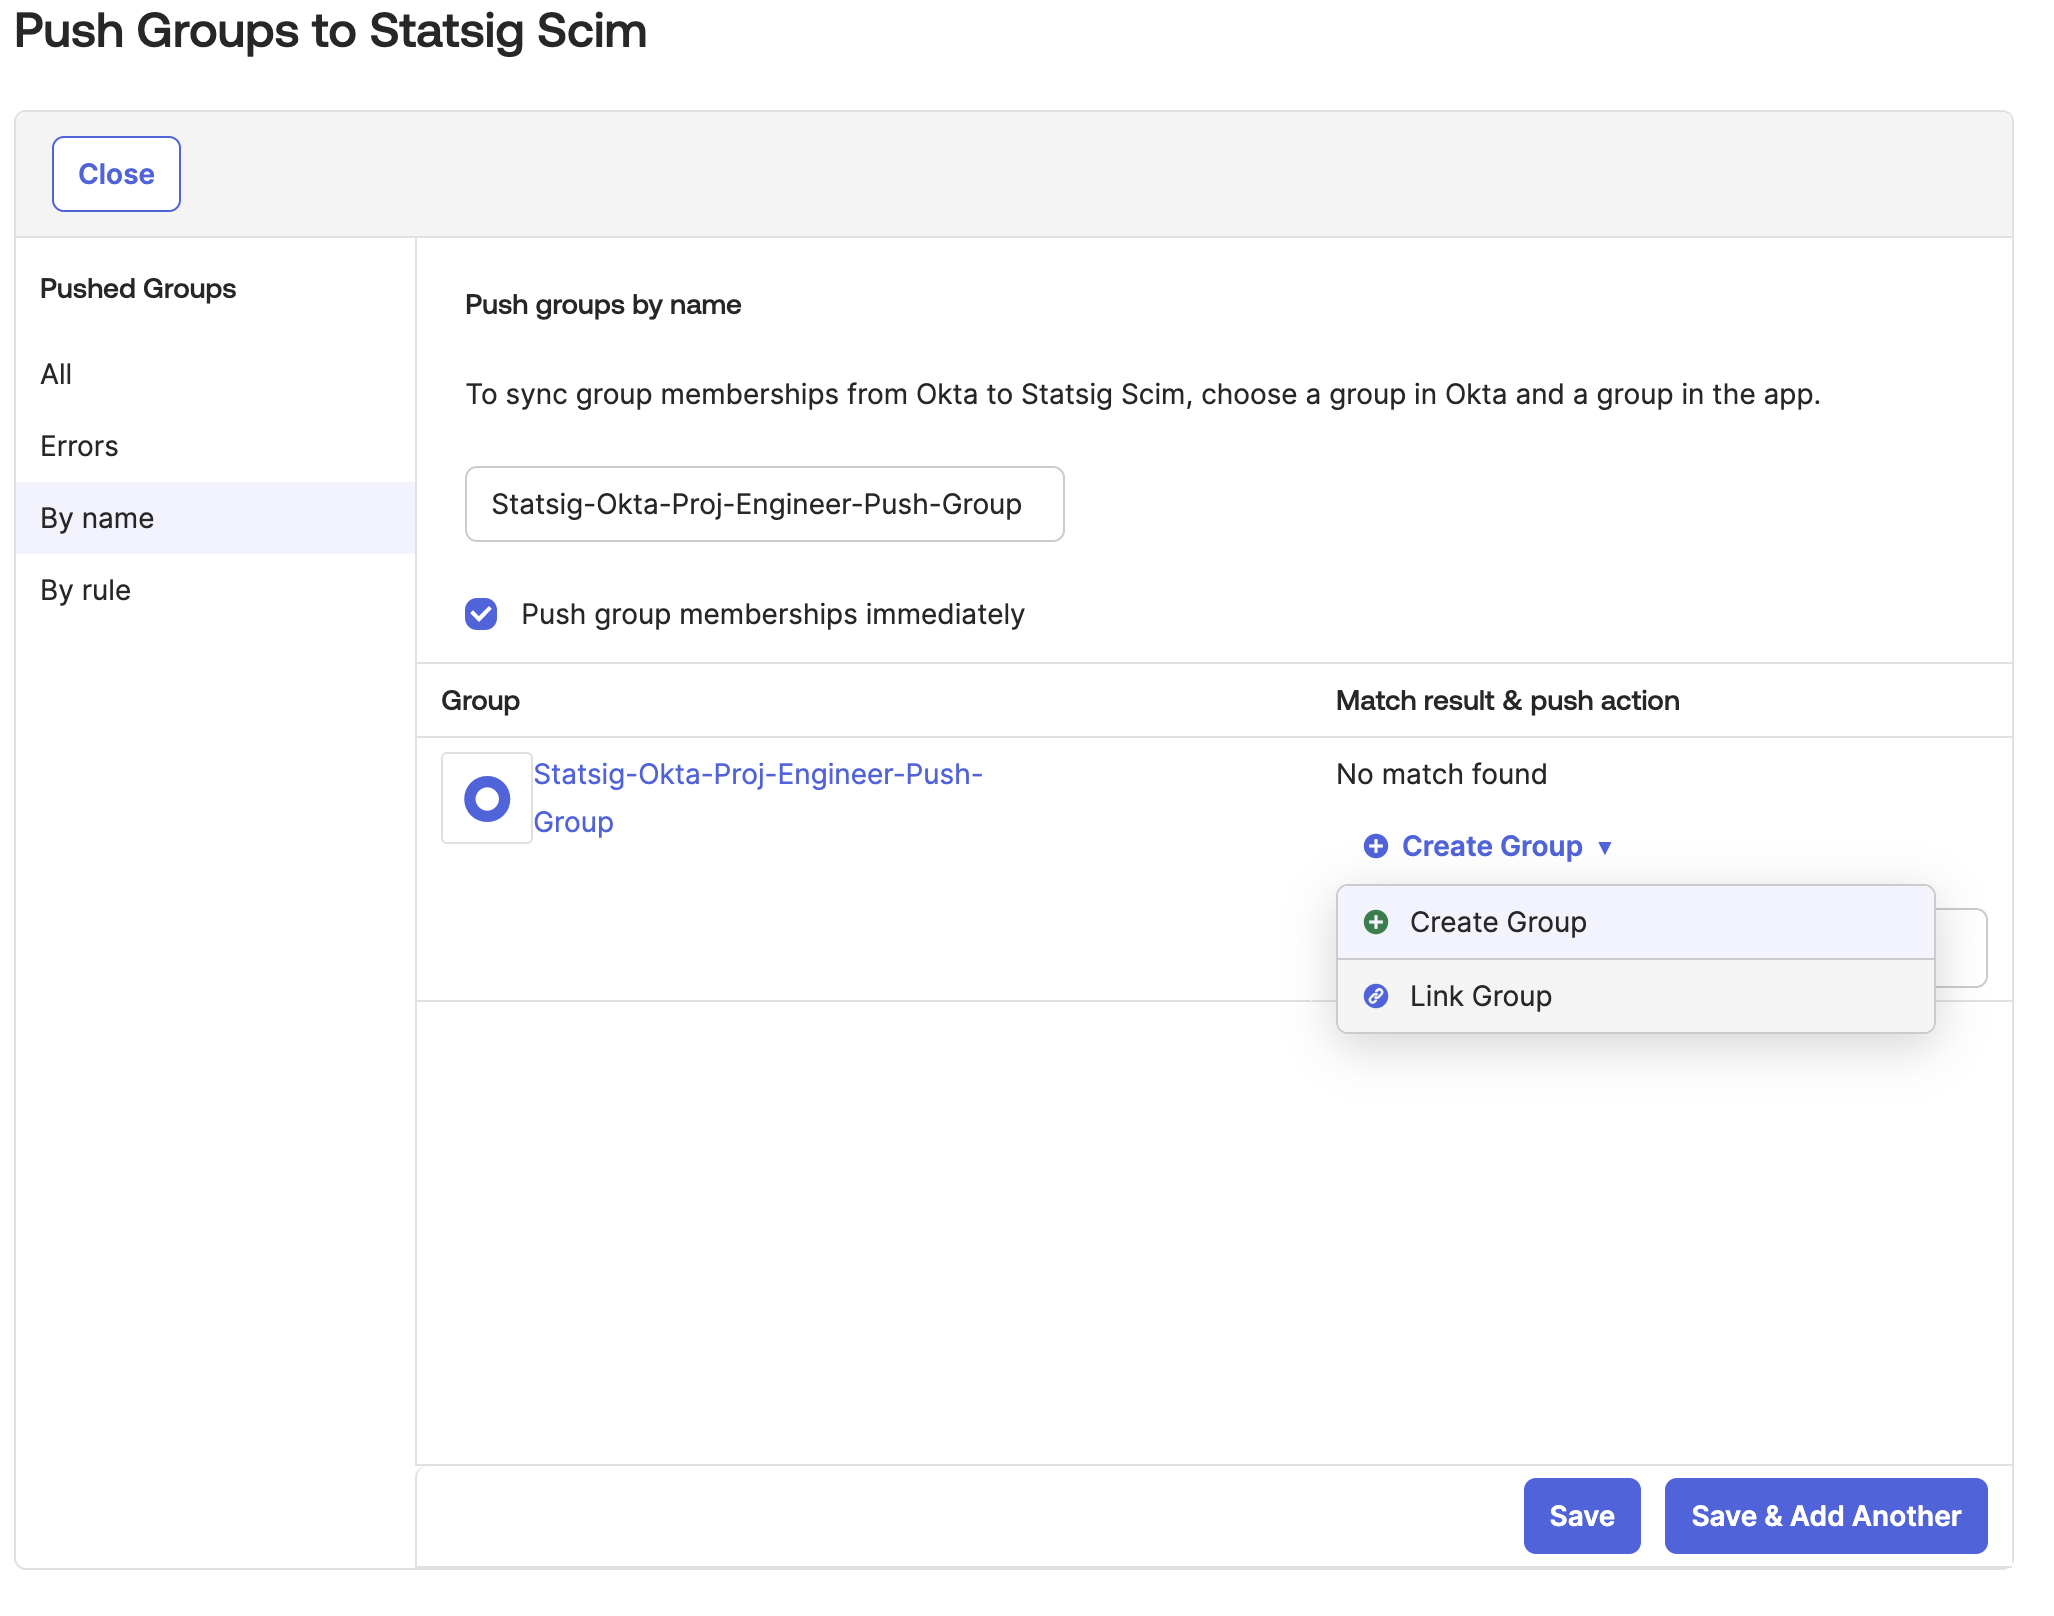
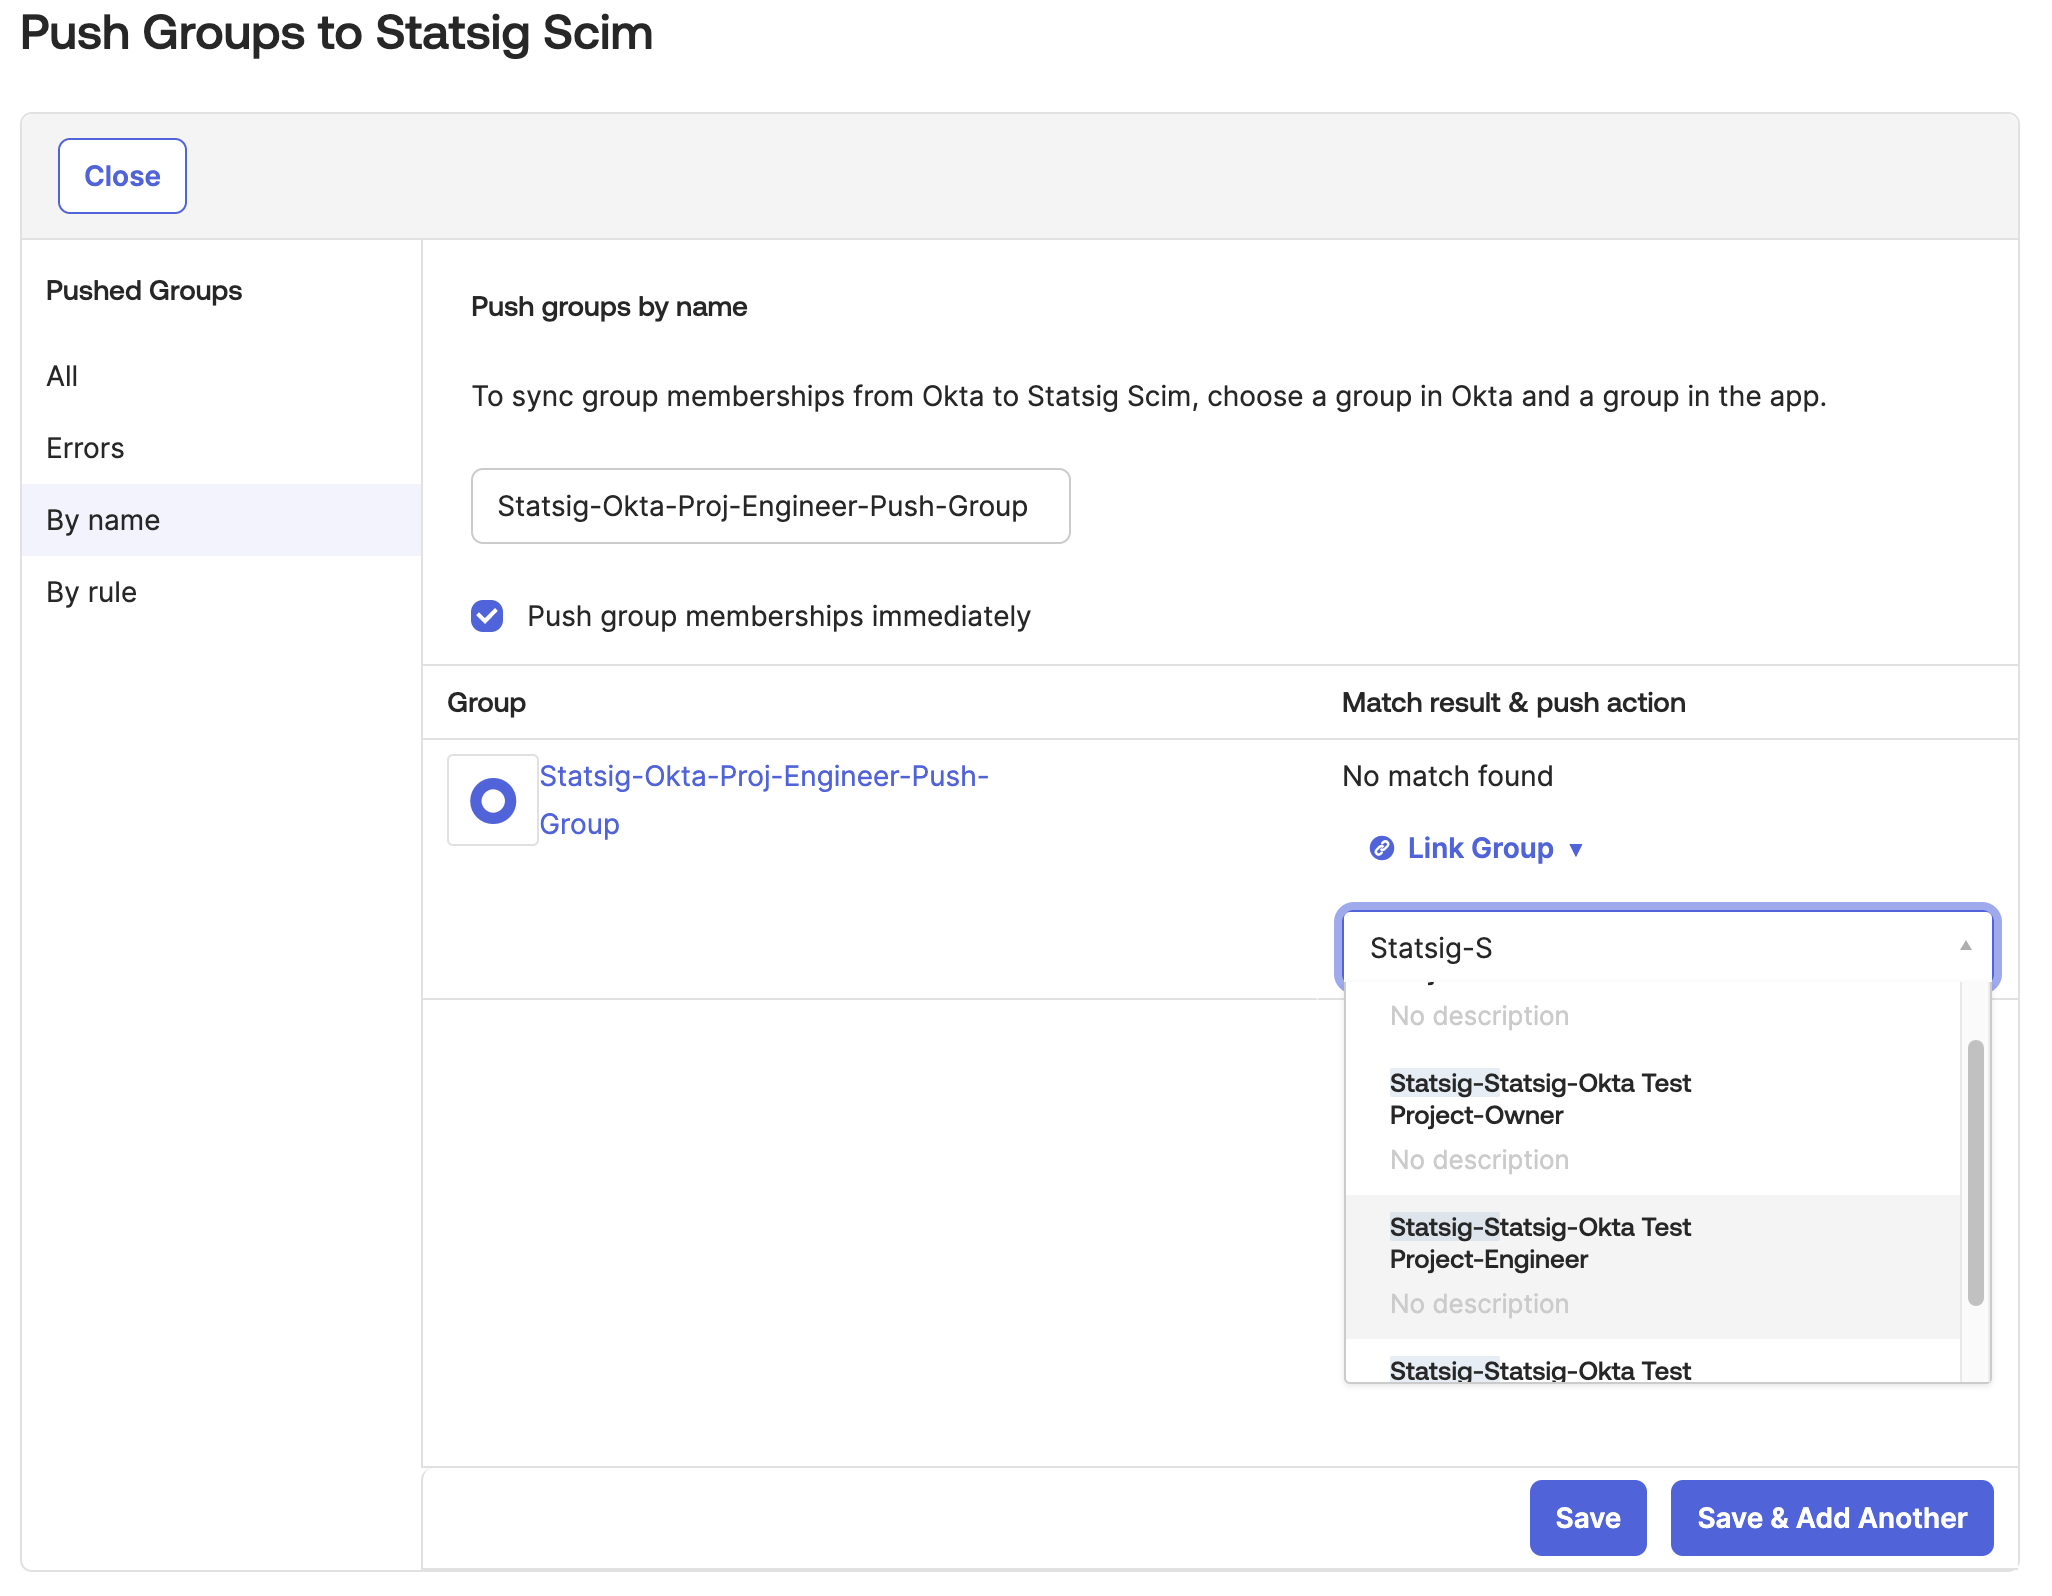
- Select the Statsig Project x Role Group that the Okta group pushes to.
- Statsig displays the Project x Role Group with the format
Statsig-<Project Name>-<Role Name>on Okta. - By default Okta only allows you to map 1 Okta Group to 1 Statsig Group.
- Then link the Okta group to a Statsig Project x Role Group. On save, the group pushes to Statsig. All future group changes on Okta push to Statsig.
Was this helpful?