Pre-commit Webhooks
Configure pre-commit and pre-publish webhooks in Statsig to enforce review checks, run validations, or trigger CI workflows before changes are saved.
Pre-commit Webhooks allow you to integrate external validation into your change approval workflow. This enables you to:
- Route changes through internal approval systems
- Run automated tests before changes go live
- Enforce custom business logic or compliance checks
- Integrate with CI/CD pipelines
How pre-commit webhooks work
When a Statsig user submits a change for review and a reviewer approves it, clicking Commit Changes triggers your configured webhook. Statsig sends the change details to your endpoint. Your endpoint validates the change (for example, runs tests or checks policies) and responds to Statsig with either an approval or a rejection. The response determines whether the user can commit the change or whether it remains blocked.
Setup instructions
Step 1: Configure your webhook endpoint
Your webhook endpoint must:
- Accept POST requests from Statsig
- Process the change payload (refer to the format below)
- Call the Change Validation API to approve or reject
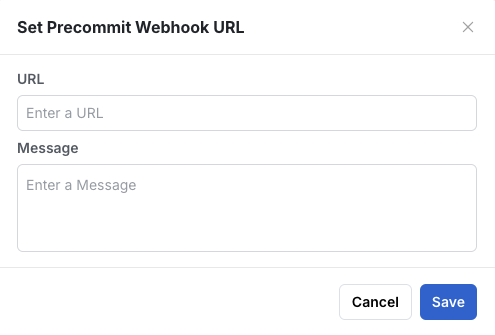
Step 2: Configure Statsig console settings
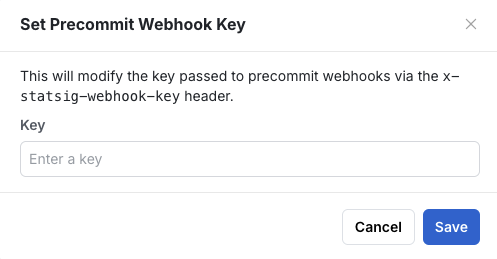
Navigate to Settings → Product Configuration → General:- Webhook URL: The endpoint where Statsig sends change notifications
- Webhook Key: A secret key sent in the
x-statsig-webhook-keyheader for authentication - Initial Message: A message shown to users while validation is in progress
- Example: "Your change is being validated by our CI/CD system. This may take up to 2 minutes..."
Usage instructions
Step 3: Send a webhook payload
Every payload has these fields at a minimum:
{
  "review_id": "string",           // Required for API response
  "submitter": "user@example.com", // Who created the review
  "committer": "user@example.com", // Who is committing the change
  "config_type": "gate | dynamic_config | segment | experiment",
  "config_name": "string",         // For gates, configs, segments
  "experiment_name": "string",     // For experiments
  "type": "string"                 // Change type (see below)
}
Currently, only changes to gates, dynamic configs, segments, and experiments trigger pre-commit webhooks, and only the following changes:
rules: Updating rules (for gates, dynamic configs, segments)- contains payloads
old_configandnew_configwith the same format returned by the console API for the entity type (e.g. /api-reference/gates/read-gate for gates)
- contains payloads
update_target_apps: Updating target applicationsupdate_allocation: Changing the pass percentage of an ongoing experimentstart_experimentship_experimentabandon_experimentupdate_experiment_settings: Changing settings of an ongoing experiment- contains payloads
old_experimentandnew_experimentwith the same format returned by the Console API
- contains payloads
Step 4: Respond to webhooks
Your system must call the Change Validation API to approve or reject the change:
Endpoint: POST https://statsigapi.net/console/v1/change_validation
When responding to validation, set the message field to provide a message to the user. Set the message after validation completes, or provide progressive updates while validation is running.
{
  "reviewID": "review_123",
  "message": "⏳ Running tests... (45/150 complete)"
}
What Users See
When a review is pending validation, users see:
- Title: "Changes to this config have been reviewed and are pending validation"
- Description:
- The company-level
precommit_webhook_message(if set in console settings) - The review-specific
precommit_message(if your webhook has set it)
- The company-level
Bypassing validation
Project Admins can grant the "Bypass Pre-commit Webhook" permission to specific roles. Users with this permission see a "Commit Changes (Bypass Validation)" option that lets them skip webhook validation entirely.
Best practices
- Respond quickly: You have 2 minutes before the request times out.
- Include debug links: Help users troubleshoot failures quickly.
- Use progressive updates: Keep users informed during long validations.
- Set a helpful initial message: Explain what is happening and the expected wait time.
- Handle errors gracefully: If your validation system is unavailable, consider auto-approving or notifying users.
Was this helpful?