Reusable Targeting with User Segments
Step-by-step guide to creating your first Statsig segment, defining audience rules, and using it to target a feature gate or experiment.
User Segments allow you to predefine targeting groups for reuse in Feature Gates and Dynamic Configs. A segment is a reusable set of users defined by conditions.
This guide walks through creating a segment to identify internal users and then using that segment in a new feature.
Step 1: Creating a segment
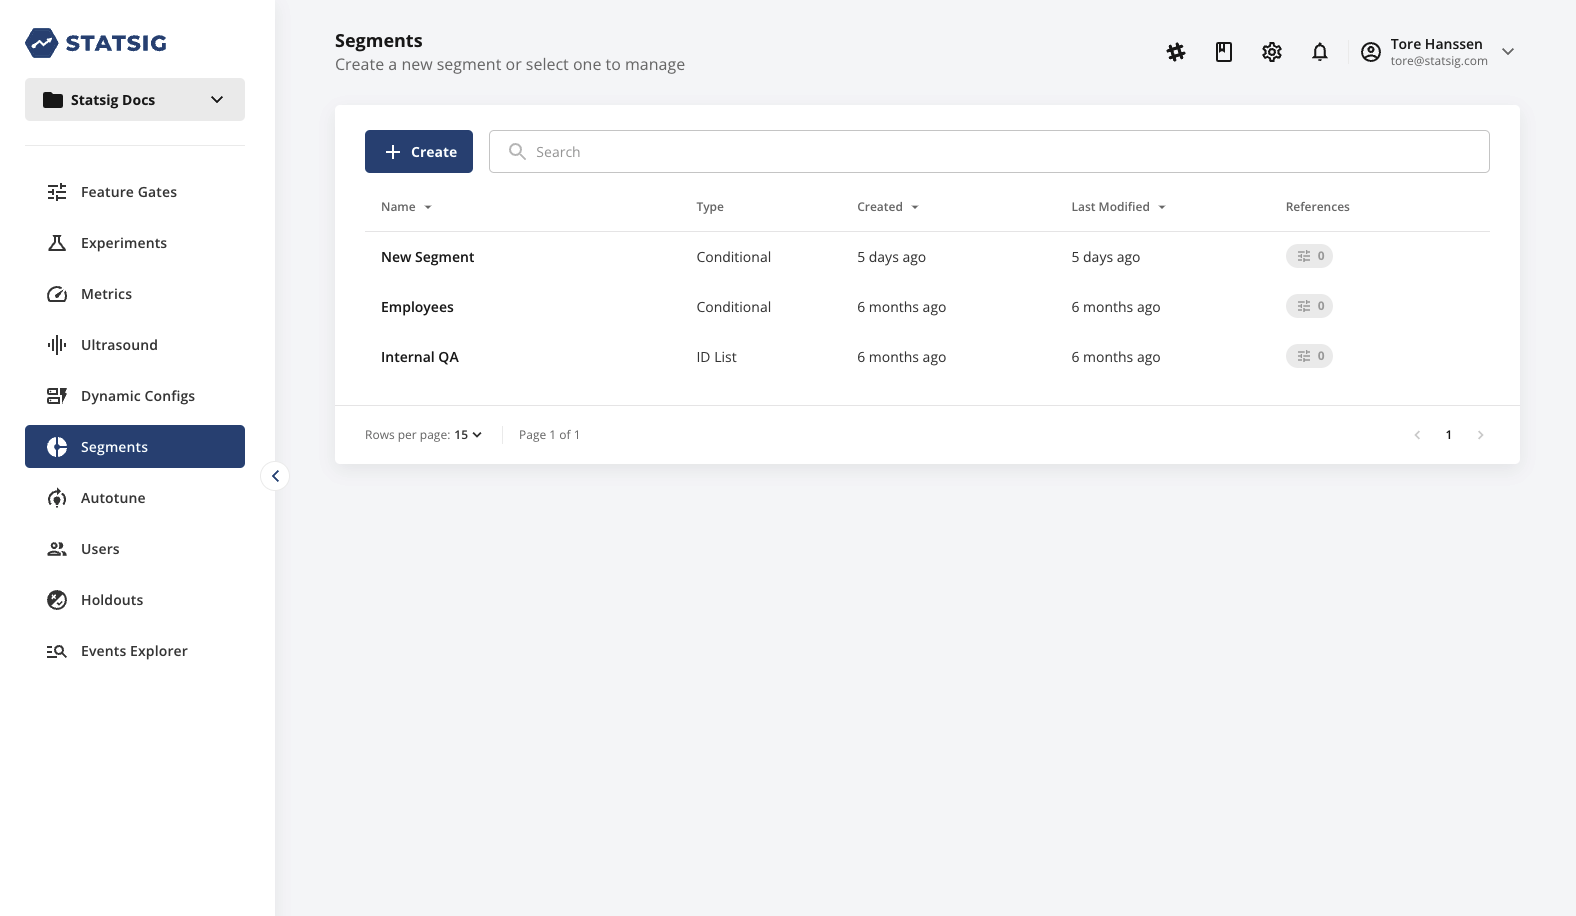
Navigate to the Segments tab in the console:
Click Create New and name the segment Internal Stakeholders:
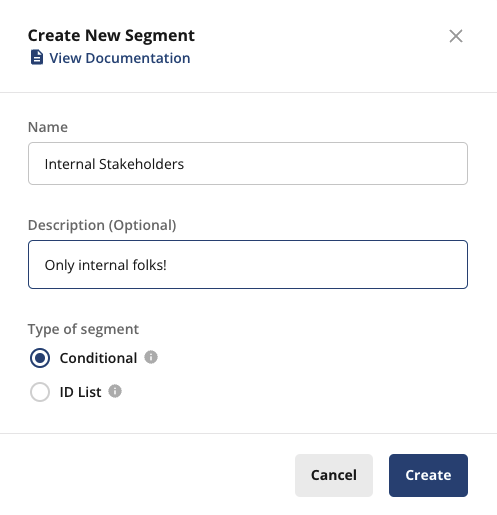
There are two types of segments:
- Conditional Segments: operate on conditions similar to Feature Gates and Dynamic Configs
- ID Lists: accept a predefined list of userIDs or a specific customID
Select Conditional and click Create.
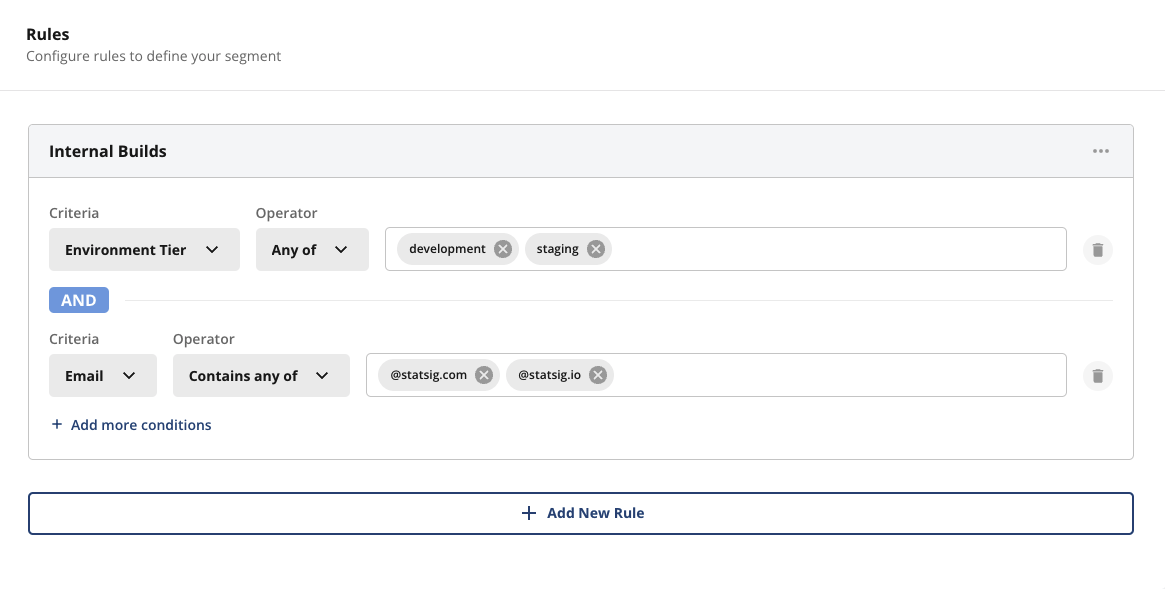
Add a condition to target users on internal environments:
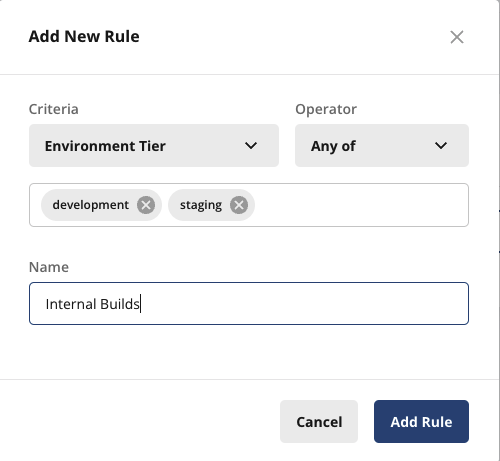
Unlike a Feature Gate, a segment rule has no pass percentage. A segment represents all users matching its conditions. When you create a Feature Gate rule based on a segment, you configure the pass percentage on the gate rule.
Add another condition to the same rule. Click Add more conditions and add an email contains any of condition to target internal employees:
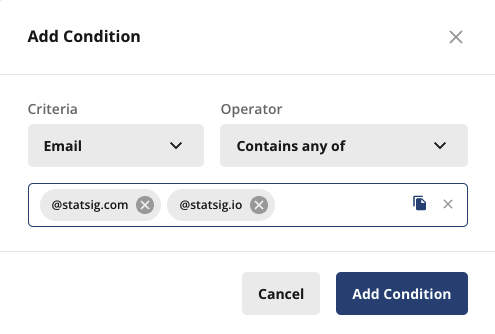
:::note Adding an additional condition to the same rule enforces that both pass - the conditions are evaluated as an AND operation.
To create multiple conditions where any of them can pass as an OR operation, add a new rule. :::
Select Save Changes. Your segment should look like this:
Step 2: Using a segment
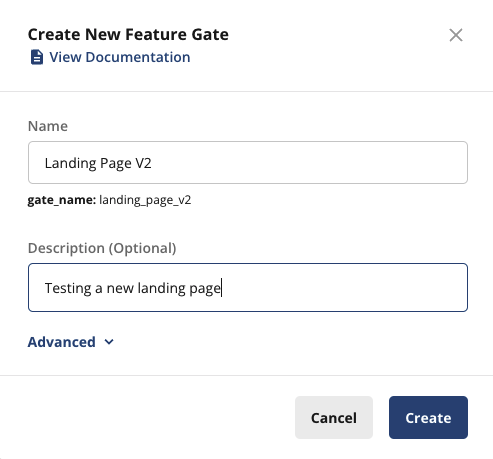
Create a gate for the new feature, "Landing Page Redesign". Navigate to Feature Gates and click Create New.
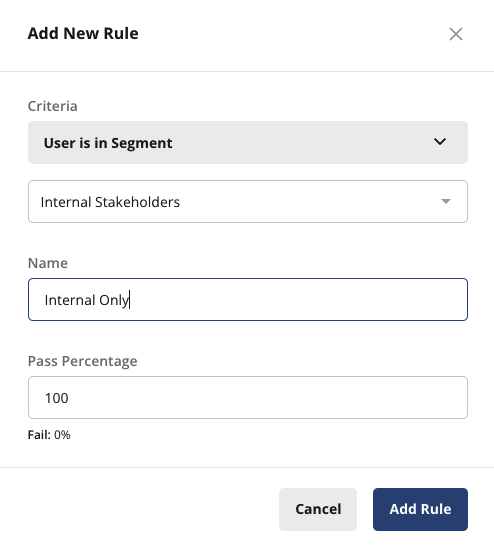
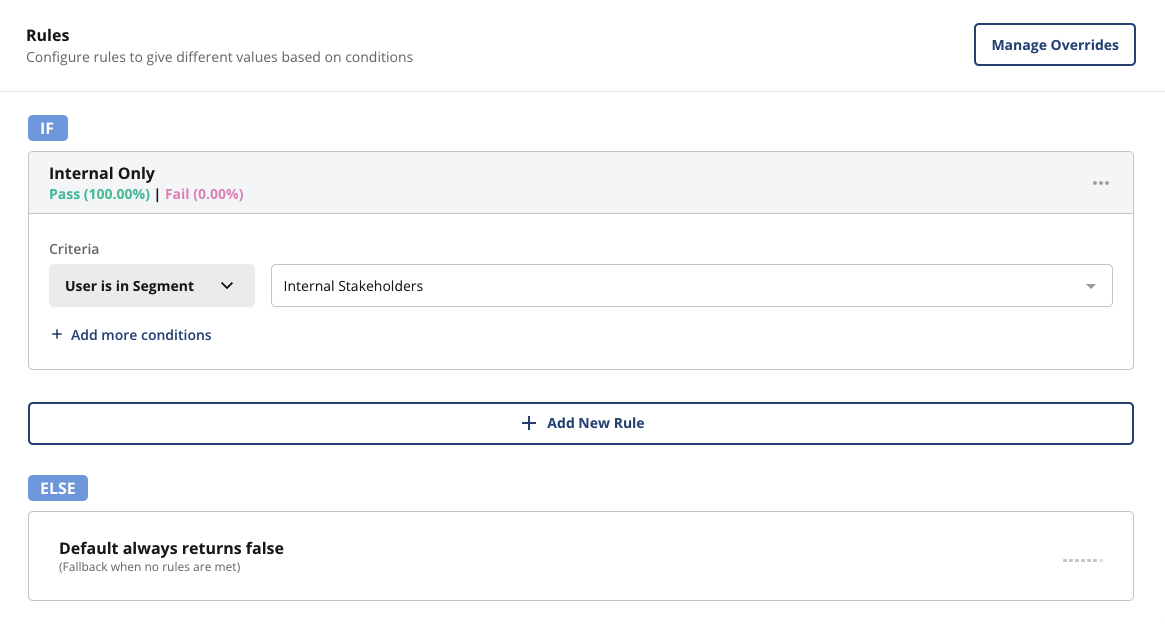
Gate the feature to internal stakeholders using the segment you created. Click Add New Rule:
Select Save Changes.
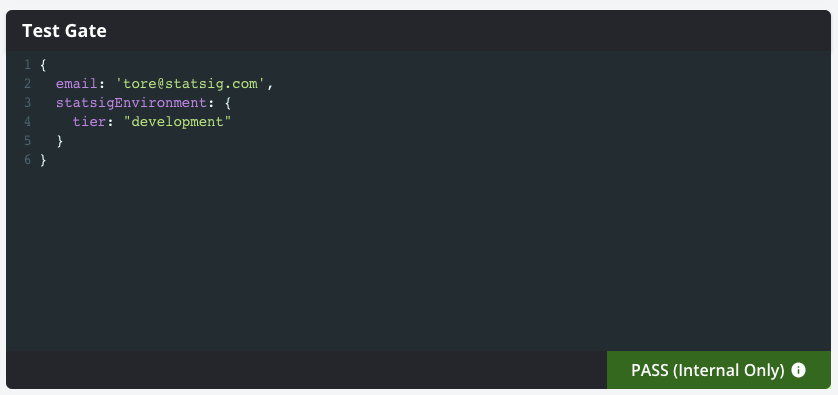
Step 3: Test the gate
Enter a user in the test gate console. The gate only passes if the user has an email ending in statsig.com or statsig.io AND a development or staging environment tier. Removing either condition causes the gate to fail.
{
  email: 'tore@statsig.com',
  statsigEnvironment: {
    tier: "development"
  }
}
You can reuse this segment in any number of Feature Gates or Dynamic Configs to control internal feature access during development.
Was this helpful?