Email AB Testing with SendGrid
Run email A/B tests with Statsig and SendGrid by logging exposure events from sends to compare open, click, and conversion metrics across variants.
Run email A/B tests with Statsig and SendGrid to find which email template performs best. You create an experiment in Statsig, connect it to SendGrid's event webhook, and split your recipients across control and test sends. Statsig tracks opens, clicks, and downstream conversion metrics for each variant so you can measure business-level impact.
This guide assumes you have an existing Statsig account. Go here to create a new free account if you don't already have one: https://statsig.com/signup
Step 1: Create an experiment
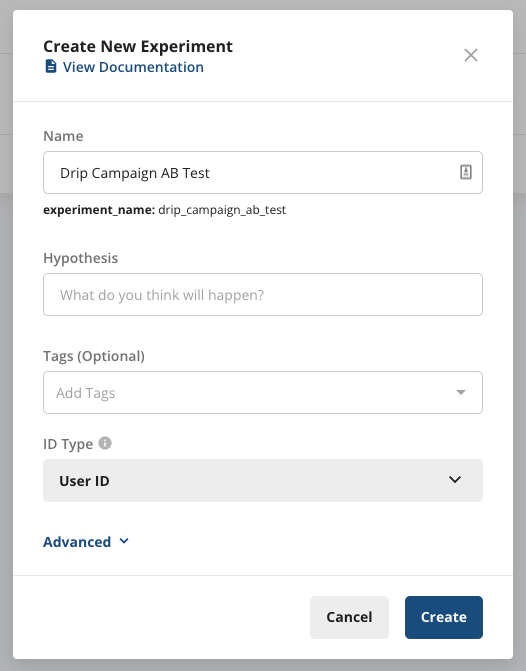
Start by creating a new experiment on the Statsig console. Enter a name and leave the remaining fields at their defaults.
Step 2: Start the experiment
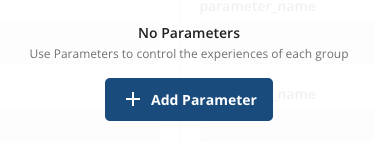
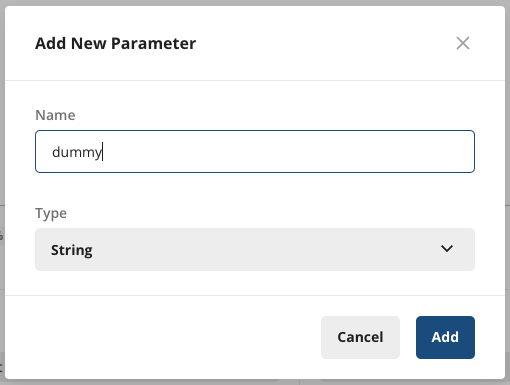
Because you can't start an experiment without a parameter, add a placeholder parameter.
Save the experiment setup and select Start.
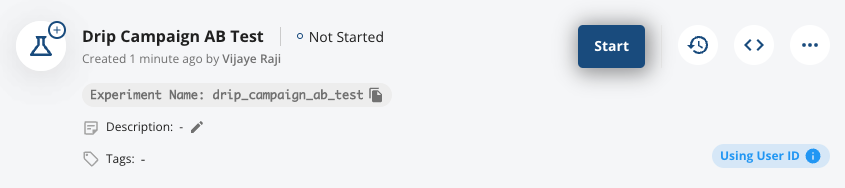
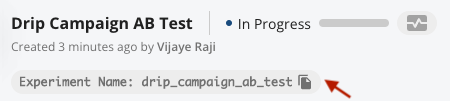
Copy the Experiment Name. You need it in the next step.
Step 3: Set up webhook
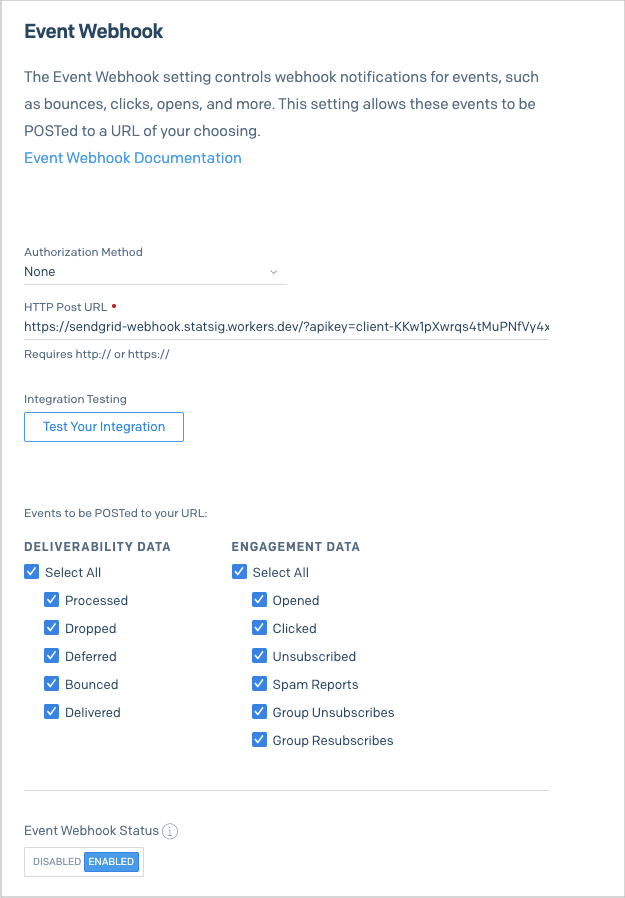
In your SendGrid console, go to Settings > Mail Settings > Event Webhook.
In the HTTP Post URL, enter:
https://sendgrid-webhook.statsig.workers.dev/?apikey=[YOUR STATSIG API KEY]
You can find your API key by going to Statsig Project Settings > API Keys and copying the Client API Key.

It should look like this: client-abcd123efg...
Make sure you select all the Deliverability Data and Engagement Data checkboxes. Enable the Event Webhook Status and select Save.
The setup should look like this:
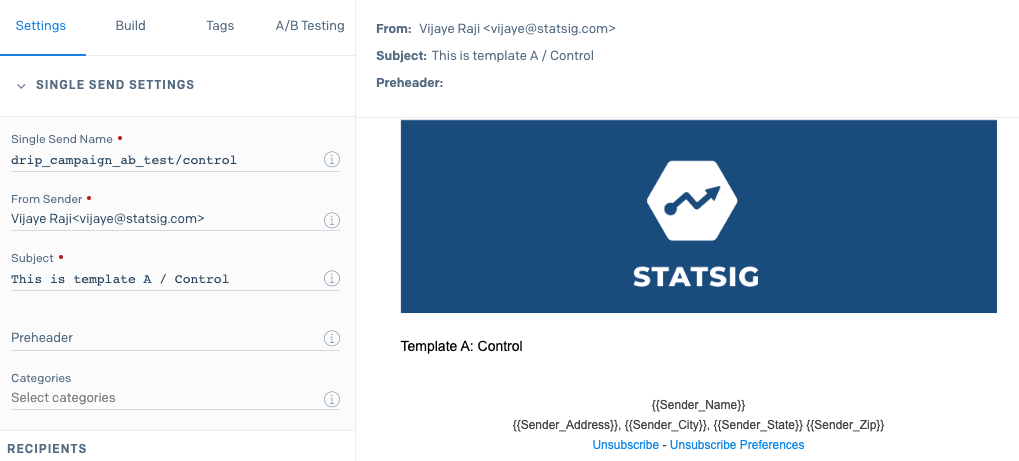
Step 4: Create single sends
In your SendGrid app, create two new Single Send campaigns and name them using the experiment name.
The first is the Control, which is the baseline. Name it [experiment_name]/control. For example: drip_campaign_ab_test/control.
The second is the Test, which is the template you're comparing with the baseline. Name it [experiment_name]/test. For example: drip_campaign_ab_test/test.
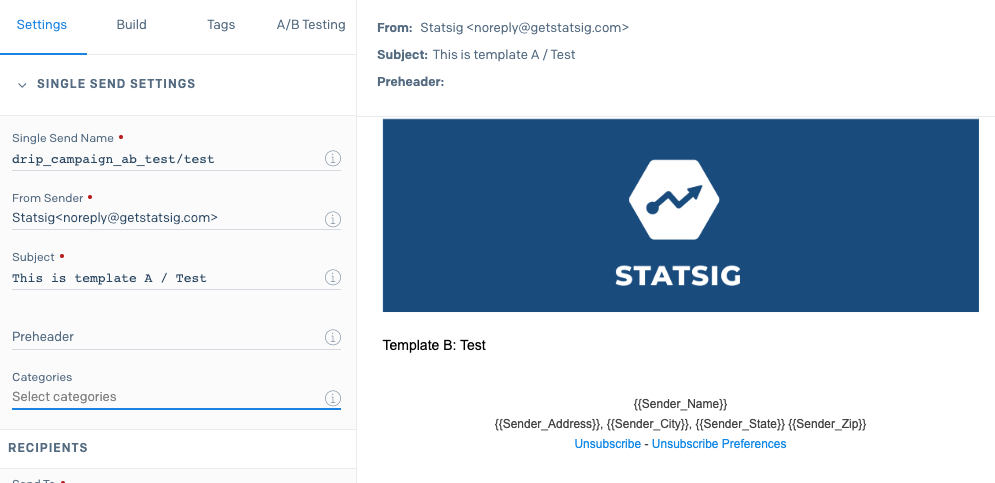
You can customize these templates however you want, and even use different subjects.
Split the recipient list evenly between the Control and Test sends to keep the experiment balanced.
To avoid bias, split the recipient list at random. Ensure you distribute recipients from the same company evenly between the two lists.
Send the emails. Statsig automatically tracks how each variant performs across email opens, clicks, and other engagement metrics.
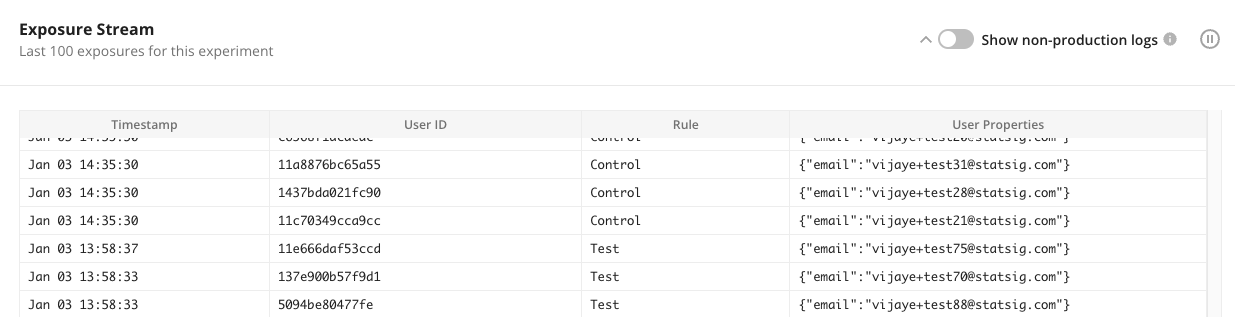
Monitoring the setup
After starting the sends, verify that everything is working by going to the Diagnostics tab in your experiment and reviewing the Exposure Stream at the bottom of the page. The Exposure Stream shows a real-time feed of page loads and the variant Statsig allocated to each user.
Interpreting results
Go to the Pulse Results tab in the Experiment page to add metrics and determine which variant is performing better. Refer to Reading Pulse Results for details.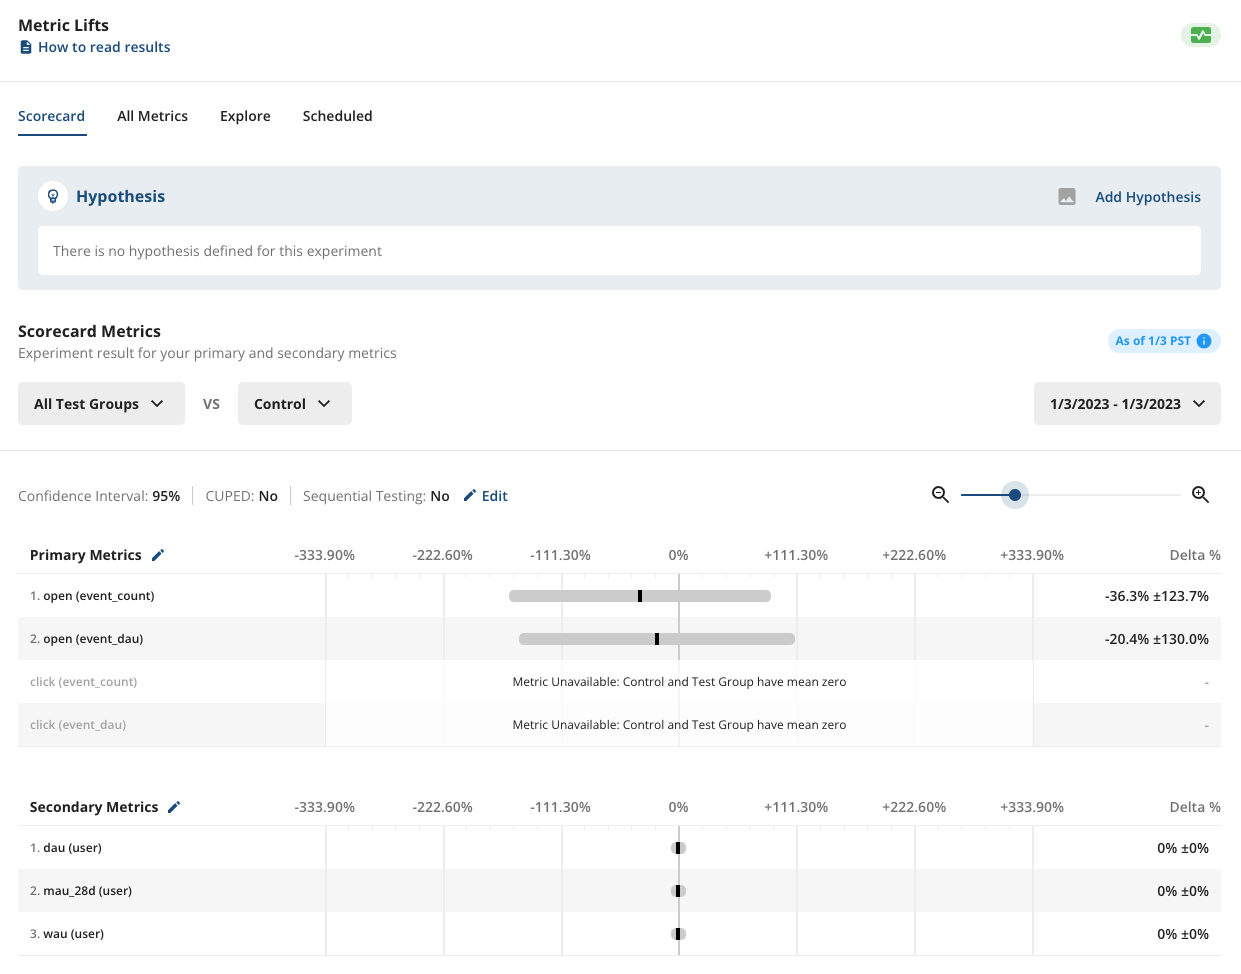
Using API instead of single send
Statsig also supports A/B testing when using the API or automation to send marketing emails. To enable this, use unique arguments and passunique_args as shown below:{
"unique_args": {
"statsig_experiment_name": "[Experiment Name]",
"statsig_variant_name": "[control or test]"
}
}
For the example above, set up the Control variant like this:
{
  "unique_args": {
    "statsig_experiment_name": "drip_campaign_ab_test",
    "statsig_variant_name": "control"
  }
}
And the Test variant looks like this:
{
  "unique_args": {
    "statsig_experiment_name": "drip_campaign_ab_test",
    "statsig_variant_name": "control"
  }
}
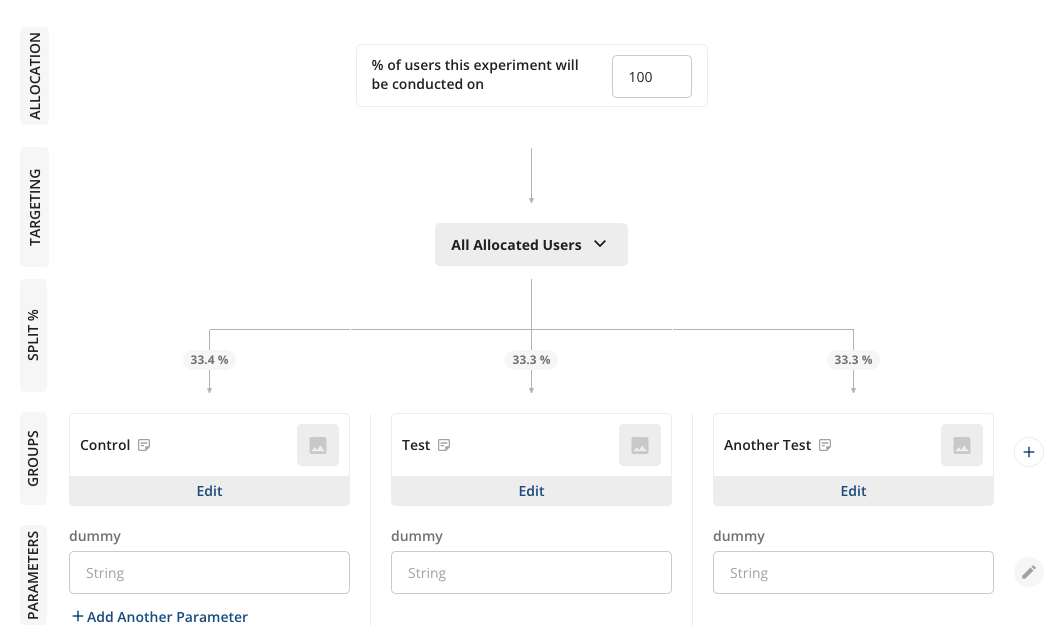
Running more than two variants
You can extend this setup to run ABC or ABn tests by adding more variants in the Experiment Setup tab. Make sure you apply the variant name correctly in either the Single Send name or the unique arguments in the API.
Was this helpful?