Okta SCIM Setup
Step-by-step guide to set up Okta SCIM provisioning with Statsig, including the integration app, attribute mappings, and group assignment configuration.
SCIM (System for Cross-domain Identity Management) connects Statsig and Okta to automate user provisioning and management. After you set it up, Okta creates, updates, and deactivates Statsig users automatically as your directory changes.
To set up SCIM, you need an Okta account with admin access and a SCIM Key from the Statsig Console, which requires Statsig Org Admin rights.Integration notes
- SCIM doesn't support user email management yet.
- When you remove a user from Statsig, Okta automatically unassigns them. If you unassign or deactivate a user in Okta, Statsig removes them from the organization.
- SCIM doesn't support creating Statsig Projects and Roles.
Step 1: Create a new app integration in Okta
- Log in to your Okta admin console
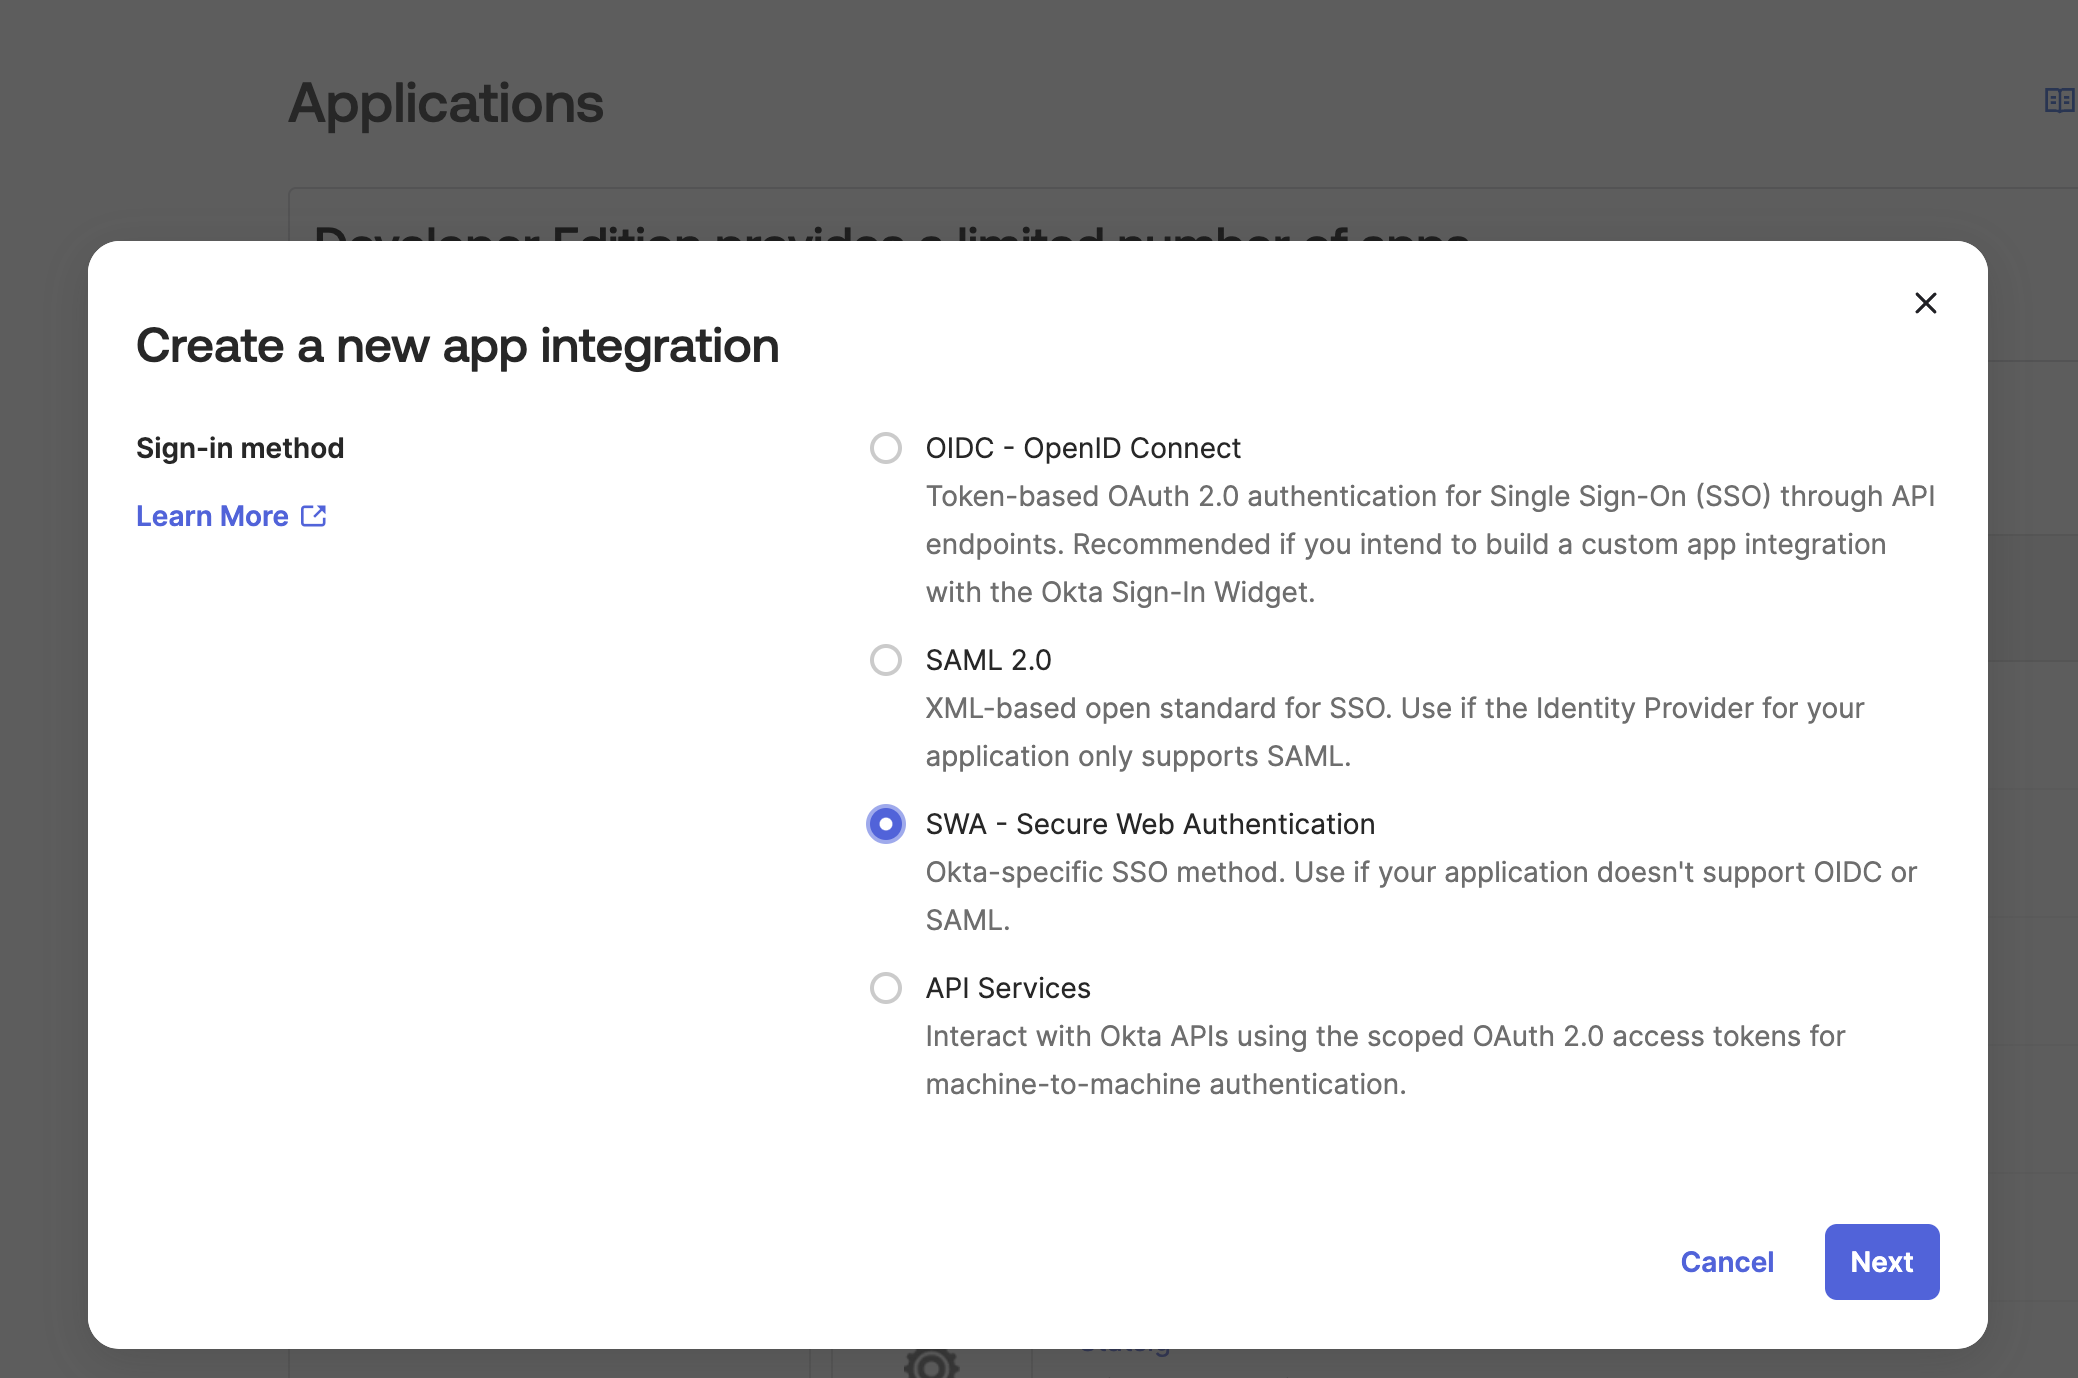
- Navigate to Applications > Applications > Create App Integration
- Select "SWA - Secure Web Authentication"
Step 2: Configure app settings
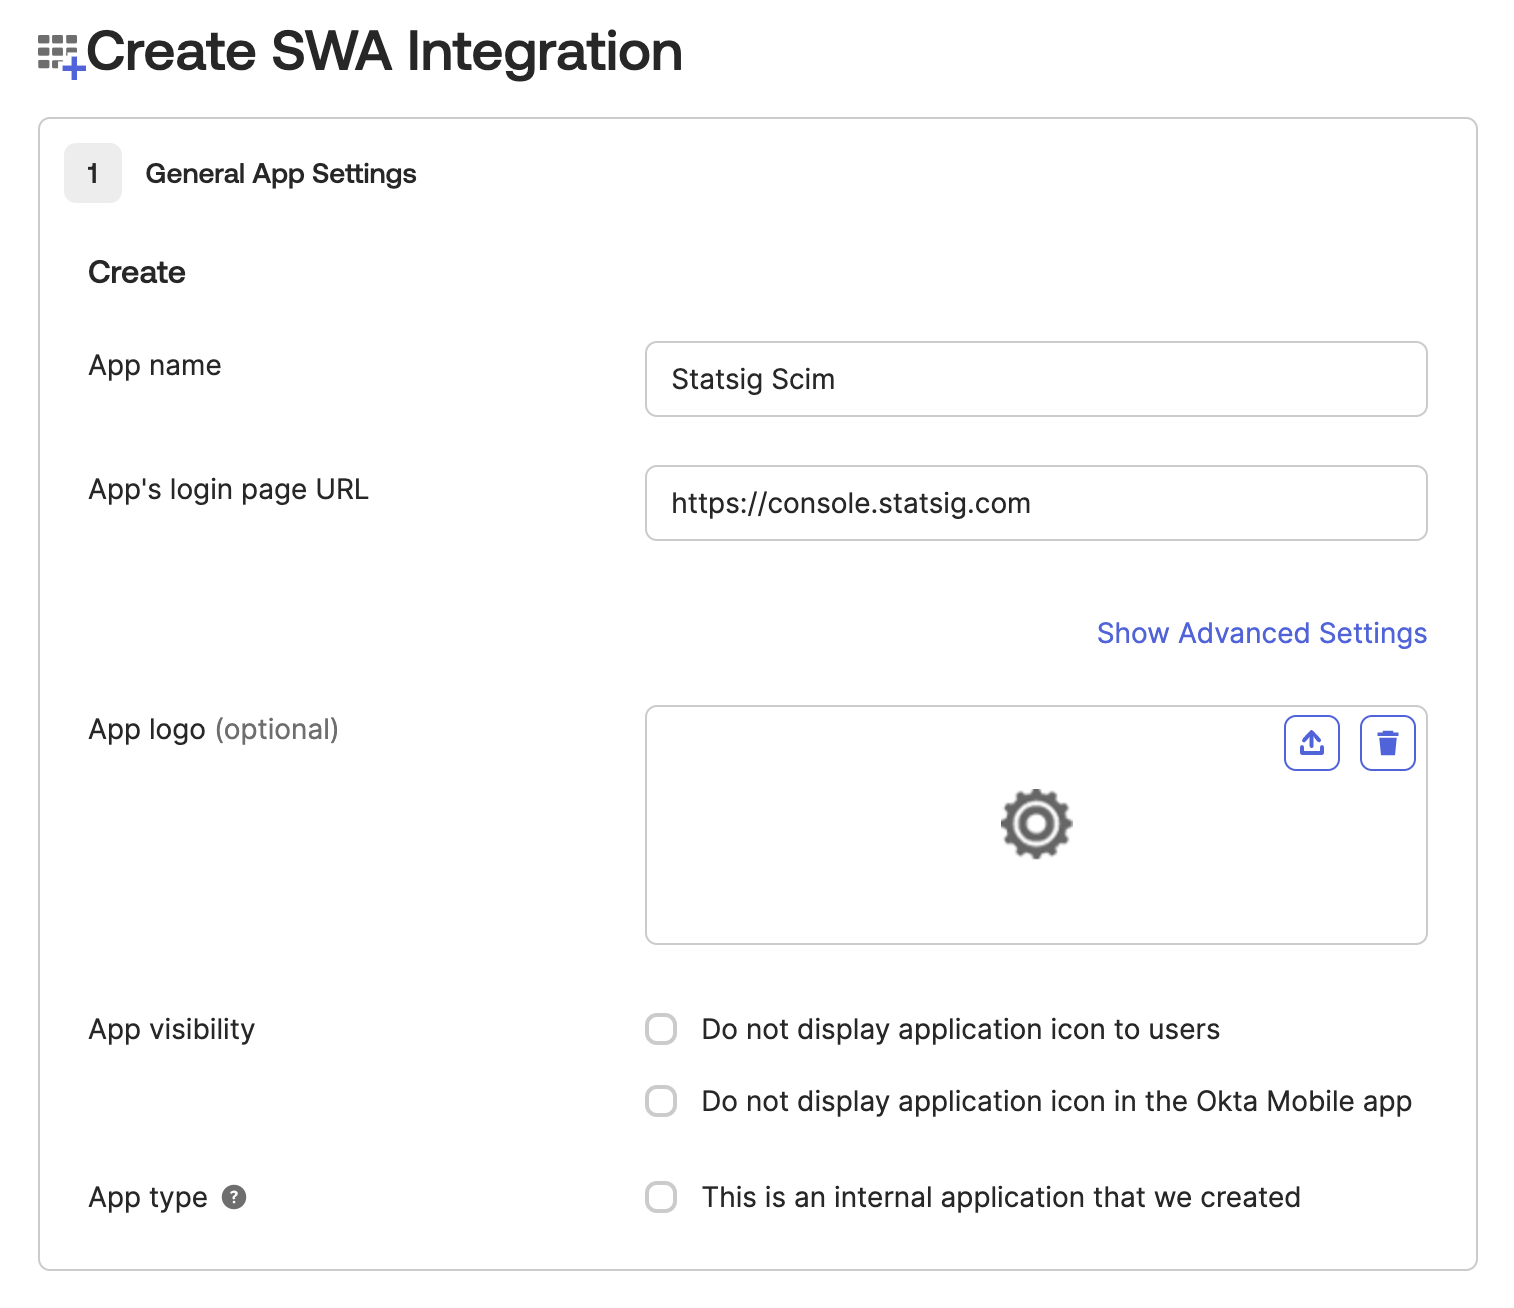
- Set the App name to "Statsig SCIM"
- Enter a placeholder URL for the App Login Page (required field, not used for SCIM). Example:
https://console.statsig.com/
Step 3: Enable SCIM provisioning
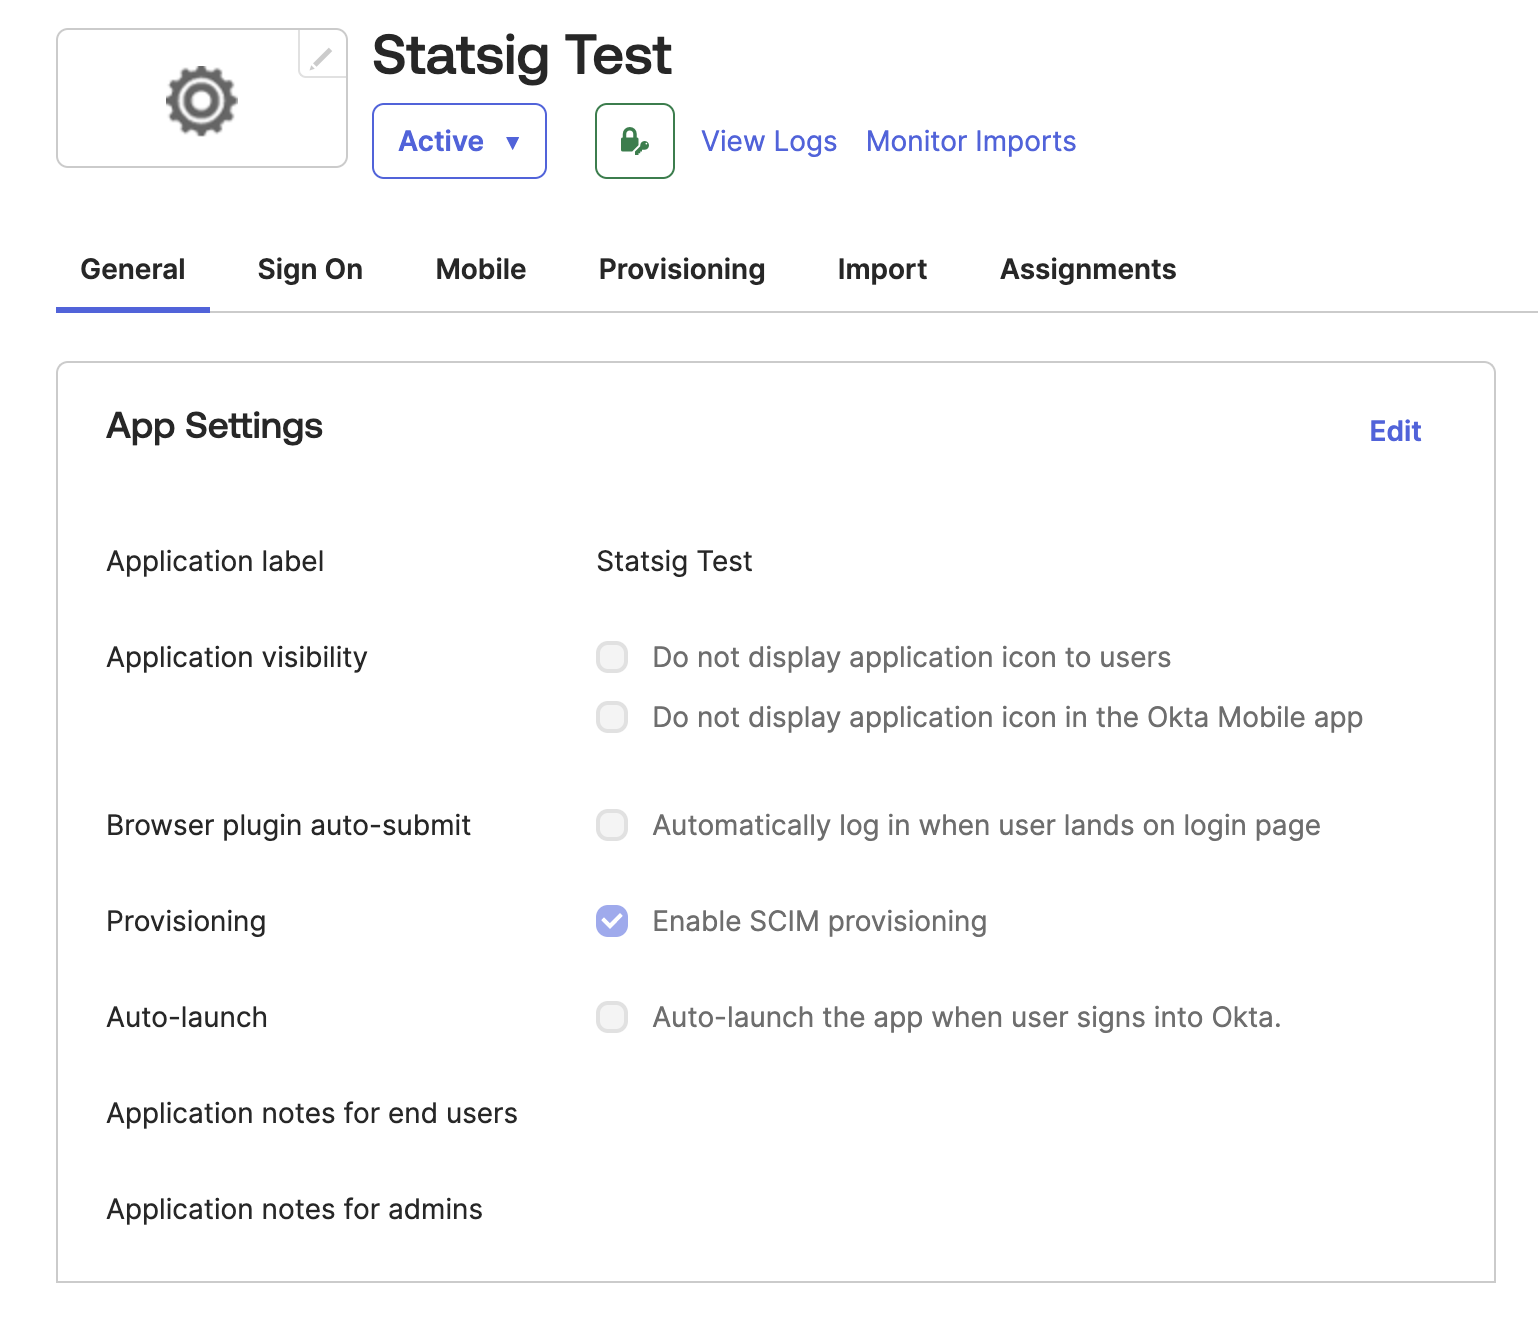
- After creating the integration, go to the "General" tab
- Click on "Edit" in the "Provisioning" section
- Enable "SCIM Provisioning"
Step 4: Configure SCIM settings
:::info
Import Groups requires an Okta flag SELECTIVE_APP_IMPORT_PLATFORM. If your organization has this flag enabled, select this option. If it doesn't, leave it unchecked.
:::
- Navigate to the
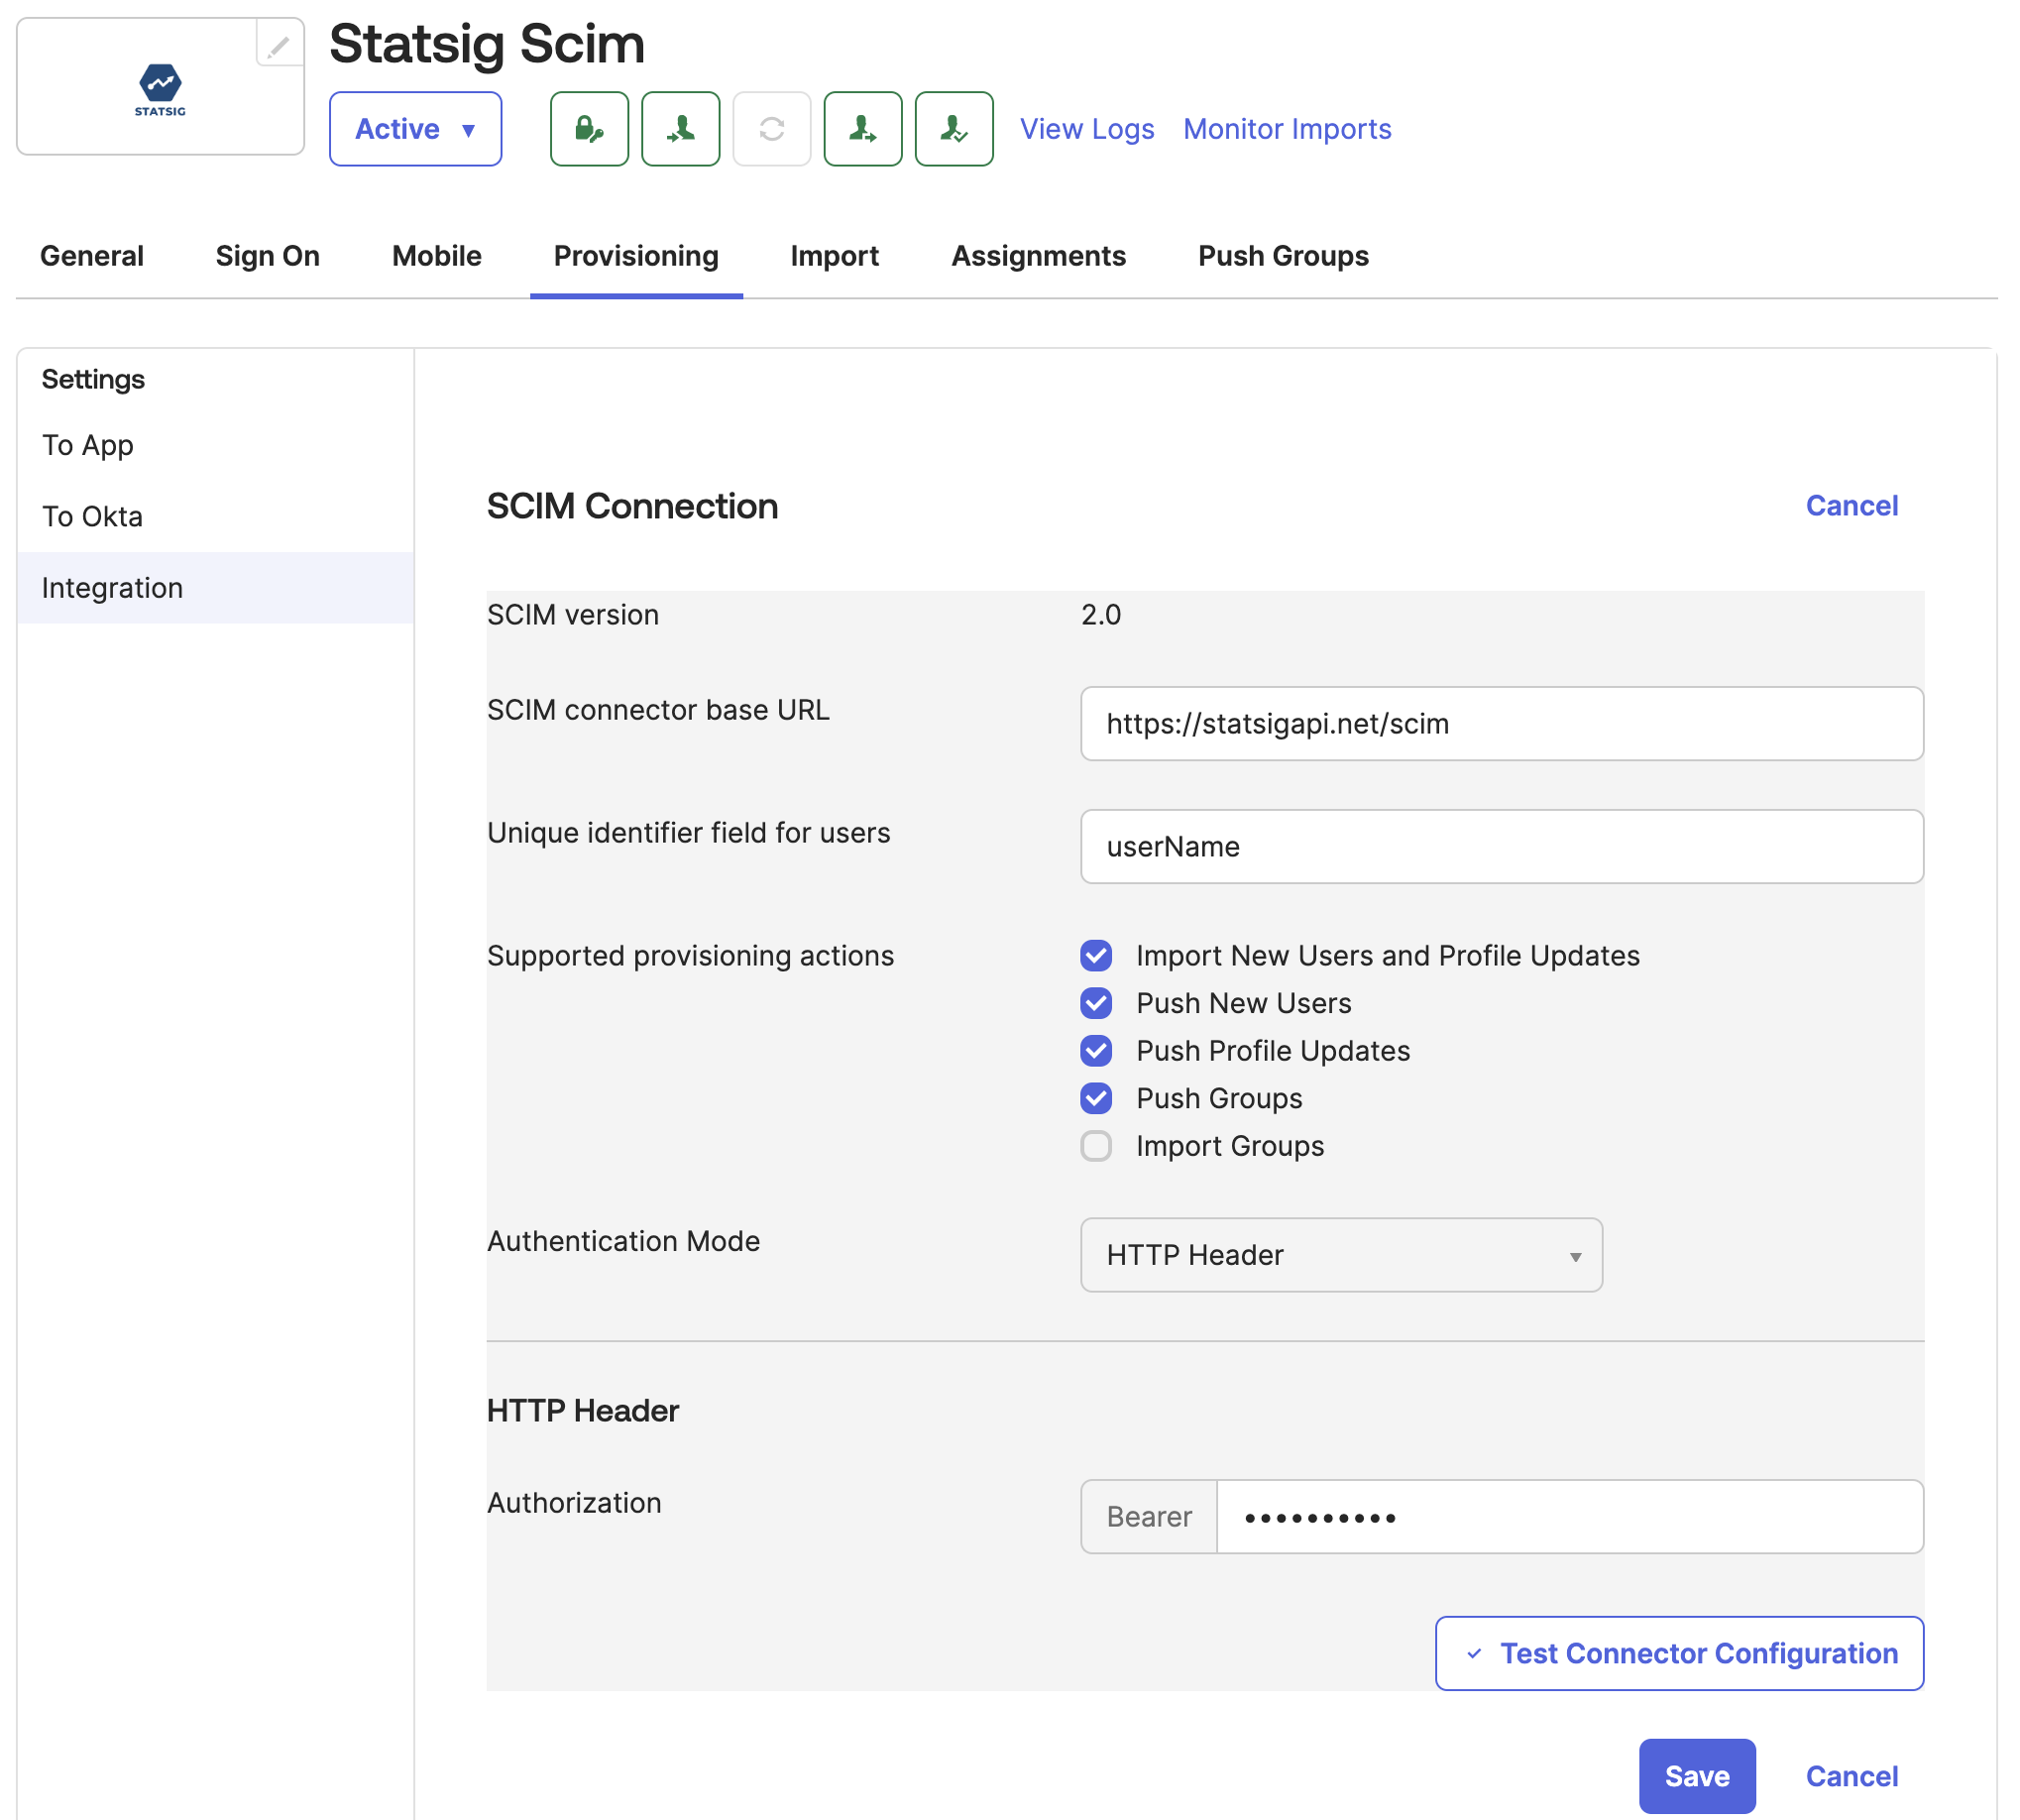
Provisioningtab - Set the SCIM connector base URL to: https://statsigapi.net/scim
- Set "Unique identifier field for users" to
userName - Enable
Import New Users and Profile UpdatePush New UsersPush Profile UpdatesPush GroupsImport Groups(Only if your organization has theSELECTIVE_APP_IMPORT_PLATFORMflag enabled; refer to note above)
- Set the authentication mode to "HTTP Header"
- For the authorization header, use the SCIM Bearer token your Org Admin generated in Statsig. Go to How to Obtain SCIM Auth Key for details.
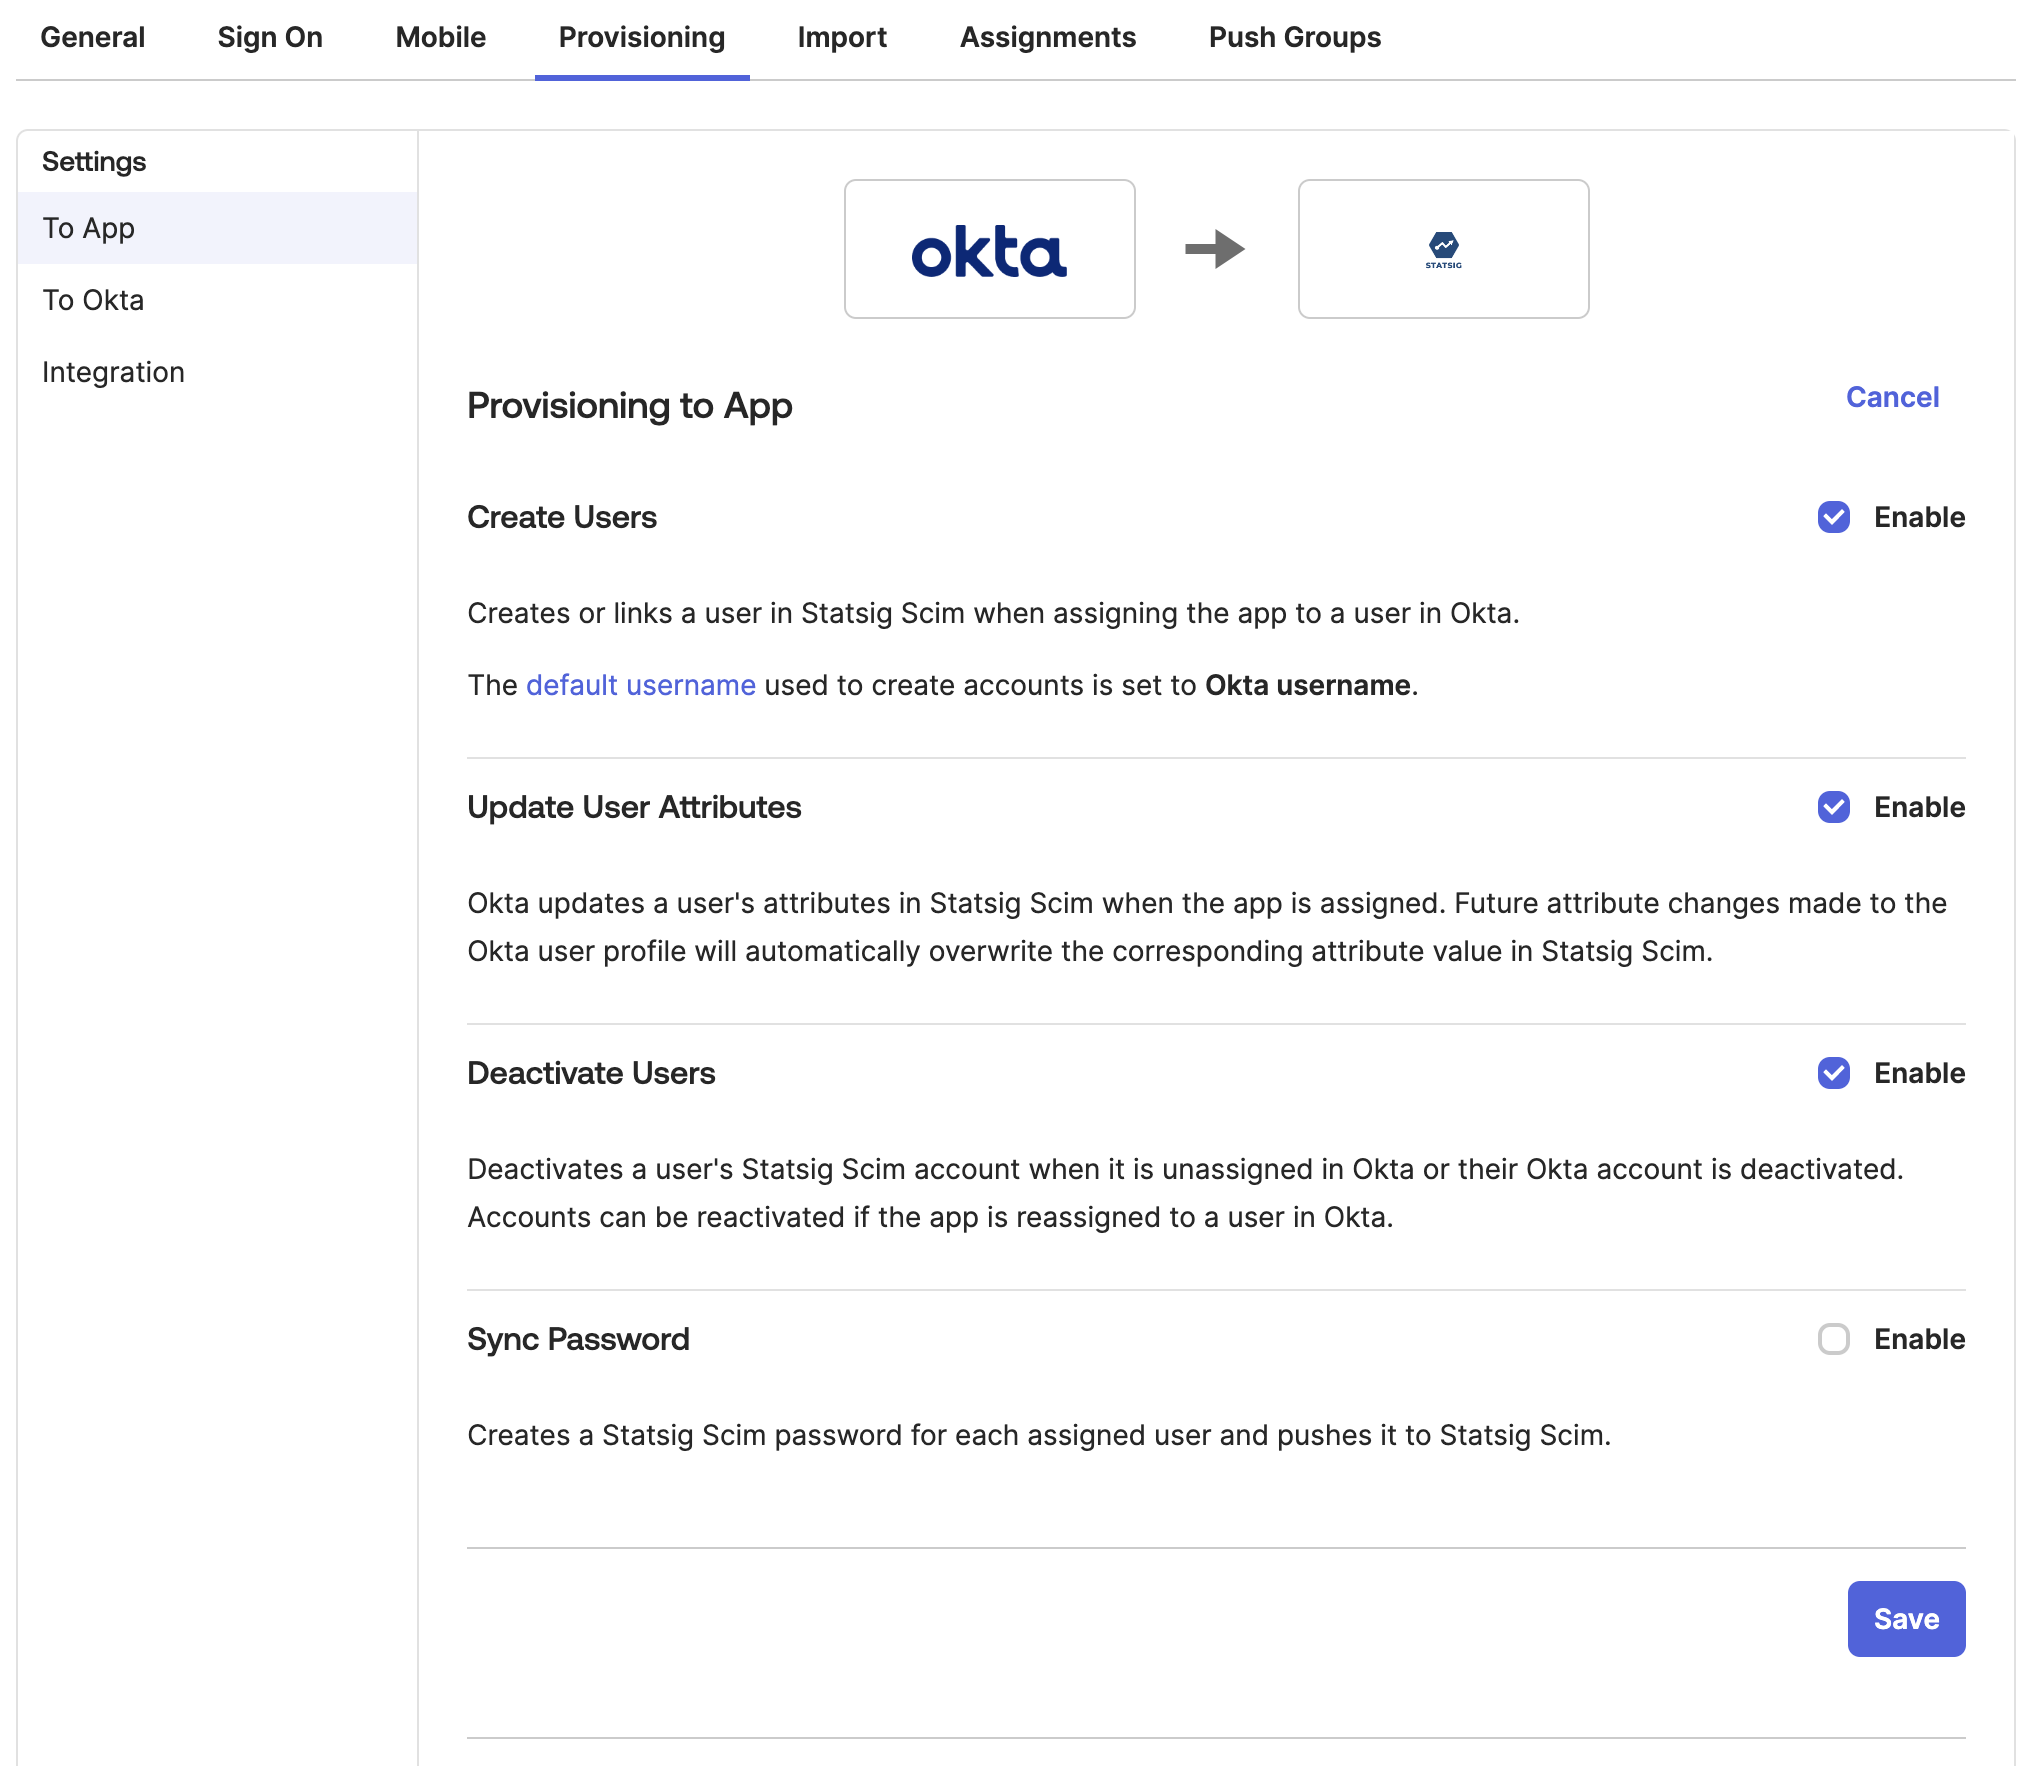
Step 5: Configure Okta to Statsig settings
- Enable "Create Users"
- Enable "Update User Attributes"
- Enable "Deactivate Users"
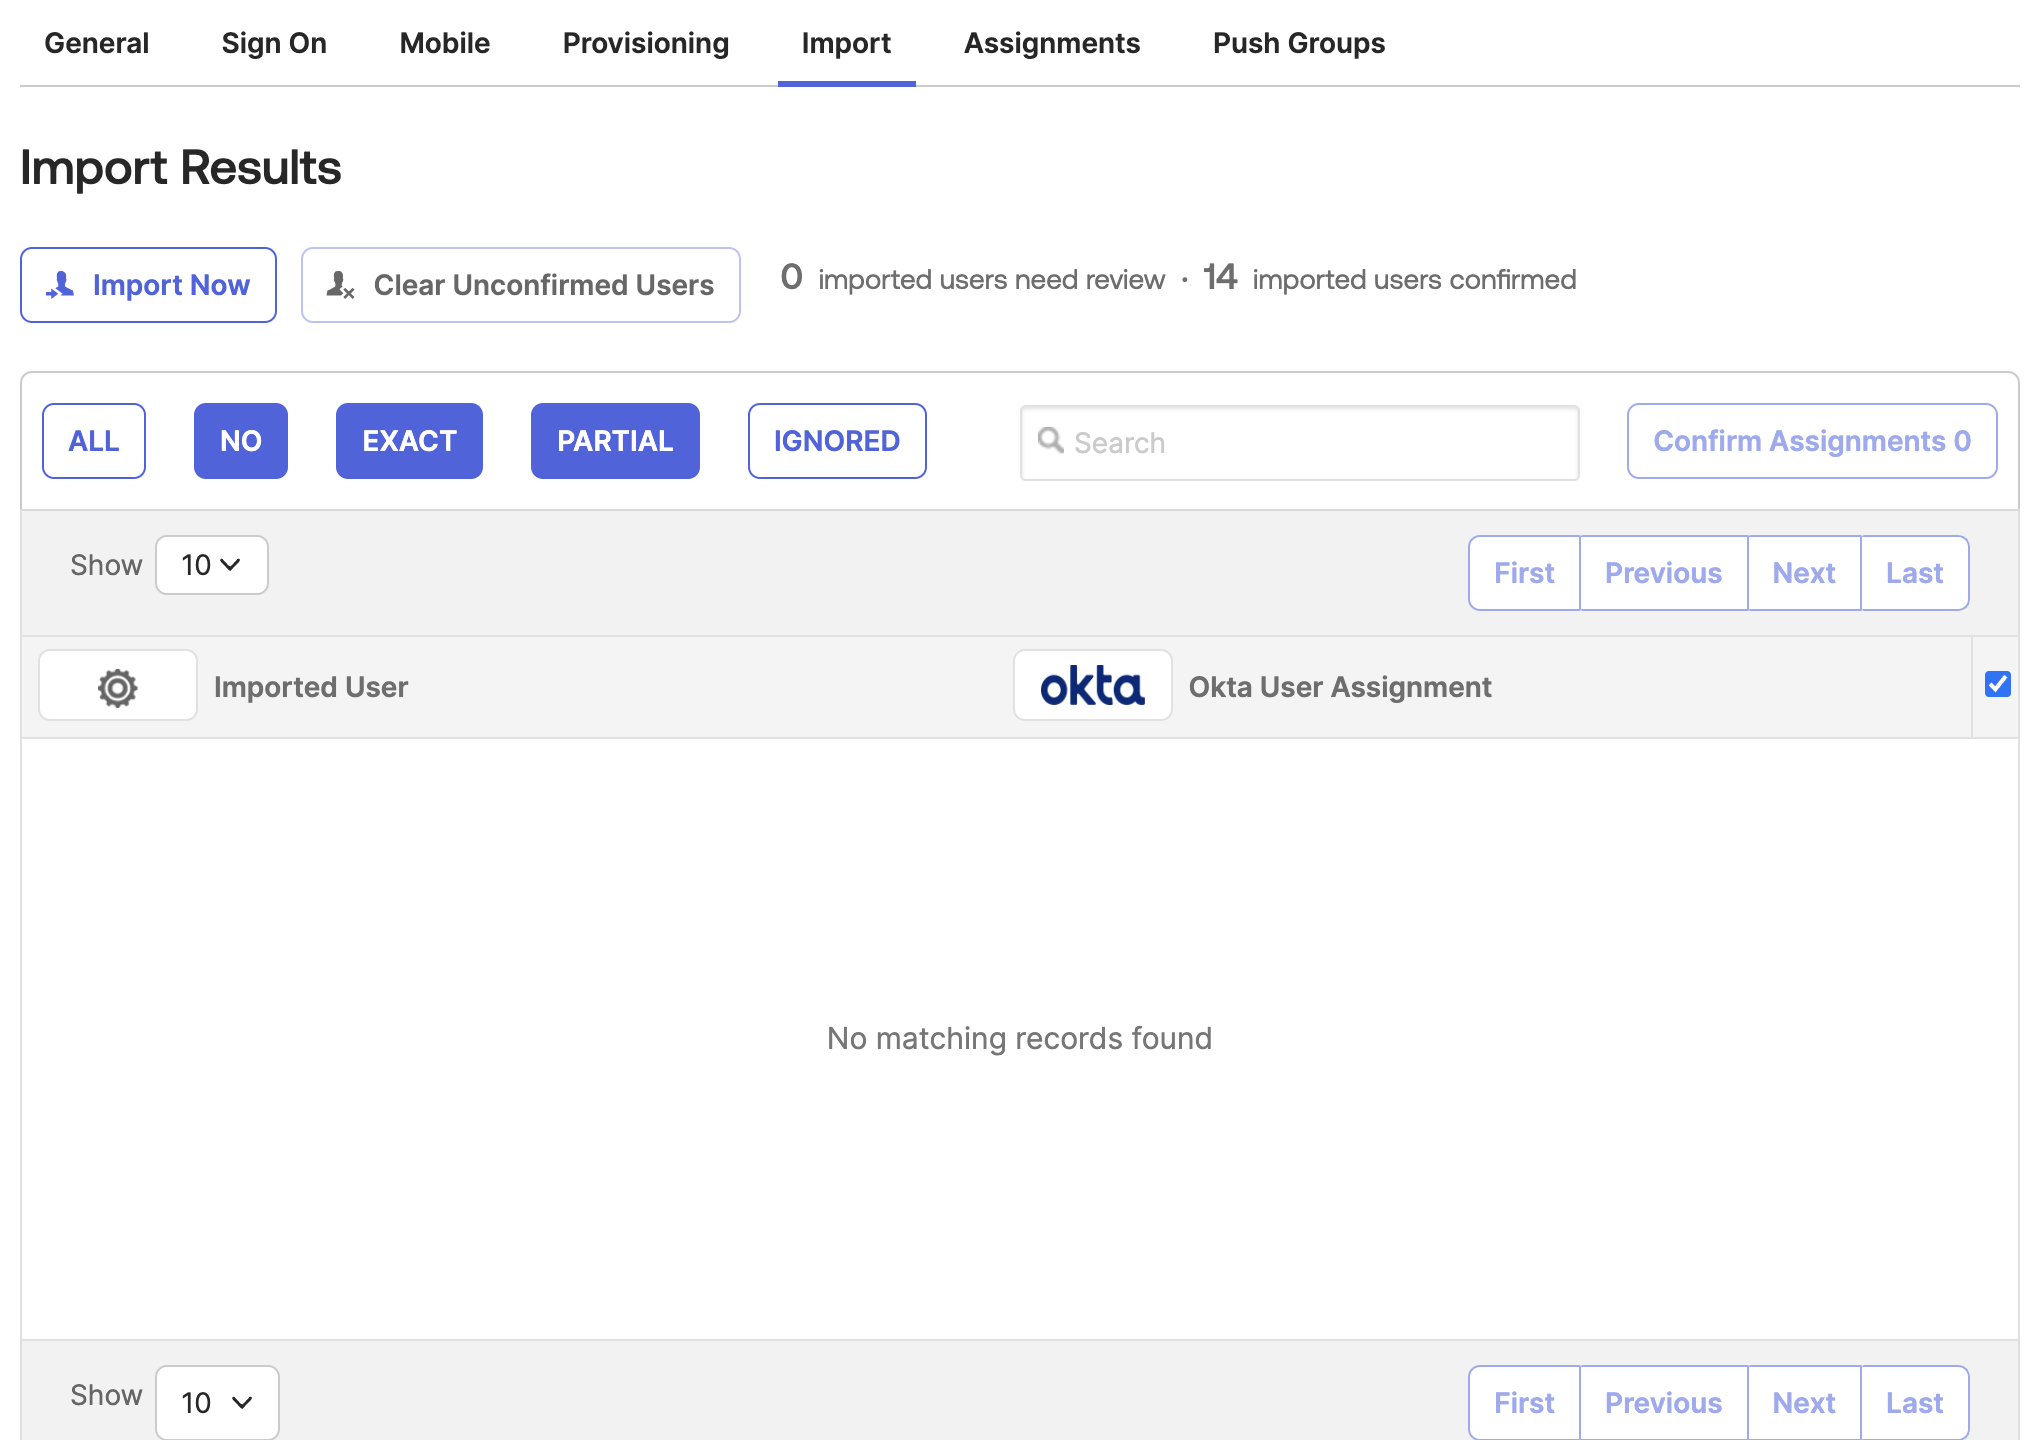
Step 6: Import existing Statsig users and groups
- In Okta, go to the Statsig app's "Import" tab
- Click "Import Now" to fetch existing Statsig users and groups
- Process the imported users as needed
Was this helpful?