For AI agents: a documentation index is available at /llms.txt. Append .md to any page URL for markdown, or send Accept: text/markdown.
SCIM User Provisioning
Overview of SCIM user and group provisioning in Statsig, supported identity providers, and how automated sync works for Enterprise customers.
How SCIM works
SCIM (System for Cross-domain Identity Management) is a standardized protocol that automates user provisioning and management across multiple platforms. By integrating SCIM with your preferred Identity Provider (IdP), such as Okta, you can manage user creation, updates, and de-provisioning within Statsig. Statsig offers an Okta SCIM integration.
How to obtain SCIM auth key
You must be a Statsig Organization Admin to enable SCIM. The SCIM key includes the scim prefix.
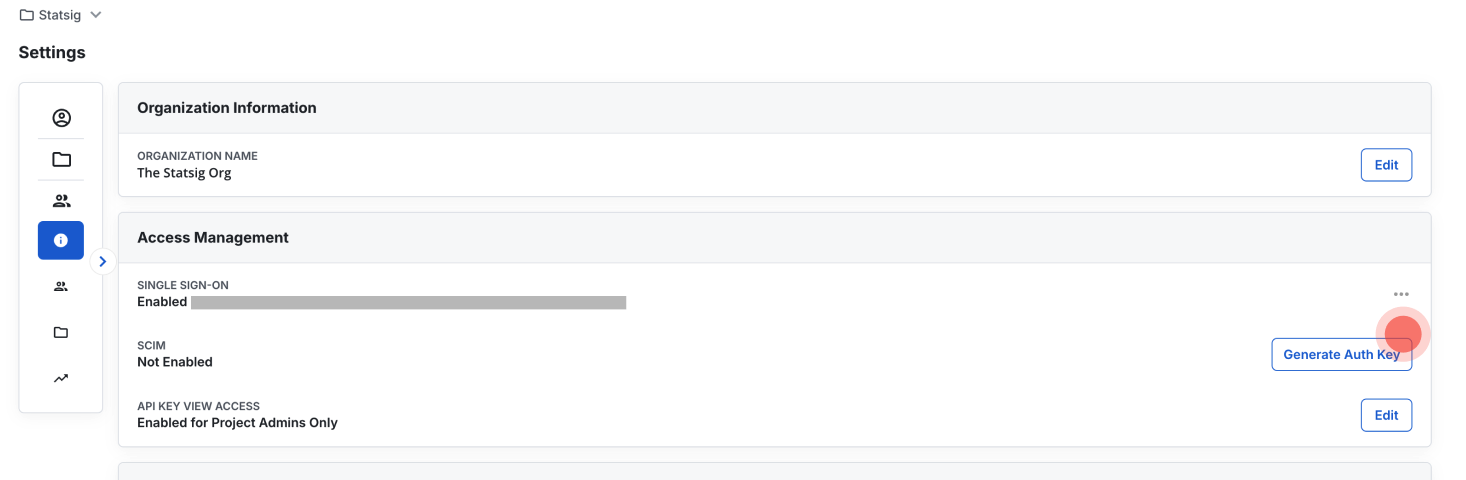
- Navigate to Organization Access Management: Go to Settings > Organization > Organization Info > Access Management.
- Generate a Key: If you haven't enabled SCIM yet, generate a new authentication key.
- Deactivate the Key: To disable the key, select Deactivate.
- Regenerate the Key: If you suspect the key has been compromised, you can regenerate a new one to replace it.
Current SCIM offering
Okta
- Push Users: Assigning users to the Statsig application in Okta automatically adds them as members of your organization in Statsig. Unassigning users deactivates them and wipes all roles/permissions.
- Import Users: Statsig can import users into Okta and either match them to existing Okta users, or create them as new Okta users.
- Import Groups: Import project/team roles as groups in Okta. You can't modify imported groups in Okta.
- Push Groups: Push groups to Statsig to update user project/team roles.
Manage SCIM group aliases
SCIM group aliases map an IdP group name that you can't change onto a Statsig project and role, so provisioning matches even when the group name doesn't follow the Statsig-<Project>-<Role> convention. For what aliases do and when to use them, go to SCIM Concepts.
Manage aliases from the same Access Management panel where you generate the SCIM key. The SCIM Group Aliases block appears below the SCIM key row when SCIM is enabled and you're an Organization Admin.
The setting for SCIM Group Aliases is enabled per org by Statsig. Please reach out to Statsig Support to have this enabled for your company.
View existing aliases
The alias table lists each alias name, its resolved target project, and its target role. A Stale badge marks any alias whose target no longer resolves, for example after you delete the target project. Delete or repoint stale aliases so provisioning stays predictable.
Add an alias
- Go to Settings > Organization > Organization Info > Access Management.
- In the SCIM Group Aliases block, click Add alias.
- Enter the external group name from your IdP, such as
PP_SSO_STATSIG_OSLO_ADMIN. Statsig rejects names that start with the reservedStatsig-prefix. - Select the target project.
- Select the target role. The picker includes custom roles.
- Click Save.
Repoint or delete an alias
To change an alias target, delete the alias and add it again with the new project or role. To remove an alias, click Delete and confirm. Statsig writes an audit-log entry for every alias you add or delete.
Alias changes take effect only after your IdP runs a full sync. Restart provisioning in your IdP (for example, Entra or Okta) after you add, repoint, or delete an alias, because IdPs link groups by ID and don't re-match existing groups on their own.
Was this helpful?