Create and manage layers
Create a layer in the Statsig console, check how much of it is still free, view its shared parameters, and override users into its experiments.
Create a layer in the Statsig console to make a group of experiments mutually exclusive. After you create it, use the Experiment Layers page to check its remaining allocation and shared parameters, and to override users into its experiments.
Create a layer
Create a layer in either of these places:
- The Layer field of the experiment creation dialog. Refer to Create an experiment.
- The Experiment Layers page. Go to Experimentation > Layers > Create.
Select the layer before the experiment starts. Statsig locks an experiment's layer when the experiment starts. You can't add a running experiment to a layer or move it to a different layer.
Check a layer's remaining allocation
Go to Experimentation > Layers to see your layers. The list shows each layer's experiment count and its Remaining Allocation, which is the share of the layer an experiment can still claim.
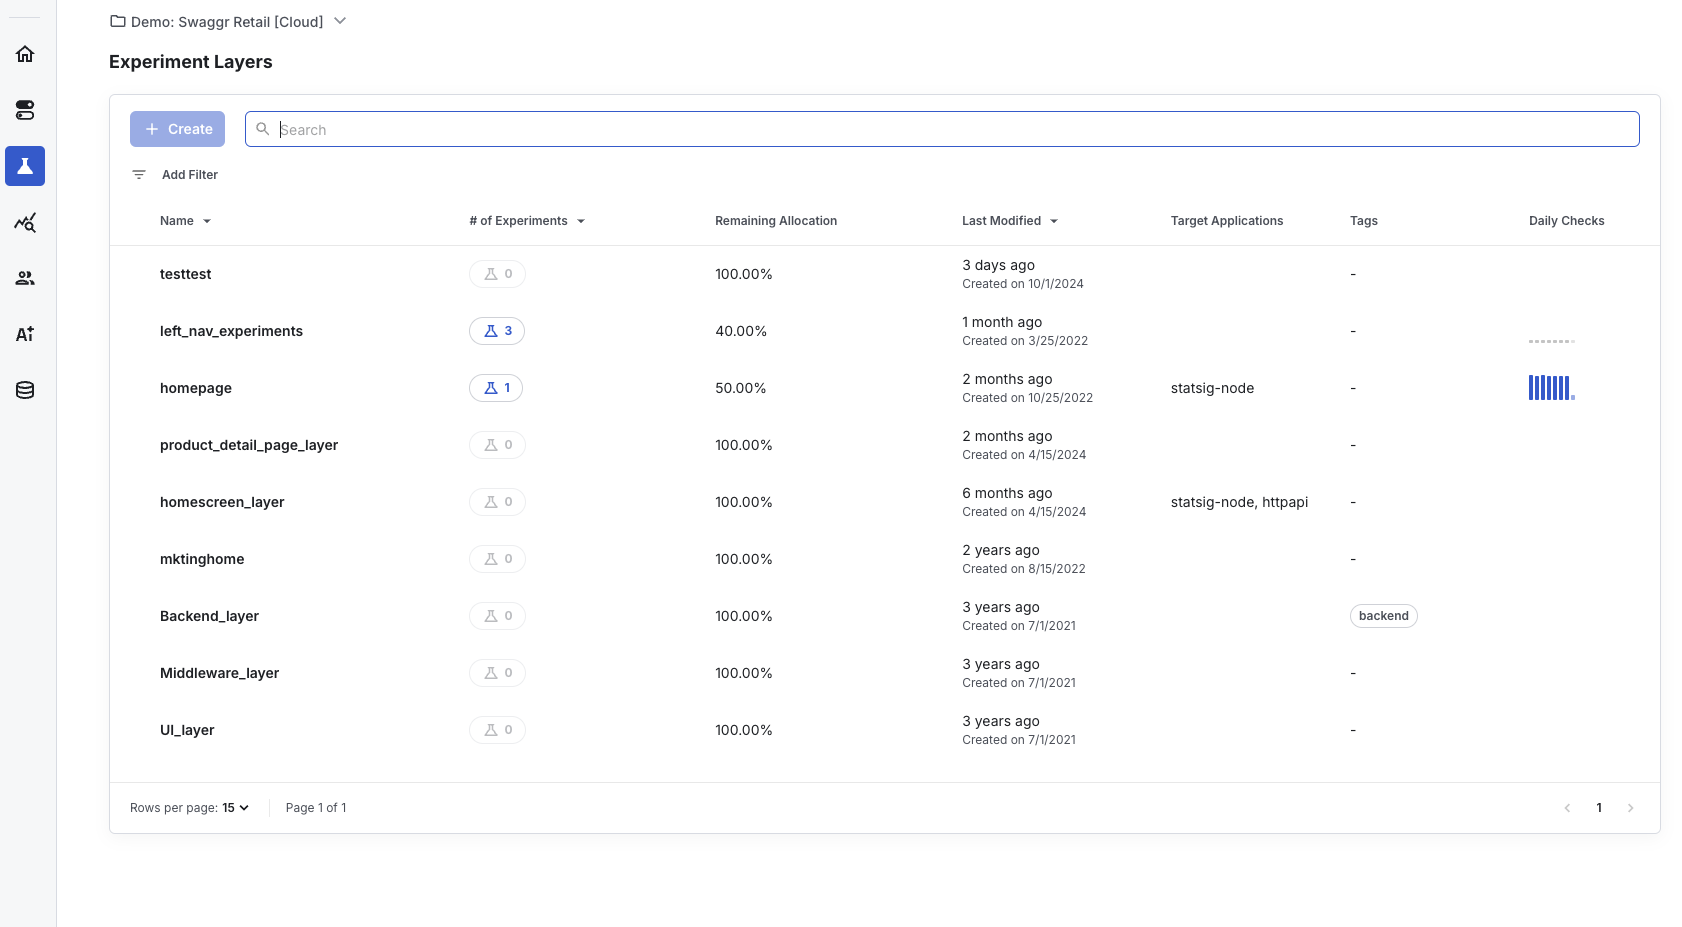
For what happens to users when you change an experiment's allocation in a layer, refer to How layer allocation works.
View a layer's shared parameters
Select a layer in the Experiment Layers list to open its details page. The details page shows the layer's shared parameters.
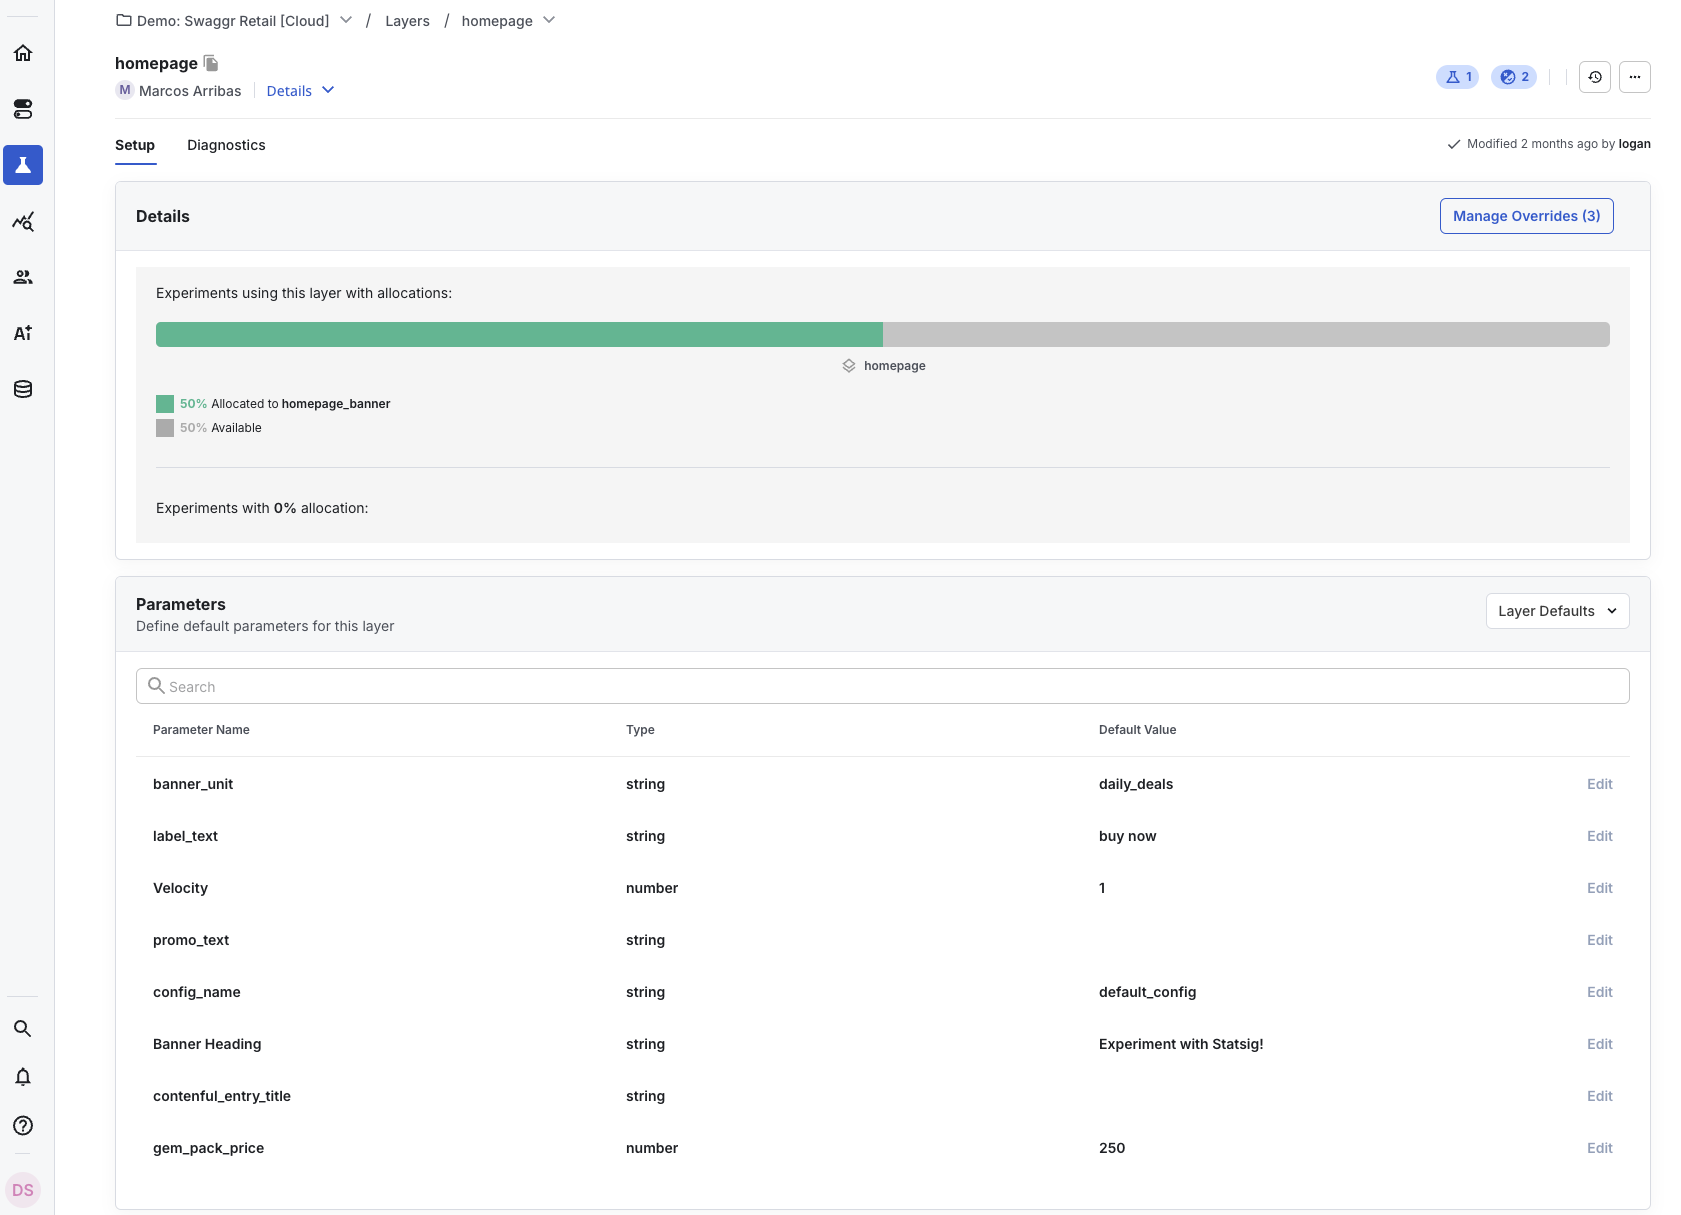
For how your code reads these parameters, refer to Use layer parameters in code.
Override a user into an experiment in a layer
To force a specific user into an experiment in a layer, add the override on the layer, not on the experiment. The experiments in a layer are mutually exclusive, so a layer-level override places the user in a single experiment in the layer. For how to add an override, refer to Experiment overrides.
Was this helpful?
For AI agents: a documentation index is available at /llms.txt. Append .md to any page URL for markdown, or send Accept: text/markdown.