Running A/B Tests
Run experiments on Azure OpenAI prompts, models, and parameters with Statsig, including variant configuration, exposure logging, and result analysis.
The Azure AI SDK lets you run A/B tests to measure the effectiveness of different models and parameters. Using Statsig's stats engine, you gain real-time insights into model performance across metrics such as cost, accuracy, and latency. You can experiment with configurations including model type, prompt settings, and response parameters, then make data-driven decisions to improve your application.
Example: Test GPT4o vs. GPT4o-mini
Step 1: Create configs
Create two dynamic configs, one named gpt-4o and another named gpt-4o-mini. In the Value section add the endpoint, key and other default parameters like this:
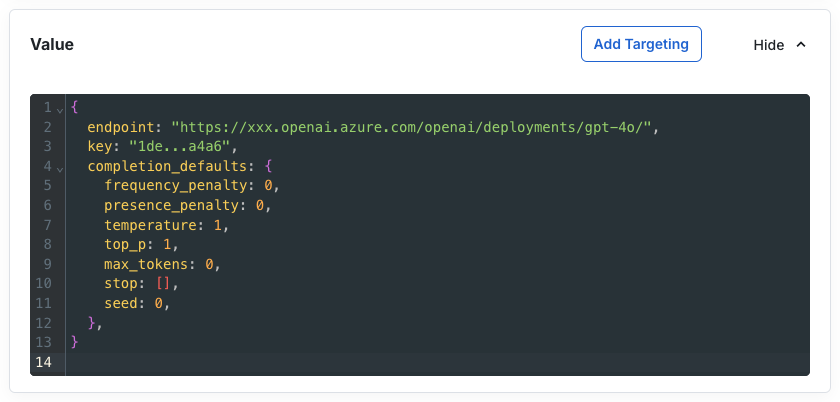
These serve as the base deployment configs for the tests and let you modify parameters dynamically after launch.
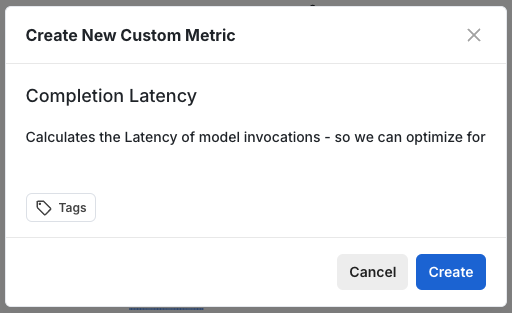
Step 2: Create some metrics to track
This example uses a latency metric to show how to create metrics in Statsig.
Navigate to the Metrics Catalog page at https://console.statsig.com/metrics/metrics_catalog and click Create.
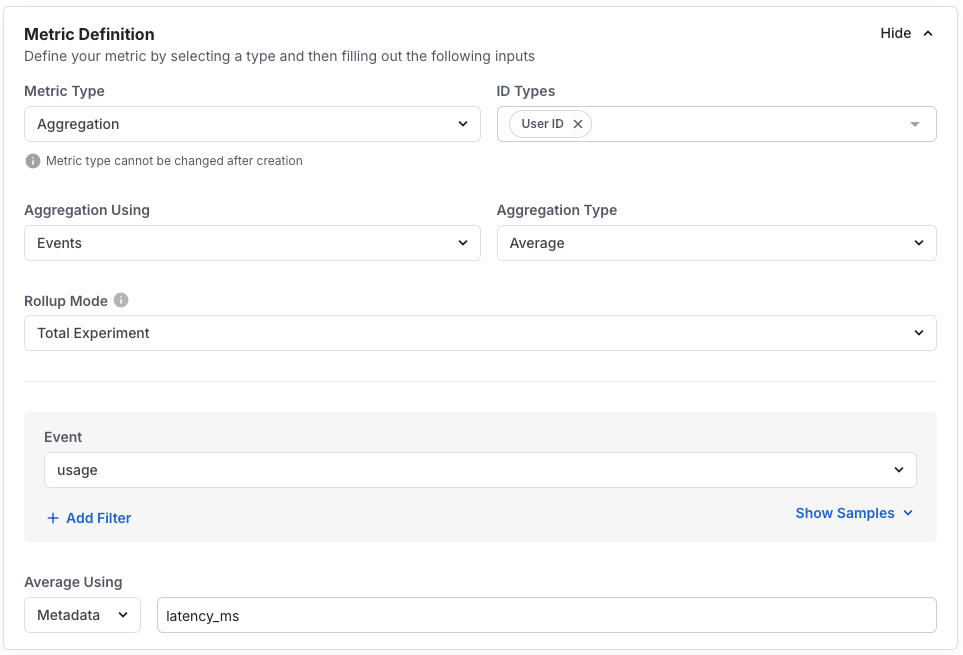
Now, in the Metric Definition section, choose:
| Property | Value |
|---|---|
| Metric Type: | Aggregation |
| ID Type: | User ID |
| Aggregation Using: | Events |
| Aggregation Type: | Average |
| Rollup Mode: | Total Experiment |
| Event: | usage |
| Average Using: | Metadata => latency_ms |
This creates a metric that averages latency across all usage events coming from chat completions.
Step 3: Create an experiment
Create a new experiment in the Statsig console at https://console.statsig.com/experiments.
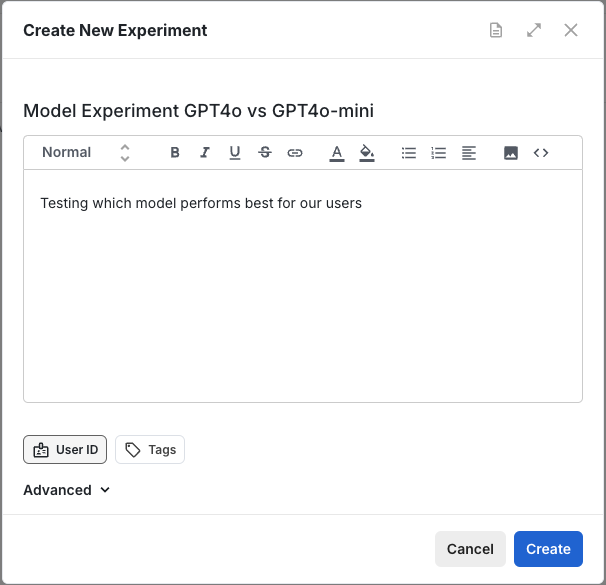
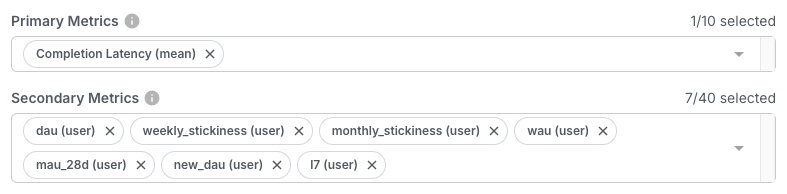
In the Setup page, add the metrics you created in Step #2 in the Primary Metrics field.
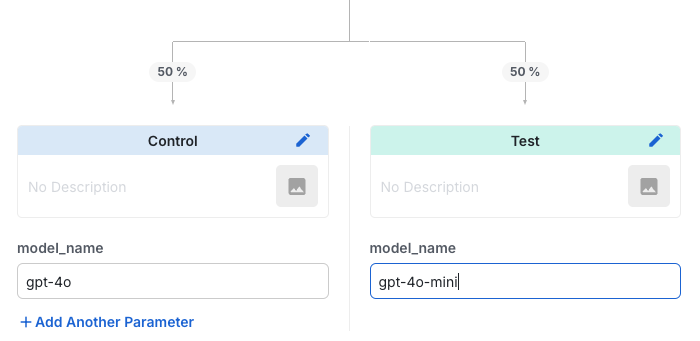
Step 4: Set up the variations
Create the control and test variants for the experiment. For this example, split them 50/50.
In the Groups and Parameters section, click Add Parameter and name the parameter model_name, with String type.

Add the two configs created in Step #1, one each to Control and Test parameters like this:
Step 5: Save and start the experiment
Select Save at the bottom of the page. A Start button appears at the top of the experiment page. Select it to begin the allocation process.
Step 6: Write code
The code below:
- Fetches the experiment configuration from the server for a given user. Pass the userID from your client application or from your database. The example generates a random one for testing.
- Gets the config name from the experiment variant (control or test).
- Creates a model client using the fetched config.
- Uses the model client to complete text.
async function testExperiments() {
  await AzureAI.initialize(statsigServerKey);

  const experiment = Statsig.getExperimentSync(
    { userID: Math.random().toString() }, // use a valid userID here
    "model_experiment_gpt4o_vs_gpt4o-mini",
  );
  const configName = experiment.get("model_name", "gpt-4o");
  console.log(`Using model: ${configName}`);

  const modelClient = AzureAI.getModelClient(configName);
  const result = await modelClient.complete([{
    role: "user",
    content: "Recite the first 10 digits of pi."
  }]);
  result.choices.forEach((choice, i) => {
    console.log(choice.message.content);
  });

  await AzureAI.shutdown();
}
Step 7: Run the experiment and verify results
Run this experiment for several days to measure the latency profiles of gpt-4o compared with gpt-4o-mini in the Statsig console. Choose whichever model suits your needs.
This is a simple experiment to test models against each other. You can also adjust other parameters such as temperature, frequency_penalty, and max_tokens by modifying the config, without updating code.
Was this helpful?