Build your first Feature
Usually referred to online as feature flags, the Statsig UI and SDKs call them feature gates.
Now that you have created your Statsig account, let's get started on building and shipping your first feature using Statsig.
Step 1 - Create a new Feature Flag (Feature Gate)
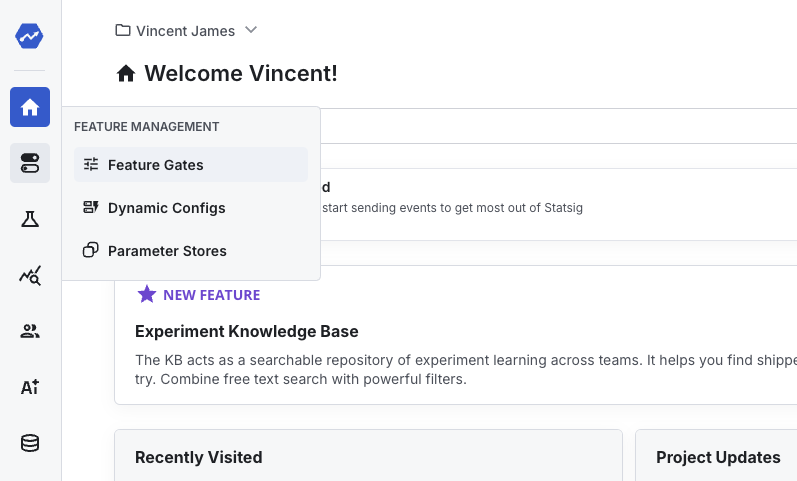
Start by creating a new Feature Gate. Pick a name related to the product feature you're building. As an example, if you are building a new mobile registration UI flow, "Mobile Registration" is a good name. If you want, you can copy the name and description below:
Mobile Registration
It's also a good practice to write in a good description that is easy for people other than you to understand what this feature is about.
This feature enables a new mobile optimized registration flow which
we will be launching on iOS and Android as part of the V2 refresh.
Once you create a new Feature Gate, you will see a screen like this:
The Feature Gate is enabled by default (meaning calls to this gate will evaluate the rules and conditions you specify next). You can disable gates by clicking on the menu button, and selecting "Disable" (this stops the gate from evaluating rules and conditions and instead just returns false
). Let's leave it on for now.
Step 2 - Create a new Rule
By default, your new Feature Gate will not pass any rule and hence will be returning false
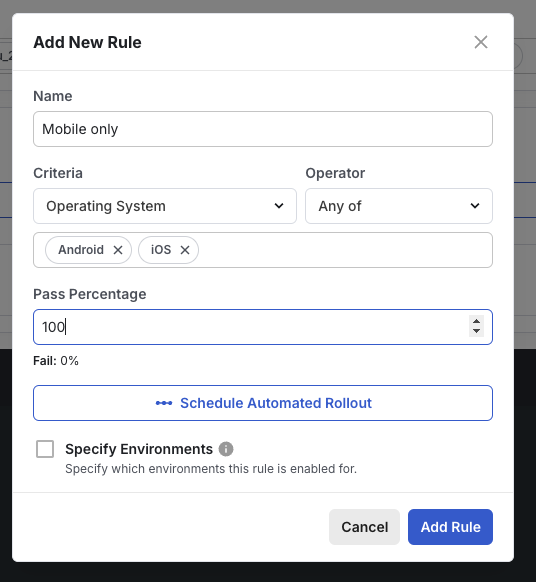
for all checks on the client side. In order to turn on this feature, you will need to target this feature to a specific set of folks. You do that by clicking on Add New Rule
You can choose from a list of targeting criteria like User ID, Country, Browser, Operating System, etc.
Let's go ahead and choose Operating System is Any of and pick Android and iOS for our Mobile only targeting.
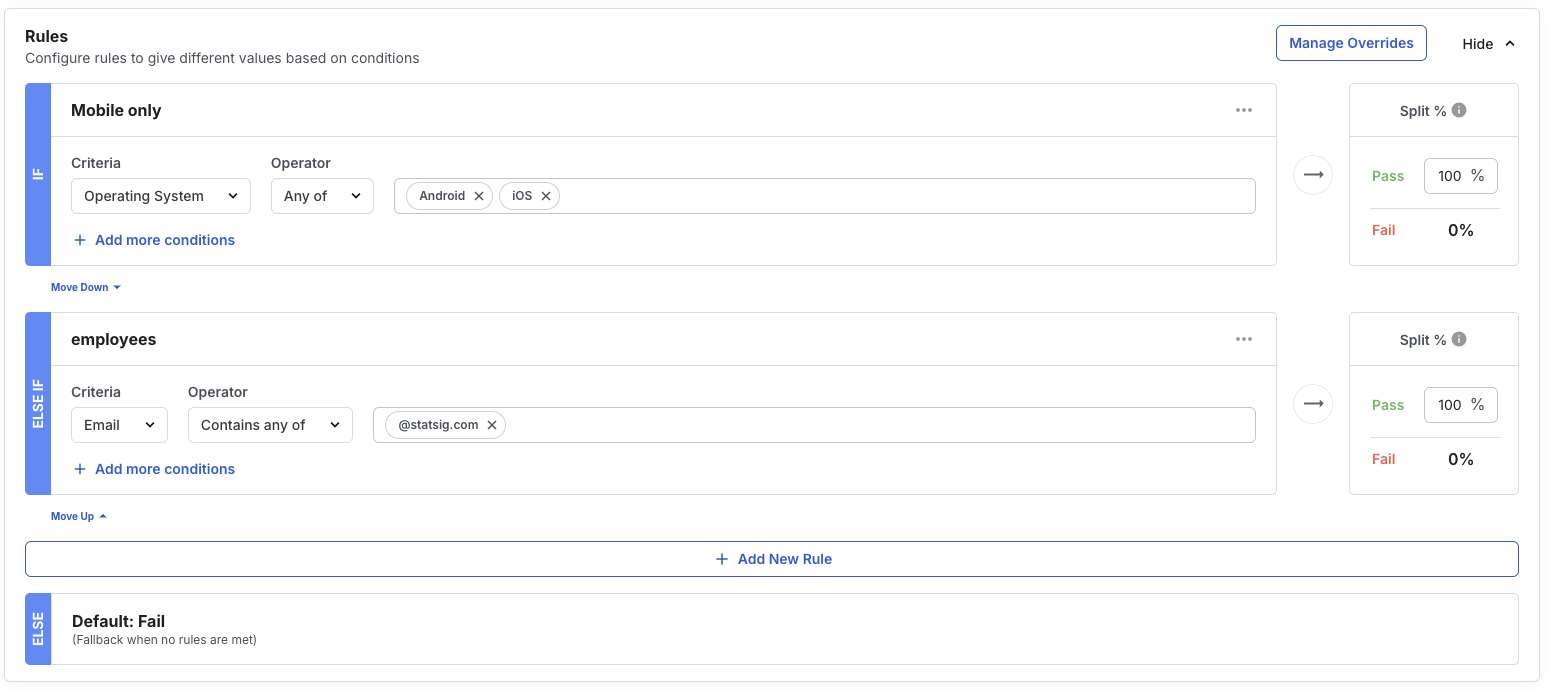
Now hit the Add Rule button and you should now see the new rule in the Feature Gate details page.
Go ahead and hit Save Changes on the top right to commit these changes. New rules and conditions are staged at first, and the changes are only commited when you finalize them by clicking "Save Changes"
You can now test this feature gate by configuring the User object in the "Test Gate" section.
Step 3 - Adding additional rules
Let's add one more rule to our Feature Gate, one that allows us to test the new feature - say, for dogfooding purposes.
This time, let's pick Email Contains any of and choose a domain. Like this:
Hit Add Rule and don't forget to Save Changes.
Step 4 - Create a new Client API key
Navigate to the API Keys section of the Statsig console (⚙️ > API Keys) or visit the API Keys section via console.statsig.com/api_keys. Here you would see different types of API keys you can generate.
Server Secret Keys are used only for server side integrations. These keys are secrets that you want to safe-guard and that means not using it on clients.
Client API Keys are used in product apps or websites to access Statsig features. It's okay to embed these keys in apps or website.
Console API Keys are used to interact with the /console API. These keys allow you to read and configure your gates/configs without using the console.statsig.com website. These keys should be kept secret and not included any public repositories or client code.
The main differences between client and server keys are that client keys are only able to fetch feature gates and experiments with hashed names (so your unreleased features won't be leaked), and client keys don't have permission to call into certain server SDK only endpoints and CRUD APIs.
For the purposes of this exercise, let's go ahead and create a new Client SDK Key.
Copy this newly created SDK key. We're going to use this in the next step.
Step 5 - Using your new Gate via the Statsig SDK
Now that we have configured this feature gate, let's go ahead and implement the feature behind this feature gate. For this exercise, let's pick a website that uses our JS SDK.
Statsig supports many different SDKs. Please checkout Getting Started for the full list of Client side SDKs
The statsig-js sdk is available from jsdelivr, an open source CDN. So let's open the Console Window of a new Chrome browser window for the next set of steps.
Use this link https://cdn.jsdelivr.net/npm/statsig-js/build/statsig-prod-web-sdk.min.js to get you the latest SDK version that's available.
Copy and paste the following code in your console:
var scrpt = document.createElement("script");
scrpt.src =
"https://cdn.jsdelivr.net/npm/statsig-js/build/statsig-prod-web-sdk.min.js";
document.getElementsByTagName("head")[0].appendChild(scrpt);
Step 6 - Check gates using the SDK
Copy and paste the following code in your console:
await statsig.initialize("YOUR_SDK_KEY", {});
Now that we have initialized Statsig, we can go ahead and make a call to our newly created Feature Gate. Copy and paste the following code in the console.
statsig.checkGate("mobile_registration");
You should get a response 'false' back - we didnt initialize from a mobile client, nor with an email containing @statsig.com
.
This is because we are not running this code on iOS or Android. And the way we configured our Feature Gate, the feature is only available on mobile.
Step 7 - Change the Environment to Mobile
Chrome DevTools allows us to change our Device type to mobile. Let's use that feature to simulate the request coming from a mobile device. First, go ahead and toggle the Mobile Device toolbar to ON by clicking on this icon at the top left corner:
Since the environment has changed, we need to call updateUser on Statsig. This will reevaluate the Feature Gates against the new environment. Copy and paste the following code in the console.
await statsig.updateUser({});
Now, let's rerun the gate check again.
statsig.checkGate("mobile_registration");
This time, you should see true
, meaning that this feature is now available on this 'mobile' device!
Step 7 - Let's try a different check
Let's toggle the mobile device to off, so we're now back to Desktop device. This time let's try a different check - one that uses the user email as the condition. When we update the user this time, we will prodive an employee email address.
Type the following code in your console:
await statsig.updateUser({ email: "vijaye@statsig.com" });
And let's try the same checkGate once more
statsig.checkGate("mobile_registration");
This time, you should get back a true
indicating that this feature is available for this user.
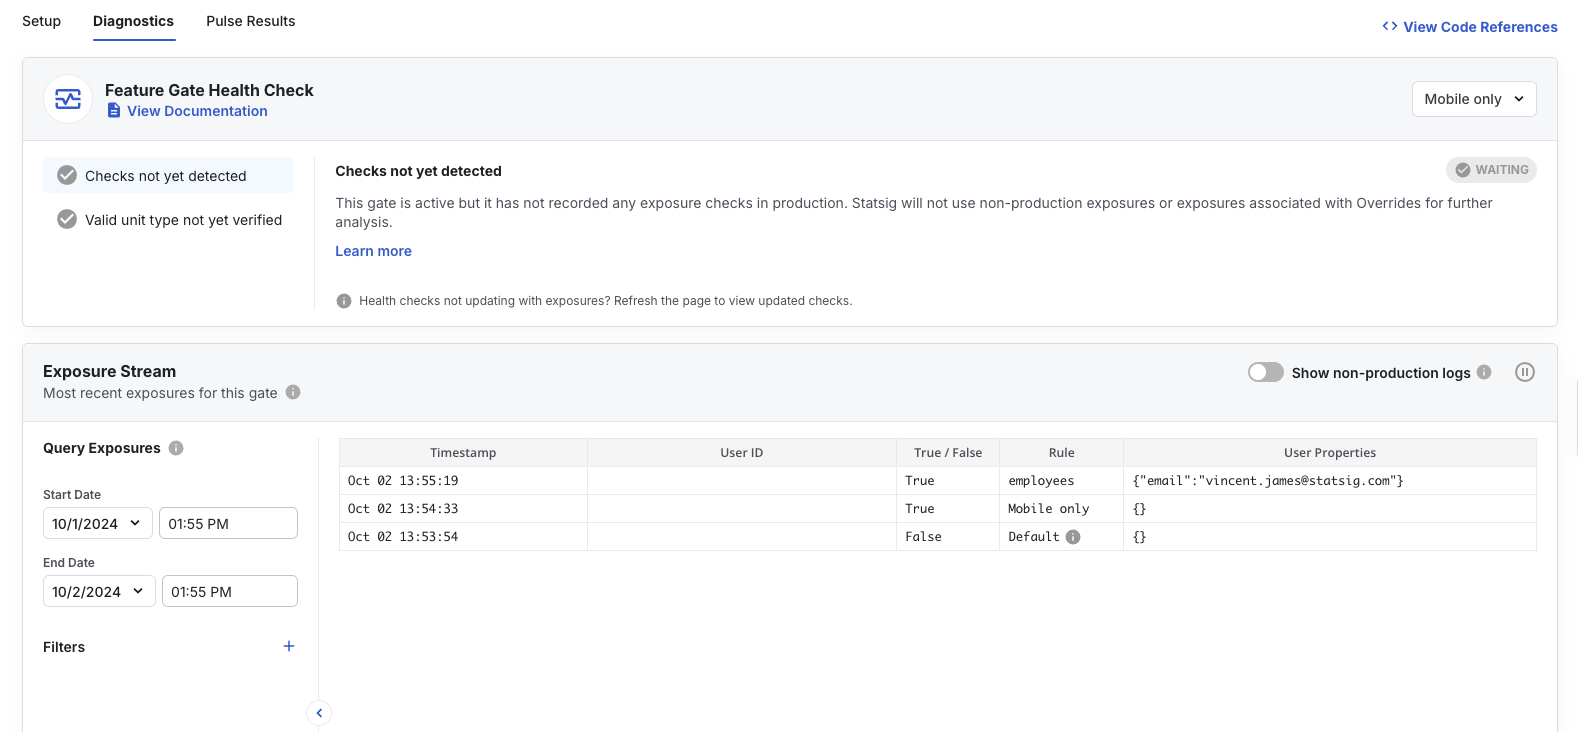
If you're ever wondering why you are getting a certain value, you can use the "Diagnostics" tab on your feature gate. This will show checks in near real time, and evaluation results, along with the rule that was evaluated, or reason you got the value.
Scroll to the bottom of the "Diagnostics" tab to see the "Exposure Stream". For our three checks we just made, we should see a fail, a Pass on the Mobile OS rule, and then a Pass on the employee rule:
Step 8 - How to use these gates in production
The pseudocode for feature gates would look something like this:
if (statsig.checkGate("mobile_registration")) {
// Show mobile registration UI
show(mobileRegistrationPage);
} else {
// Use the default path
show(oldRegistrationPage);
}