Okta SCIM Provisioning
This guide outlines the process for setting up SCIM (System for Cross-domain Identity Management) integration between Statsig and Okta. This integration allows for automated user provisioning and management.
Prerequisites
- An Okta account with admin access
- A SCIM Key from the Statsig Console (requires Statsig Org Admin rights)
Integration Notes
- User email management is not enabled on SCIM yet.
- When a user is removed from Statsig, they will be automatically unassigned in Okta. Conversely, if a user is unassigned or deactivated in Okta, they will be removed from the Statsig Organization.
- Creation of Statsig Projects and Roles is not supported via SCIM.
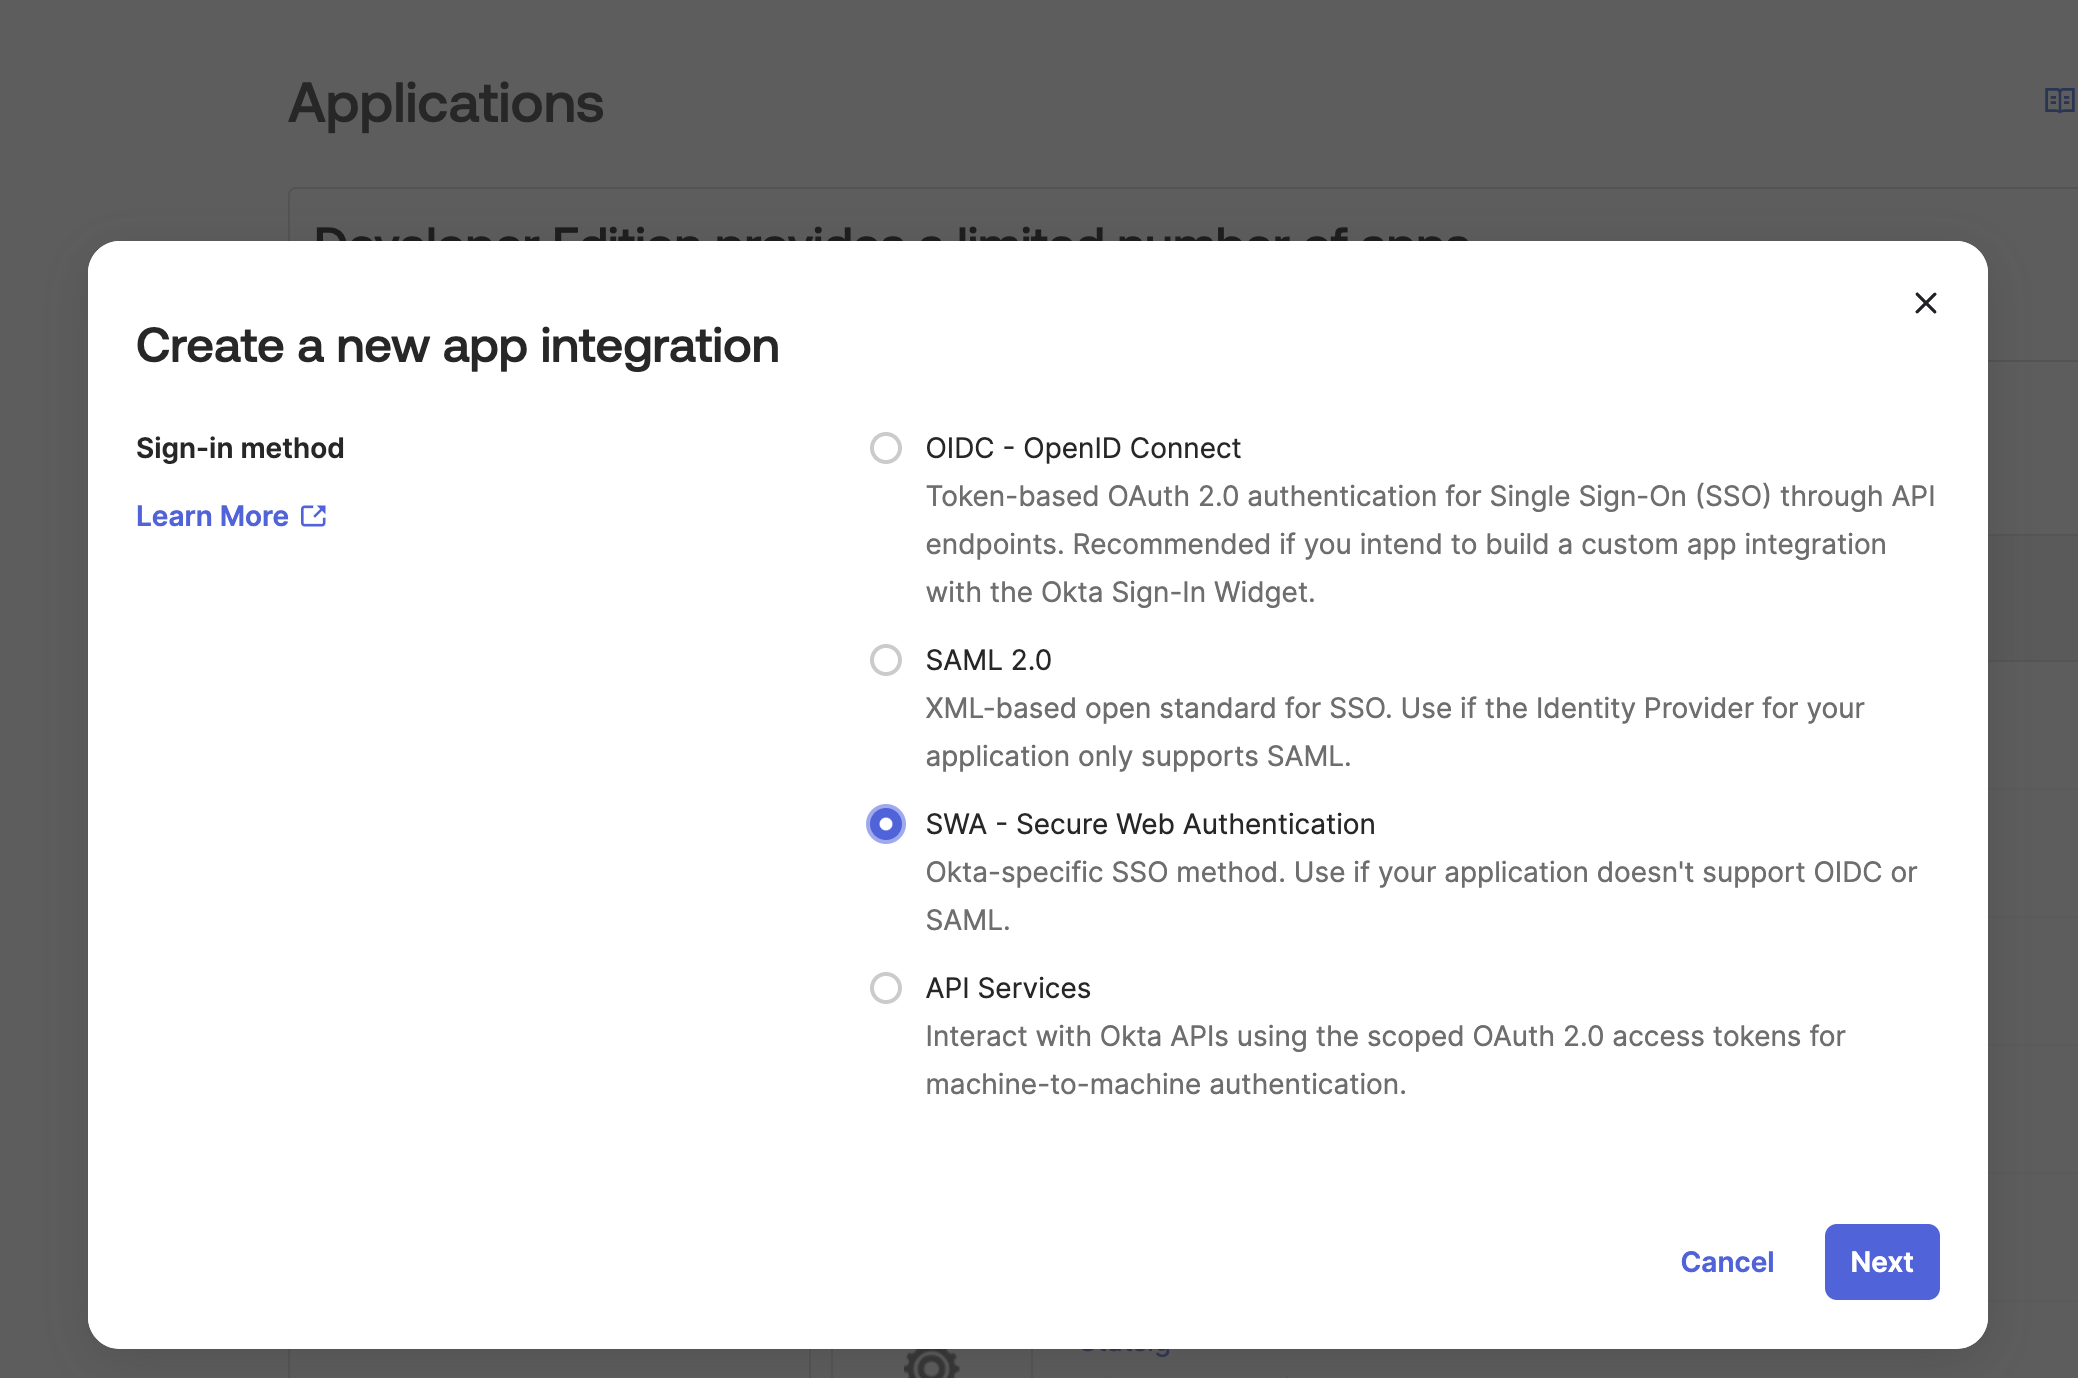
Step 1: Create a New App Integration in Okta
- Log in to your Okta admin console
- Navigate to Applications > Applications > Create App Integration
- Select "SWA - Secure Web Authentication"
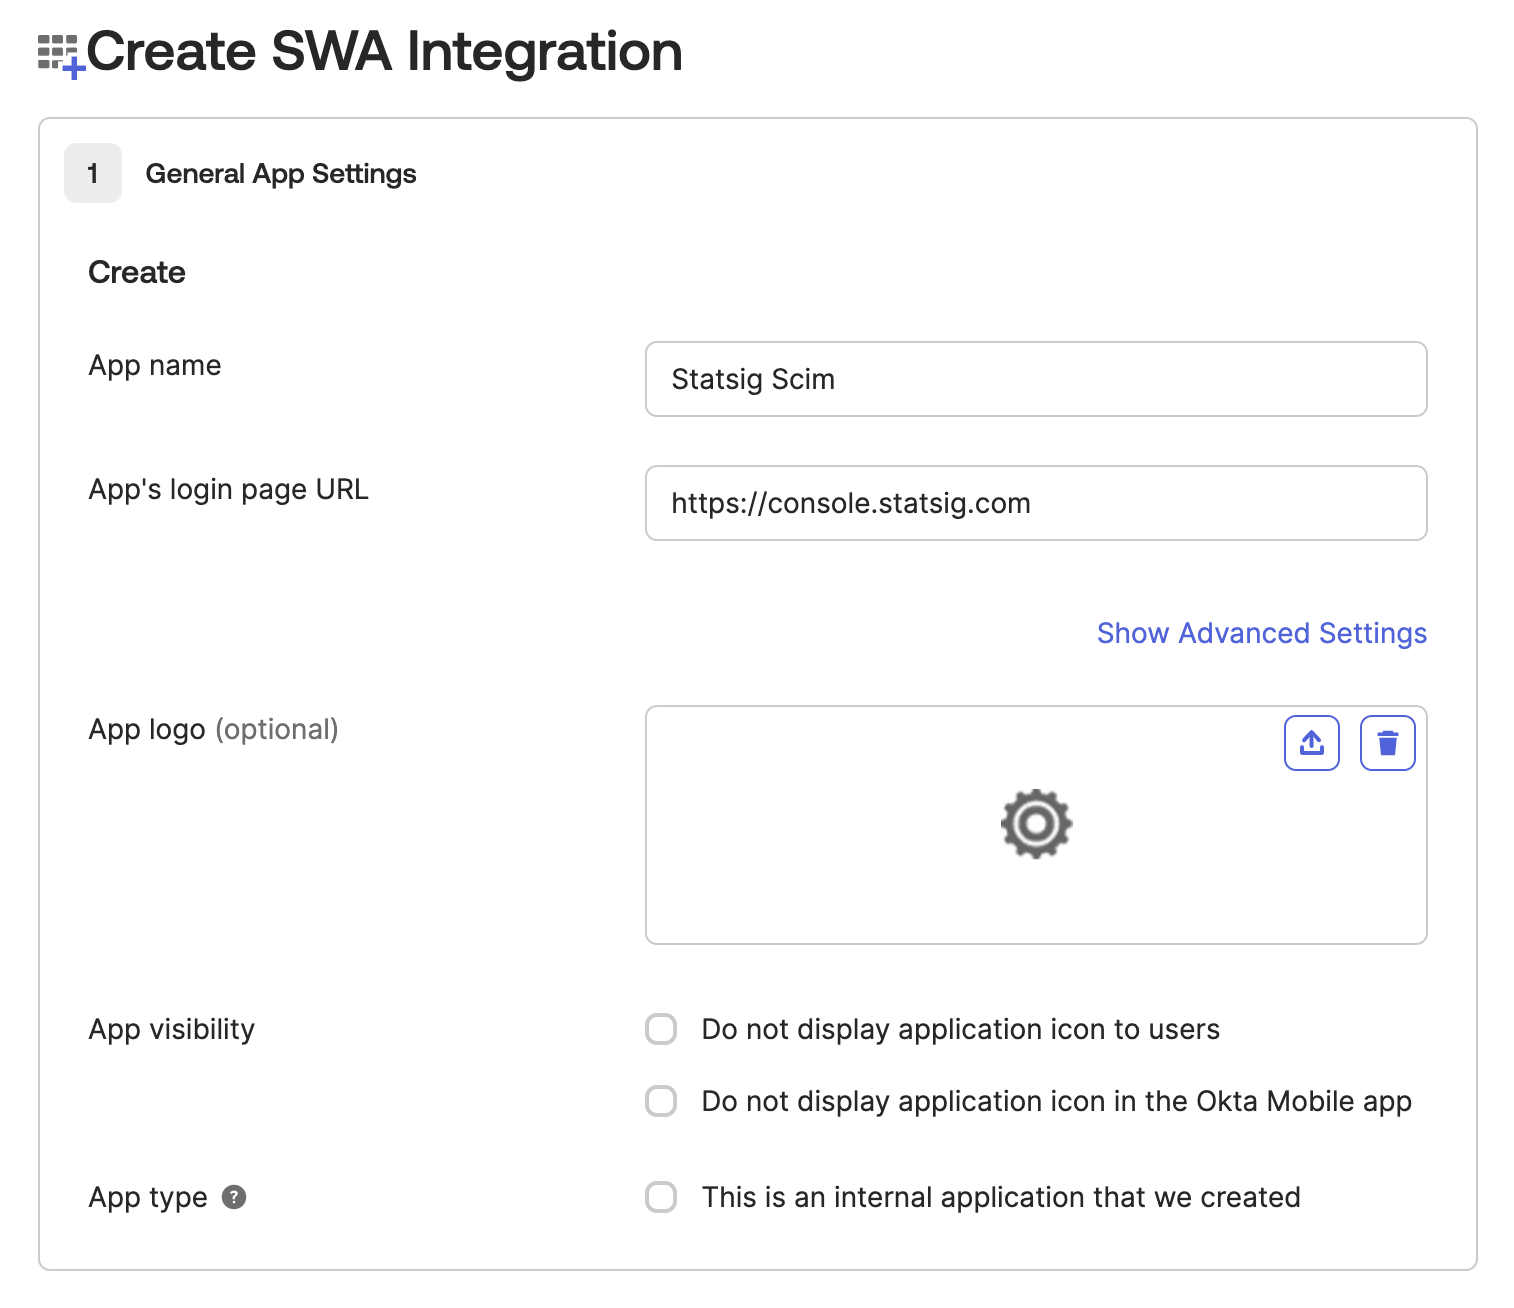
Step 2: Configure App Settings
- Set the App name to "Statsig SCIM"
- Enter a placeholder URL for the App Login Page (this is a required field but not used for SCIM). Ex:
https://console.statsig.com/
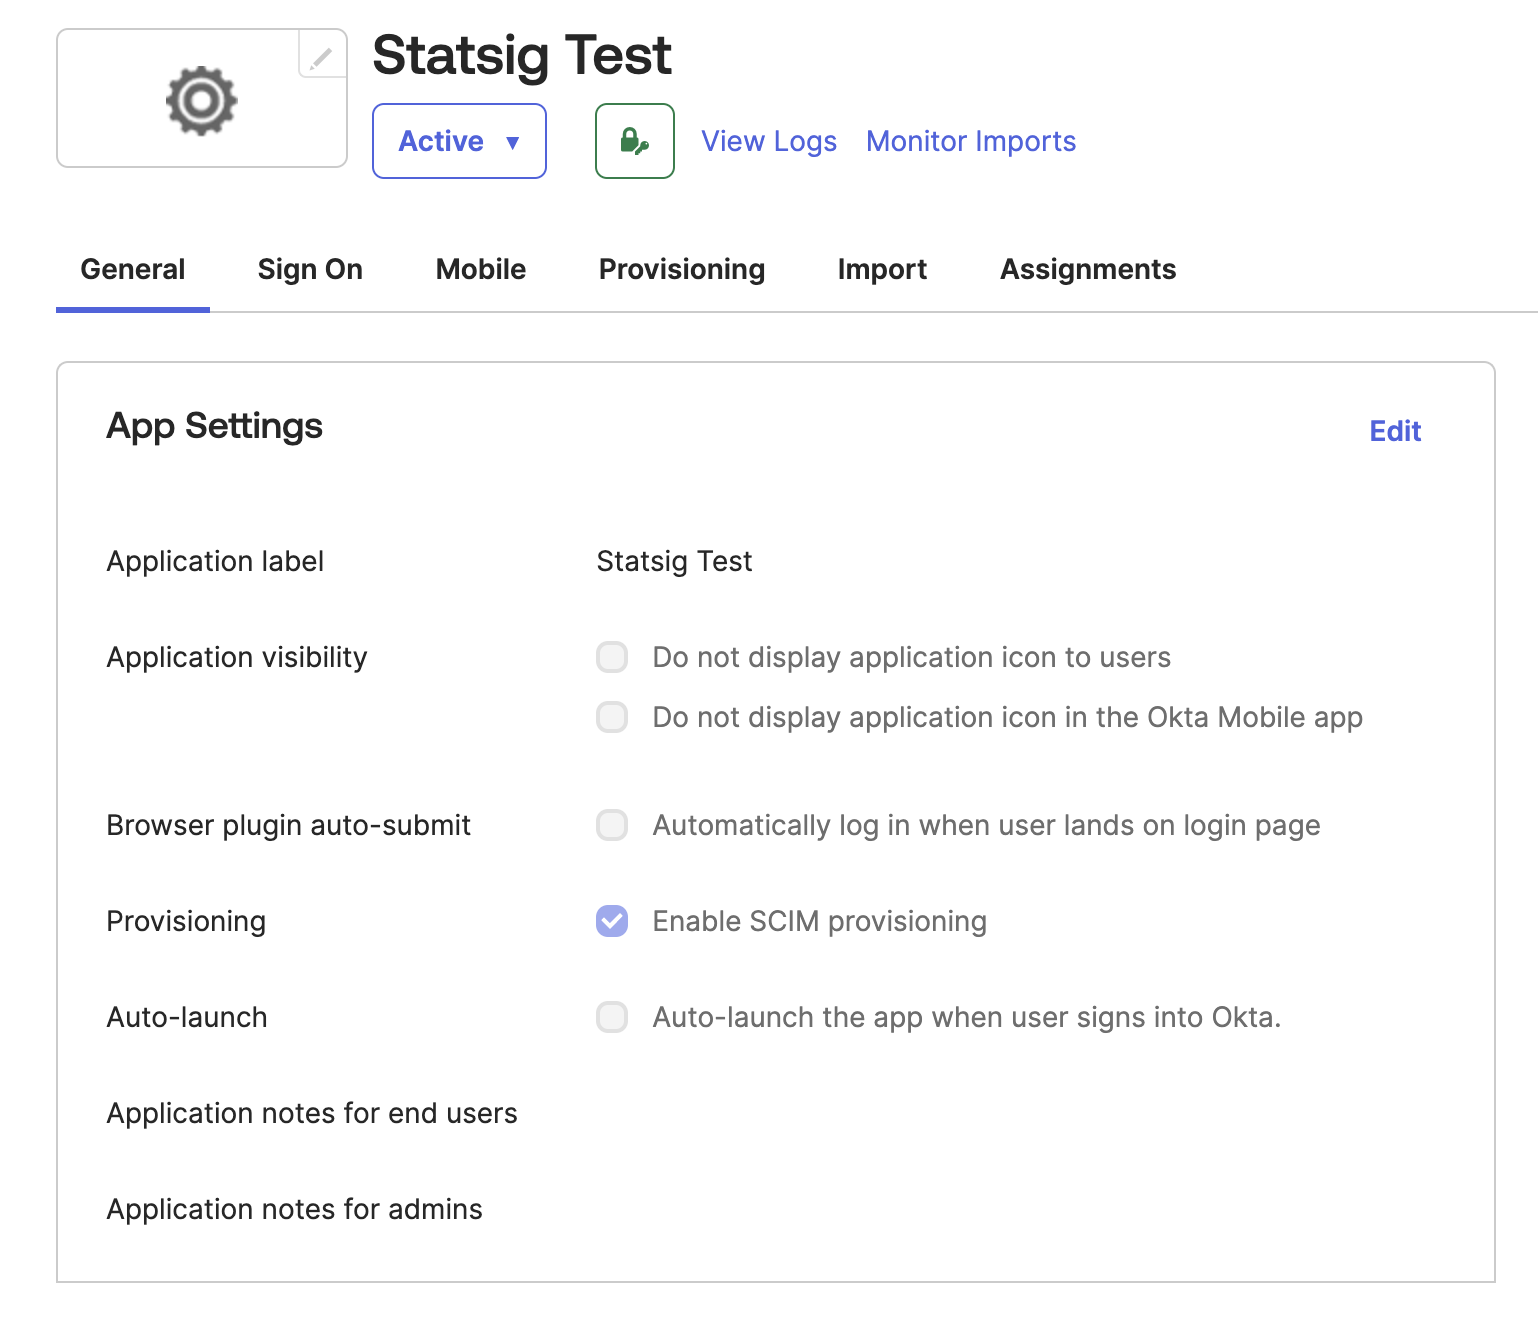
Step 3: Enable SCIM Provisioning
- After creating the integration, go to the "General" tab
- Click on "Edit" in the "Provisioning" section
- Enable "SCIM Provisioning"
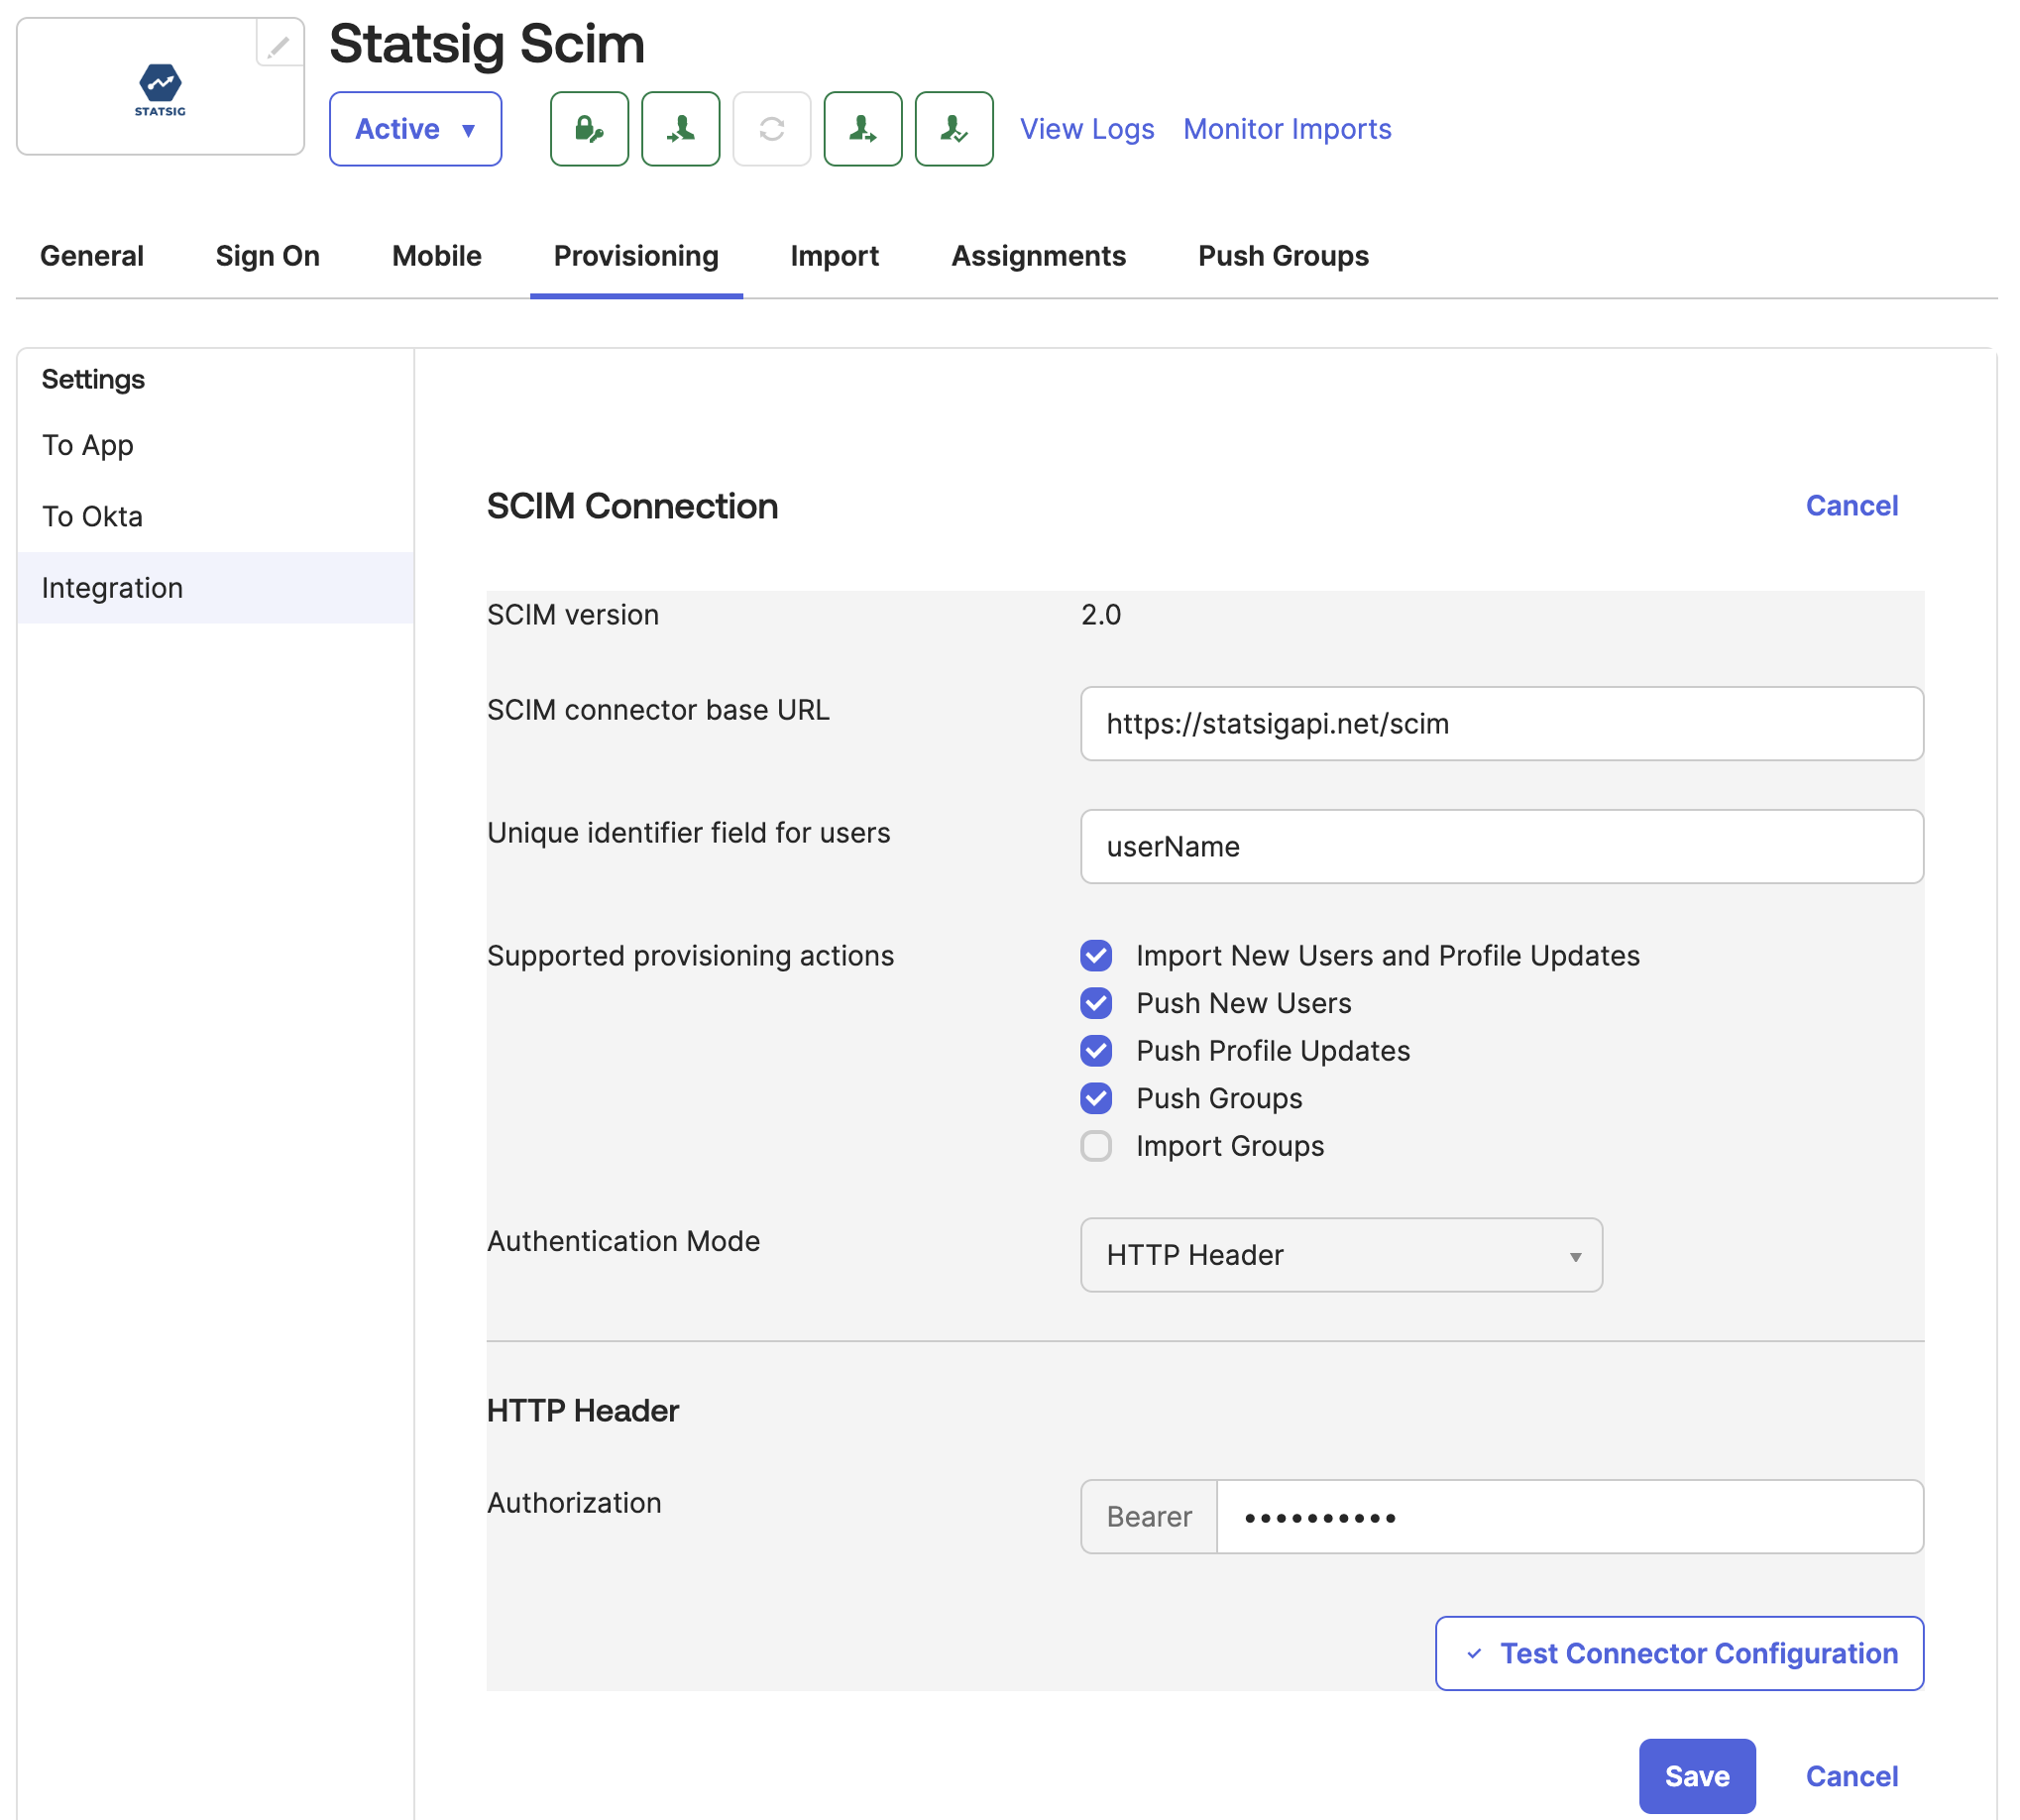
Step 4: Configure SCIM Settings
Import Groups requires an Okta flag SELECTIVE_APP_IMPORT_PLATFORM. If this flag is enabled for your organization, please select this option. If it is not, leave it unchecked.
- Navigate to the
Provisioningtab - Set the SCIM connector base URL to: https://statsigapi.net/scim
- Set "Unique identifier field for users" to
userName - Enable
Import New Users and Profile UpdatePush New UsersPush Profile UpdatesPush GroupsImport Groups(Only if your organization has theSELECTIVE_APP_IMPORT_PLATFORMflag enabled, see note above)
- Set the authentication mode to "HTTP Header"
- For the authorization header, use the SCIM Bearer token generated in Statsig by your Org Admin. See How to Obtain SCIM Auth Key for more details.
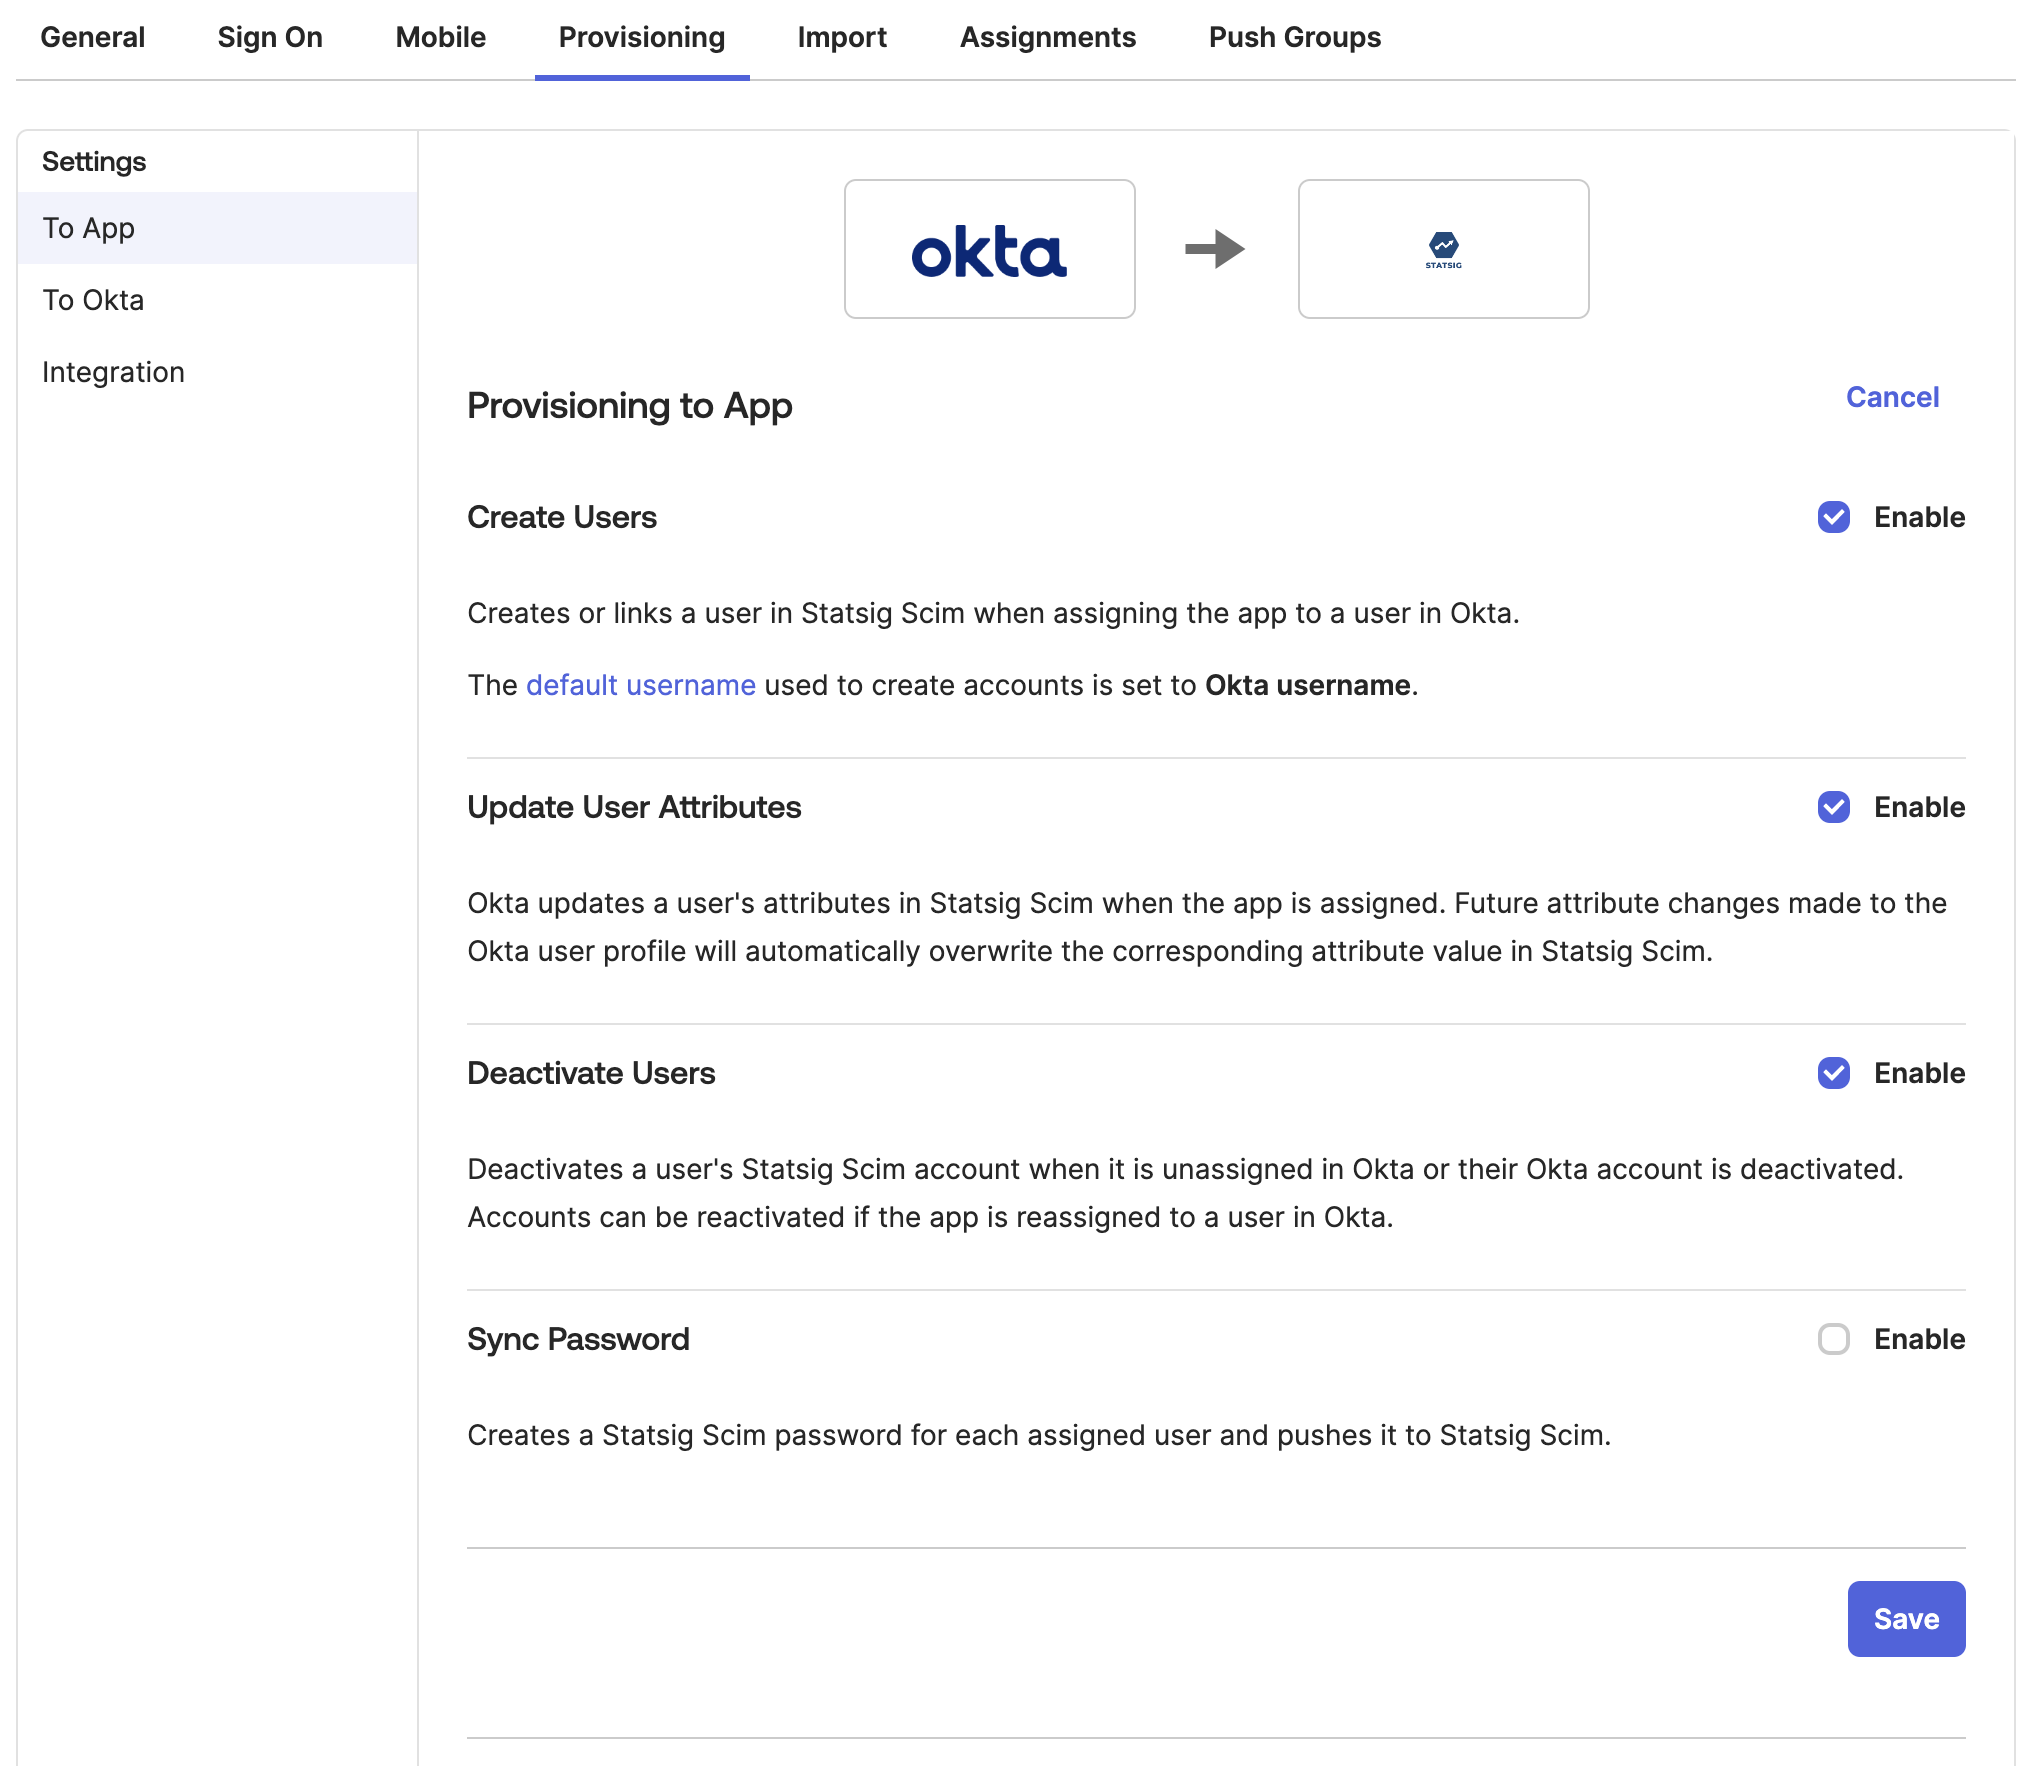
Step 5: Configure Okta to Statsig Settings
- Enable "Create Users"
- Enable "Update User Attributes"
- Enable "Deactivate Users"
Step 6: Import Existing Statsig Users and Groups
- In Okta, go to the Statsig app's "Import" tab
- Click "Import Now" to fetch existing Statsig users and groups
- Process the imported users as needed

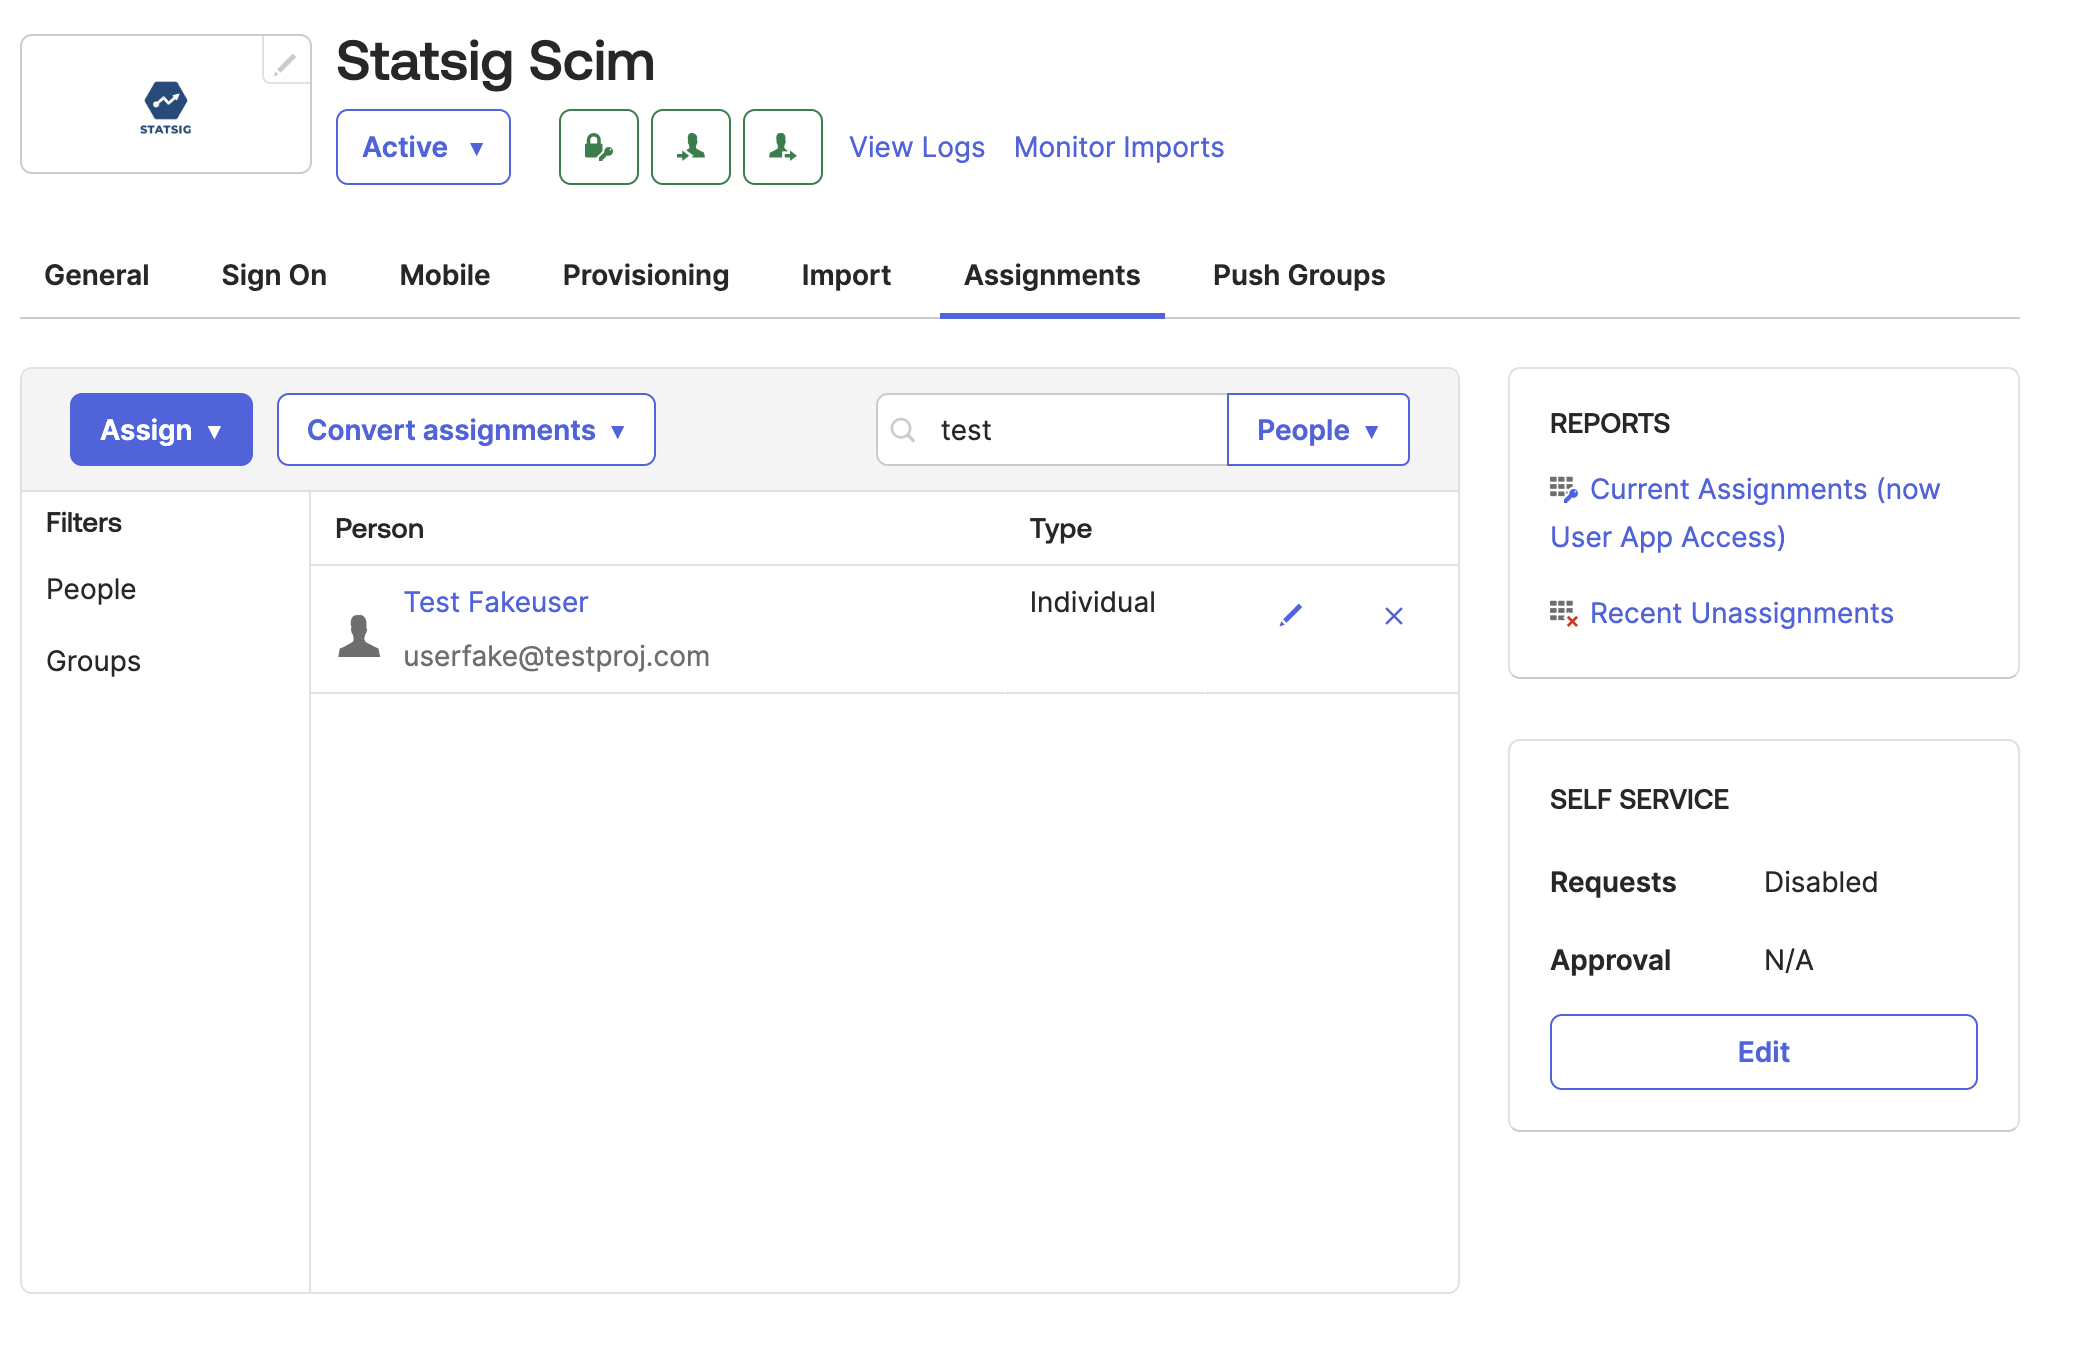
Step 7: Manage User Assignments
- Use the "Assignments" tab in Okta to add or remove users from Statsig
- Adding a user assignment in Okta will create the user in Statsig, while removing the assignment will deactivate the user's Statsig account
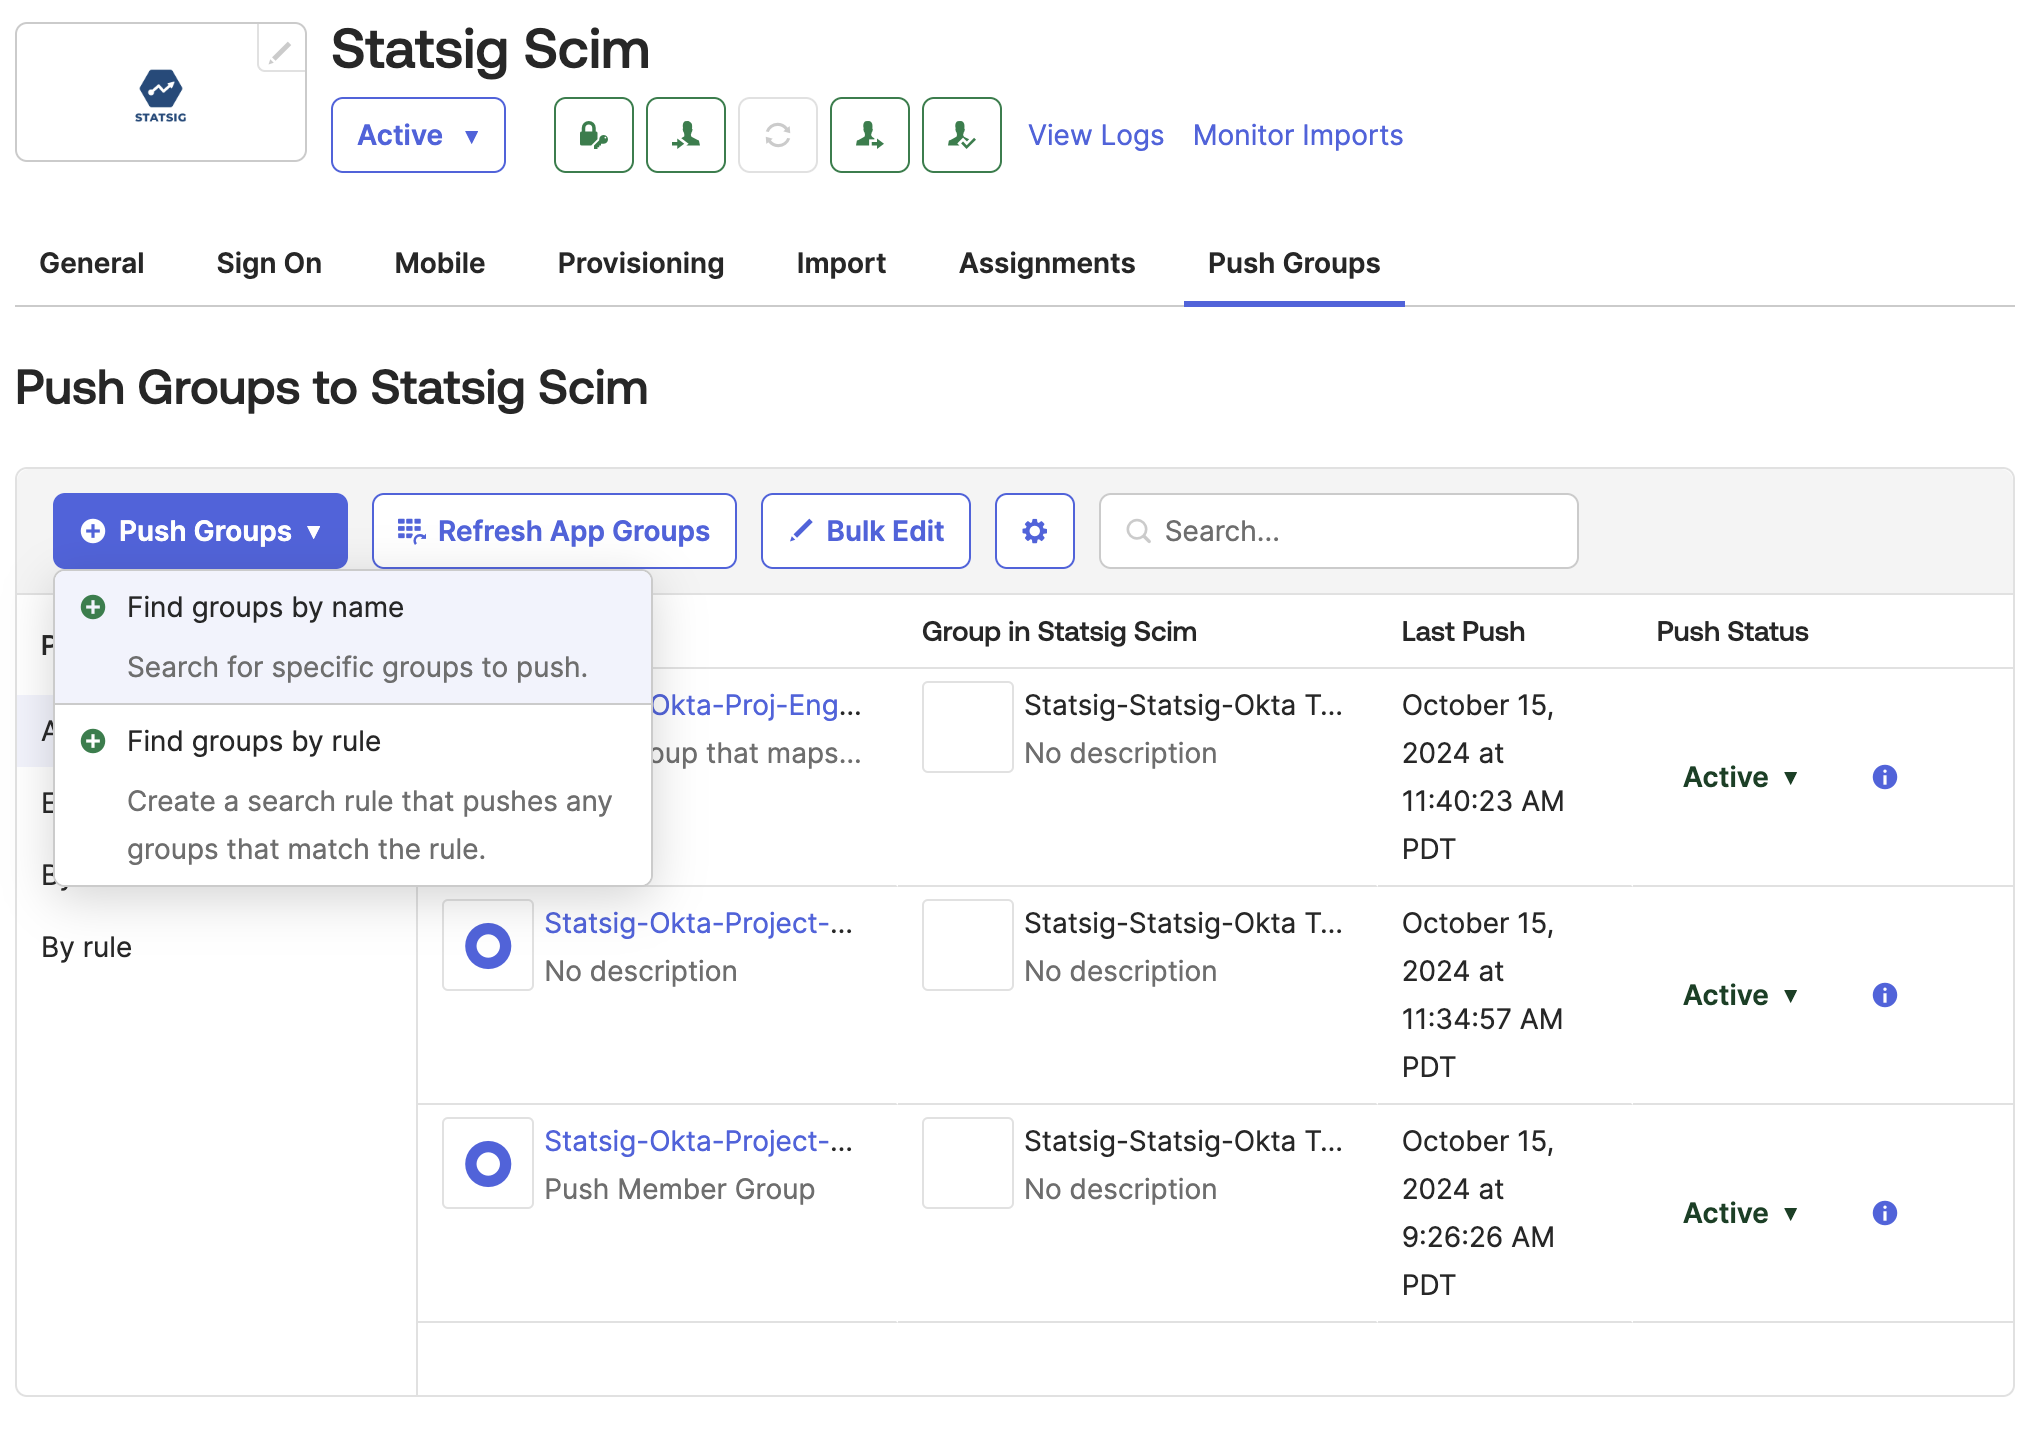
Step 8: Push Groups to Statsig
-
In Okta, go to the Statsig Integration's "Push Groups" tab
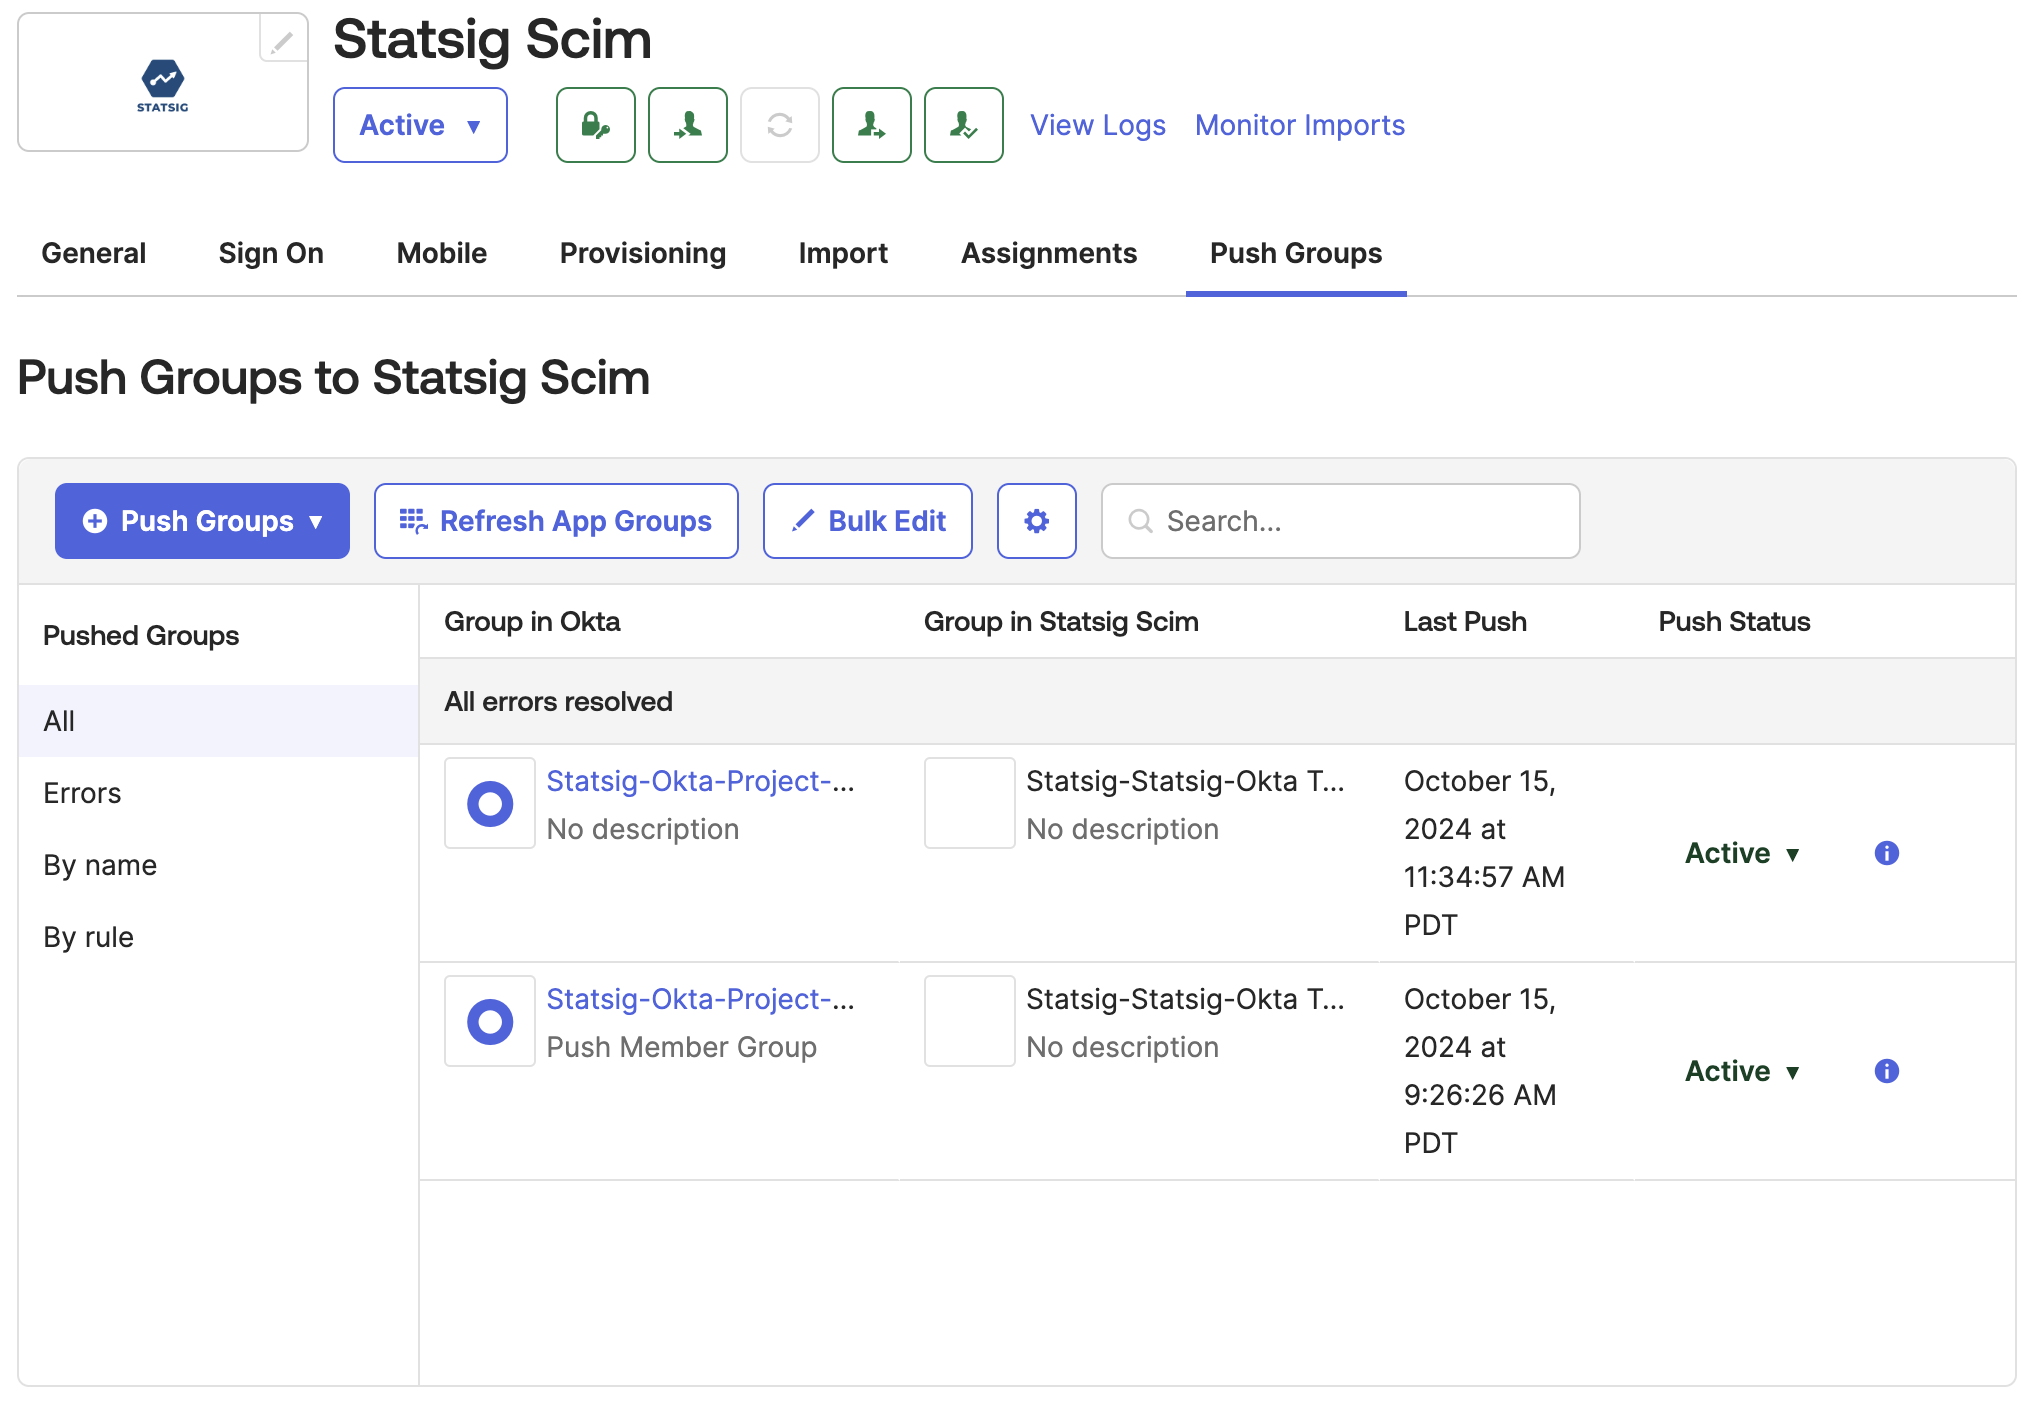
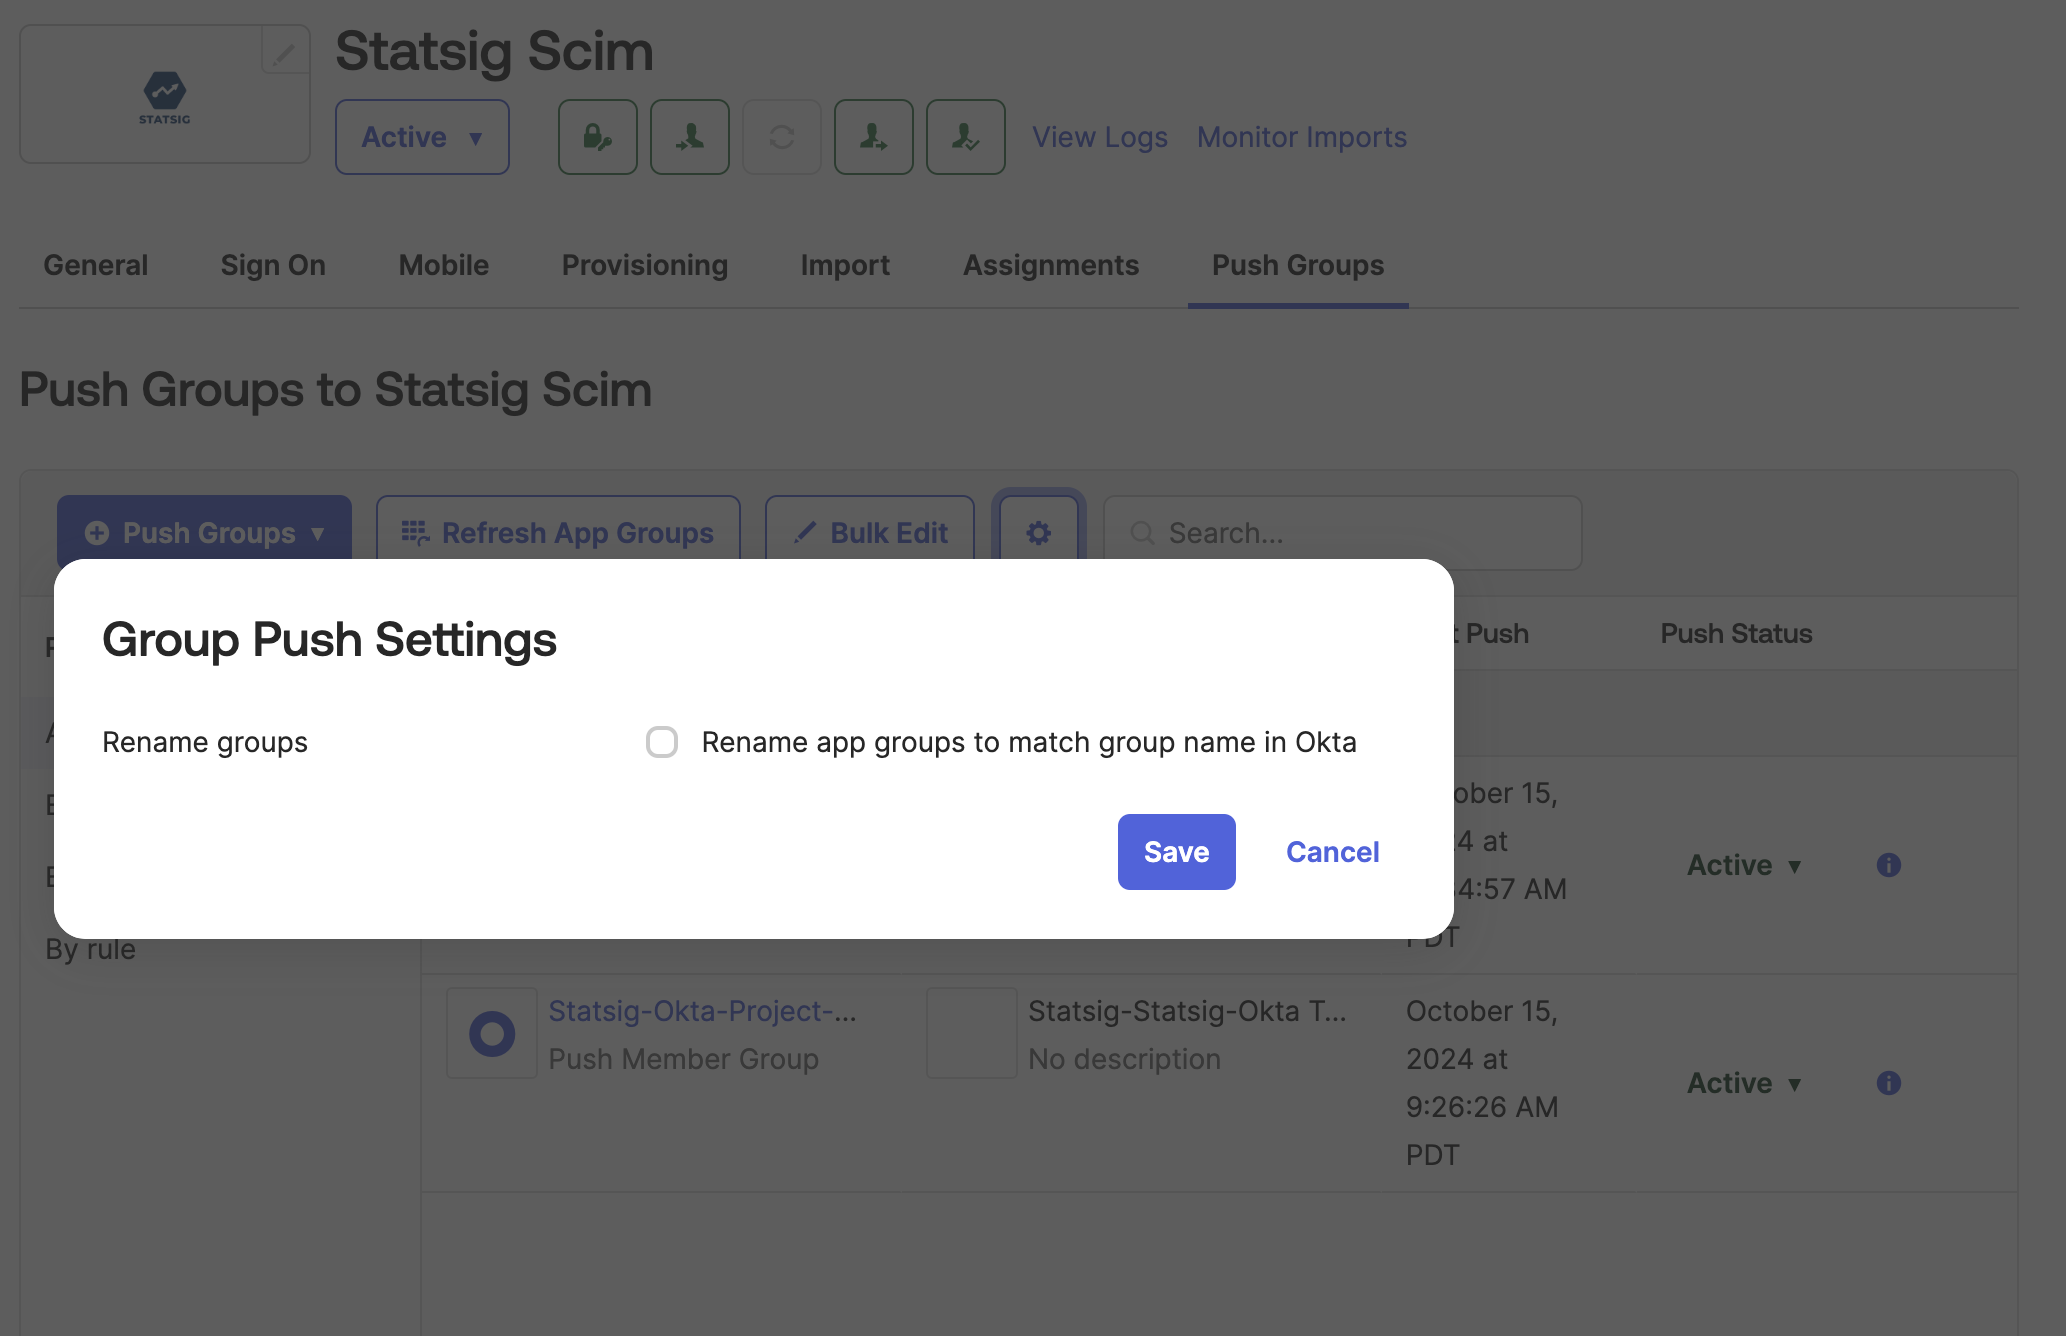
-
Click the settings button and disable "Rename Groups"
-
Click "Push Groups" and select the method for finding groups in Okta.
-
Type in and select the Okta group that will push to a Statsig Project x Role Group.
- You can find Groups in left nav of Okta:
Directory > Groups. In there, you will see the groups created from Okta and groups created by Statsig. - The required groups are groups you created from Okta. You can filter by choosing
Group source typeand set toOkta groups. If you don't have any, go ahead and create it with members as well.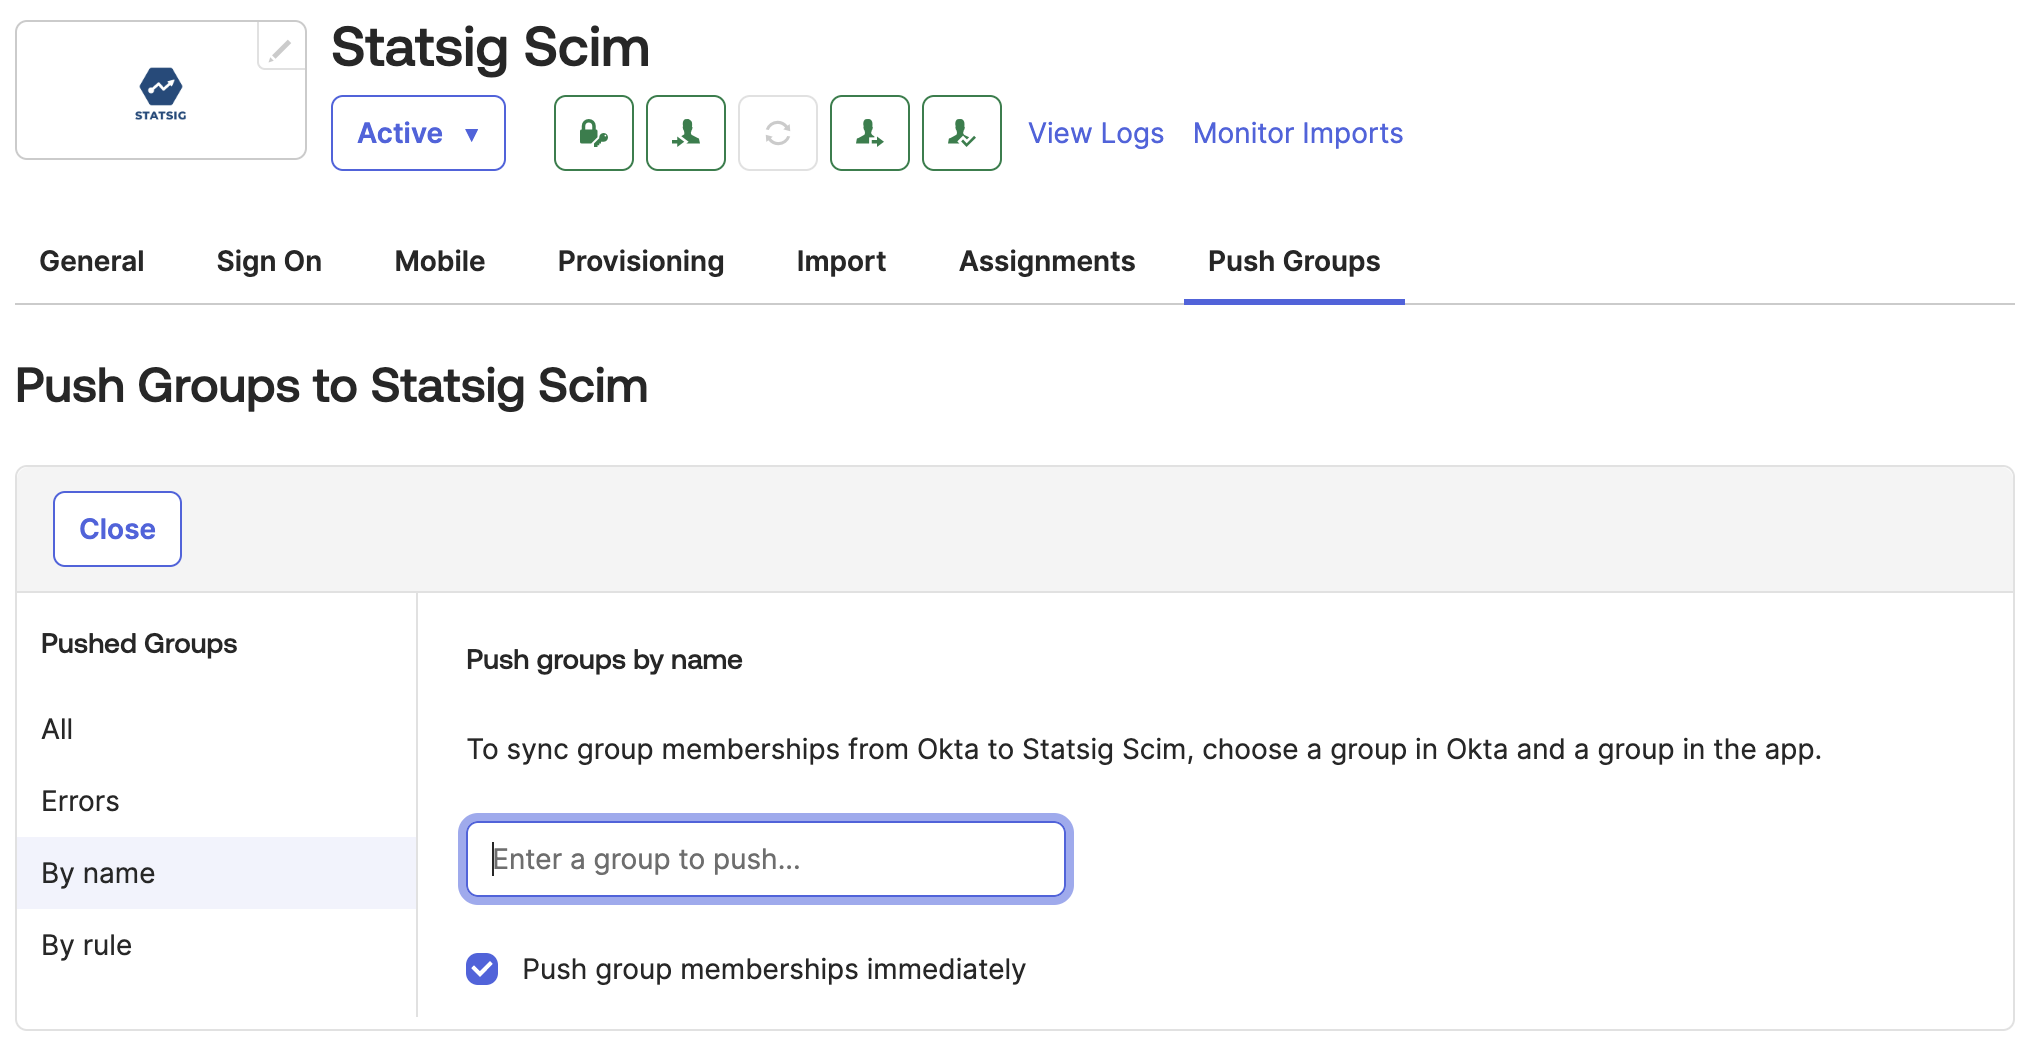
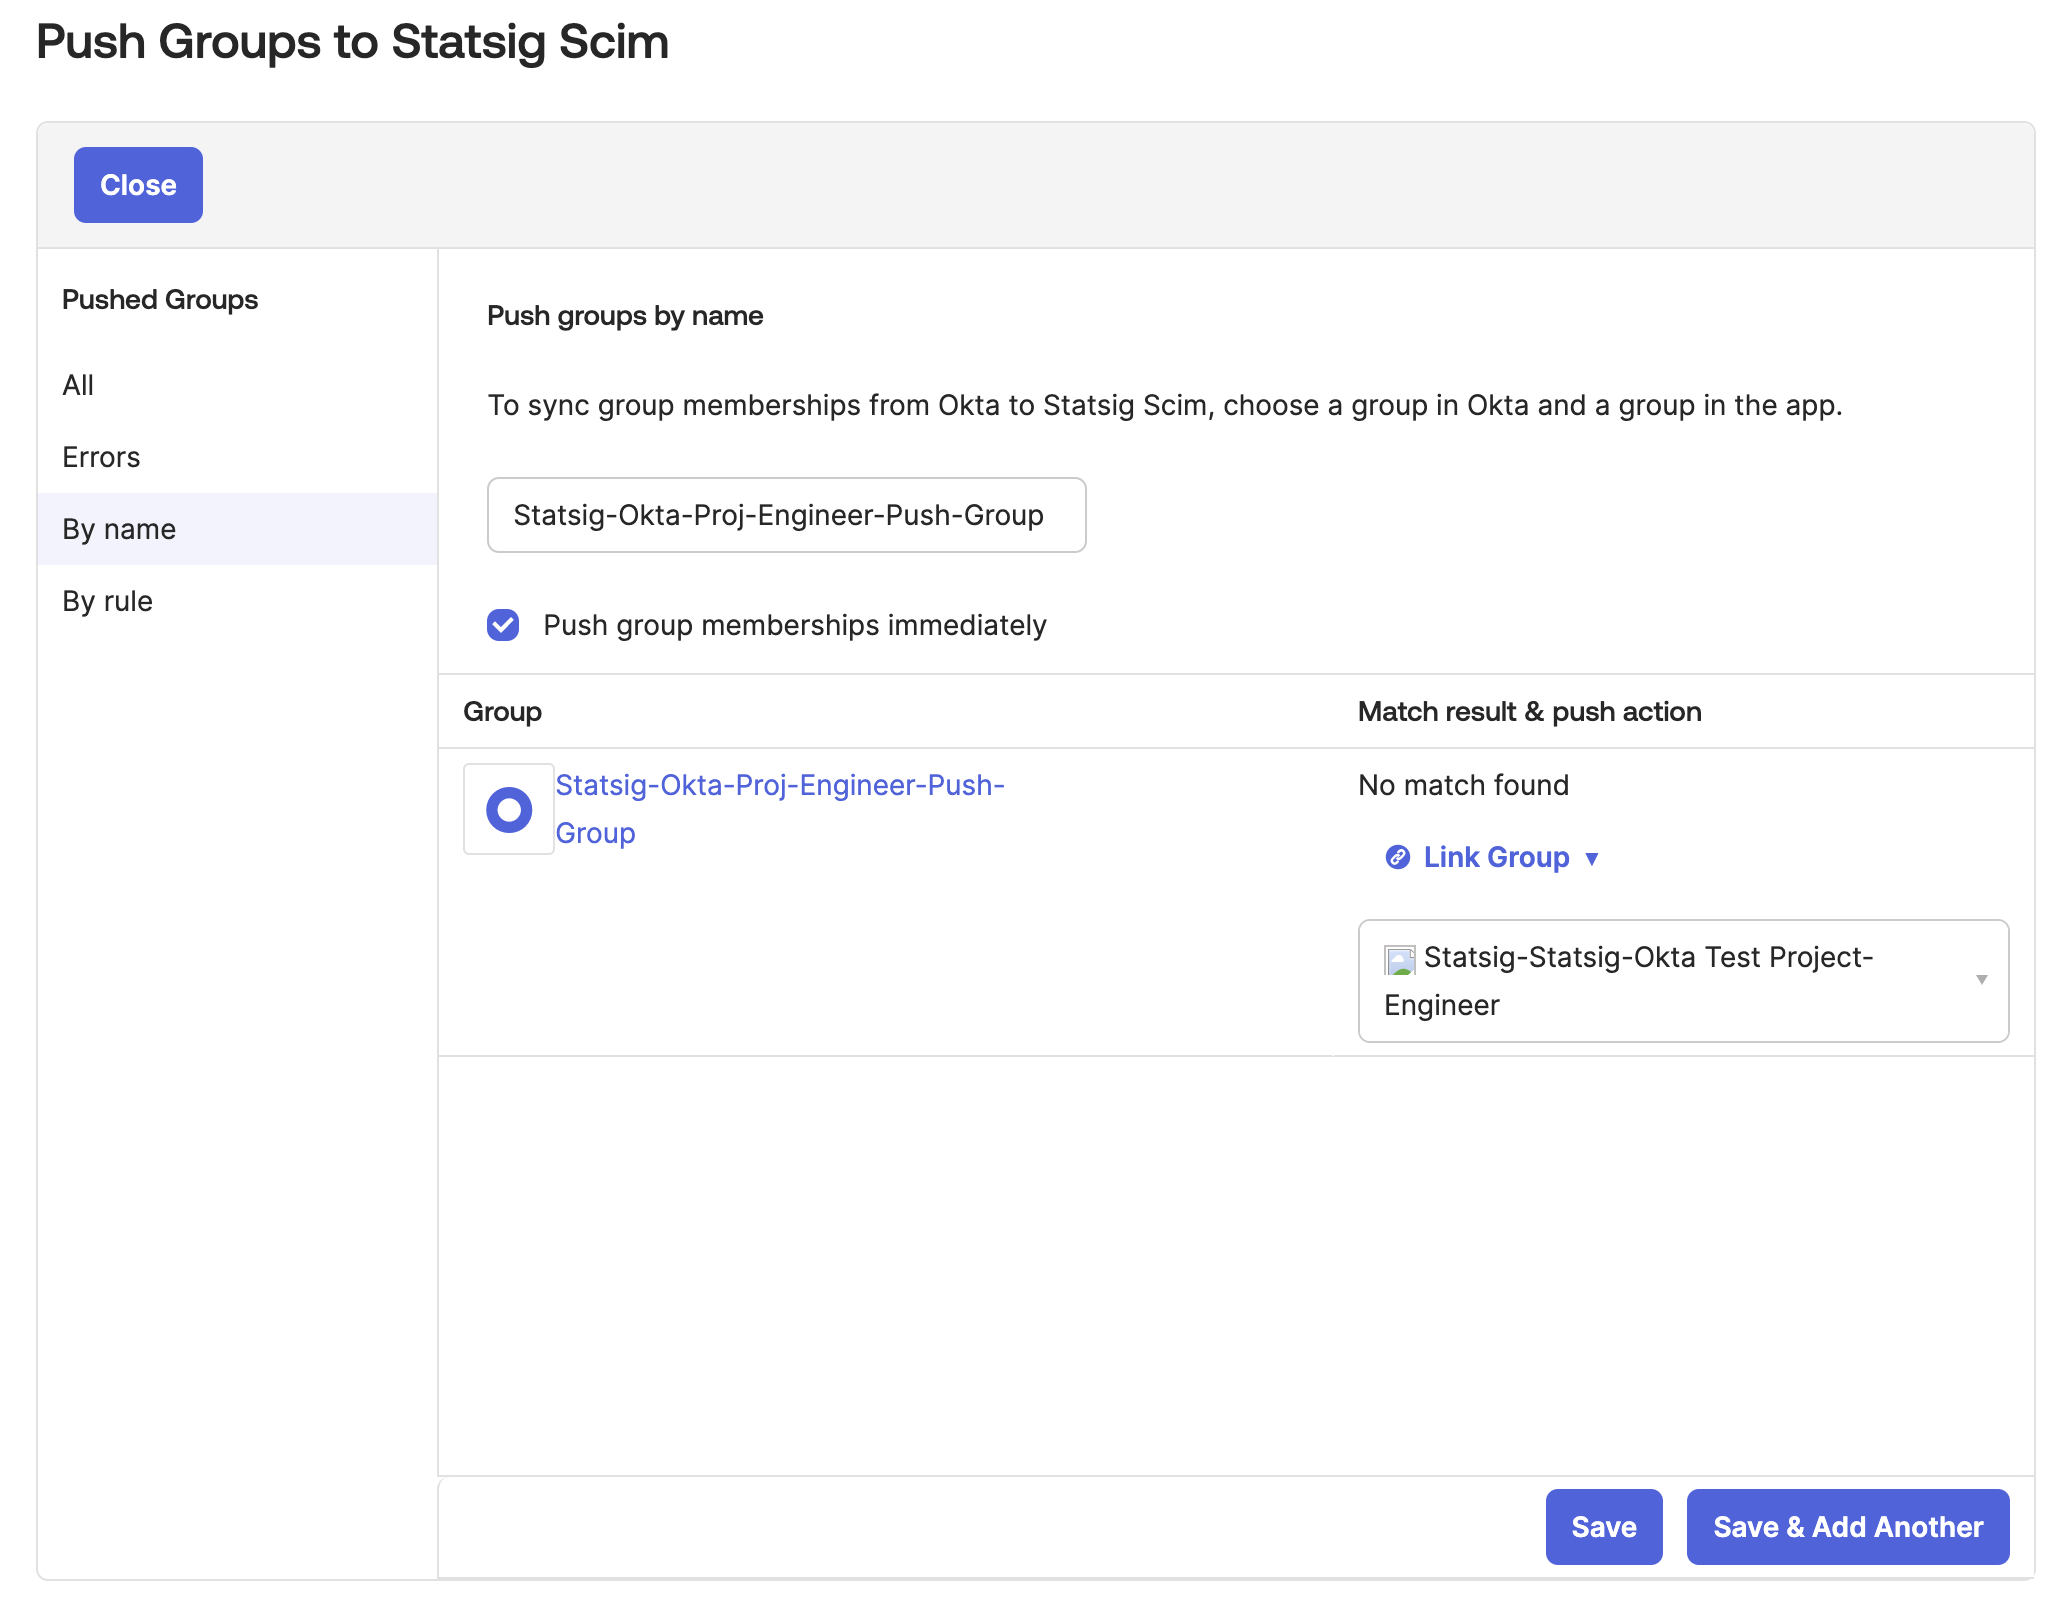
- Now let's link/assign Okta group you created from Okta to the Statsig groups with role you want.
- Change
Match Result & Push ActiontoLink Group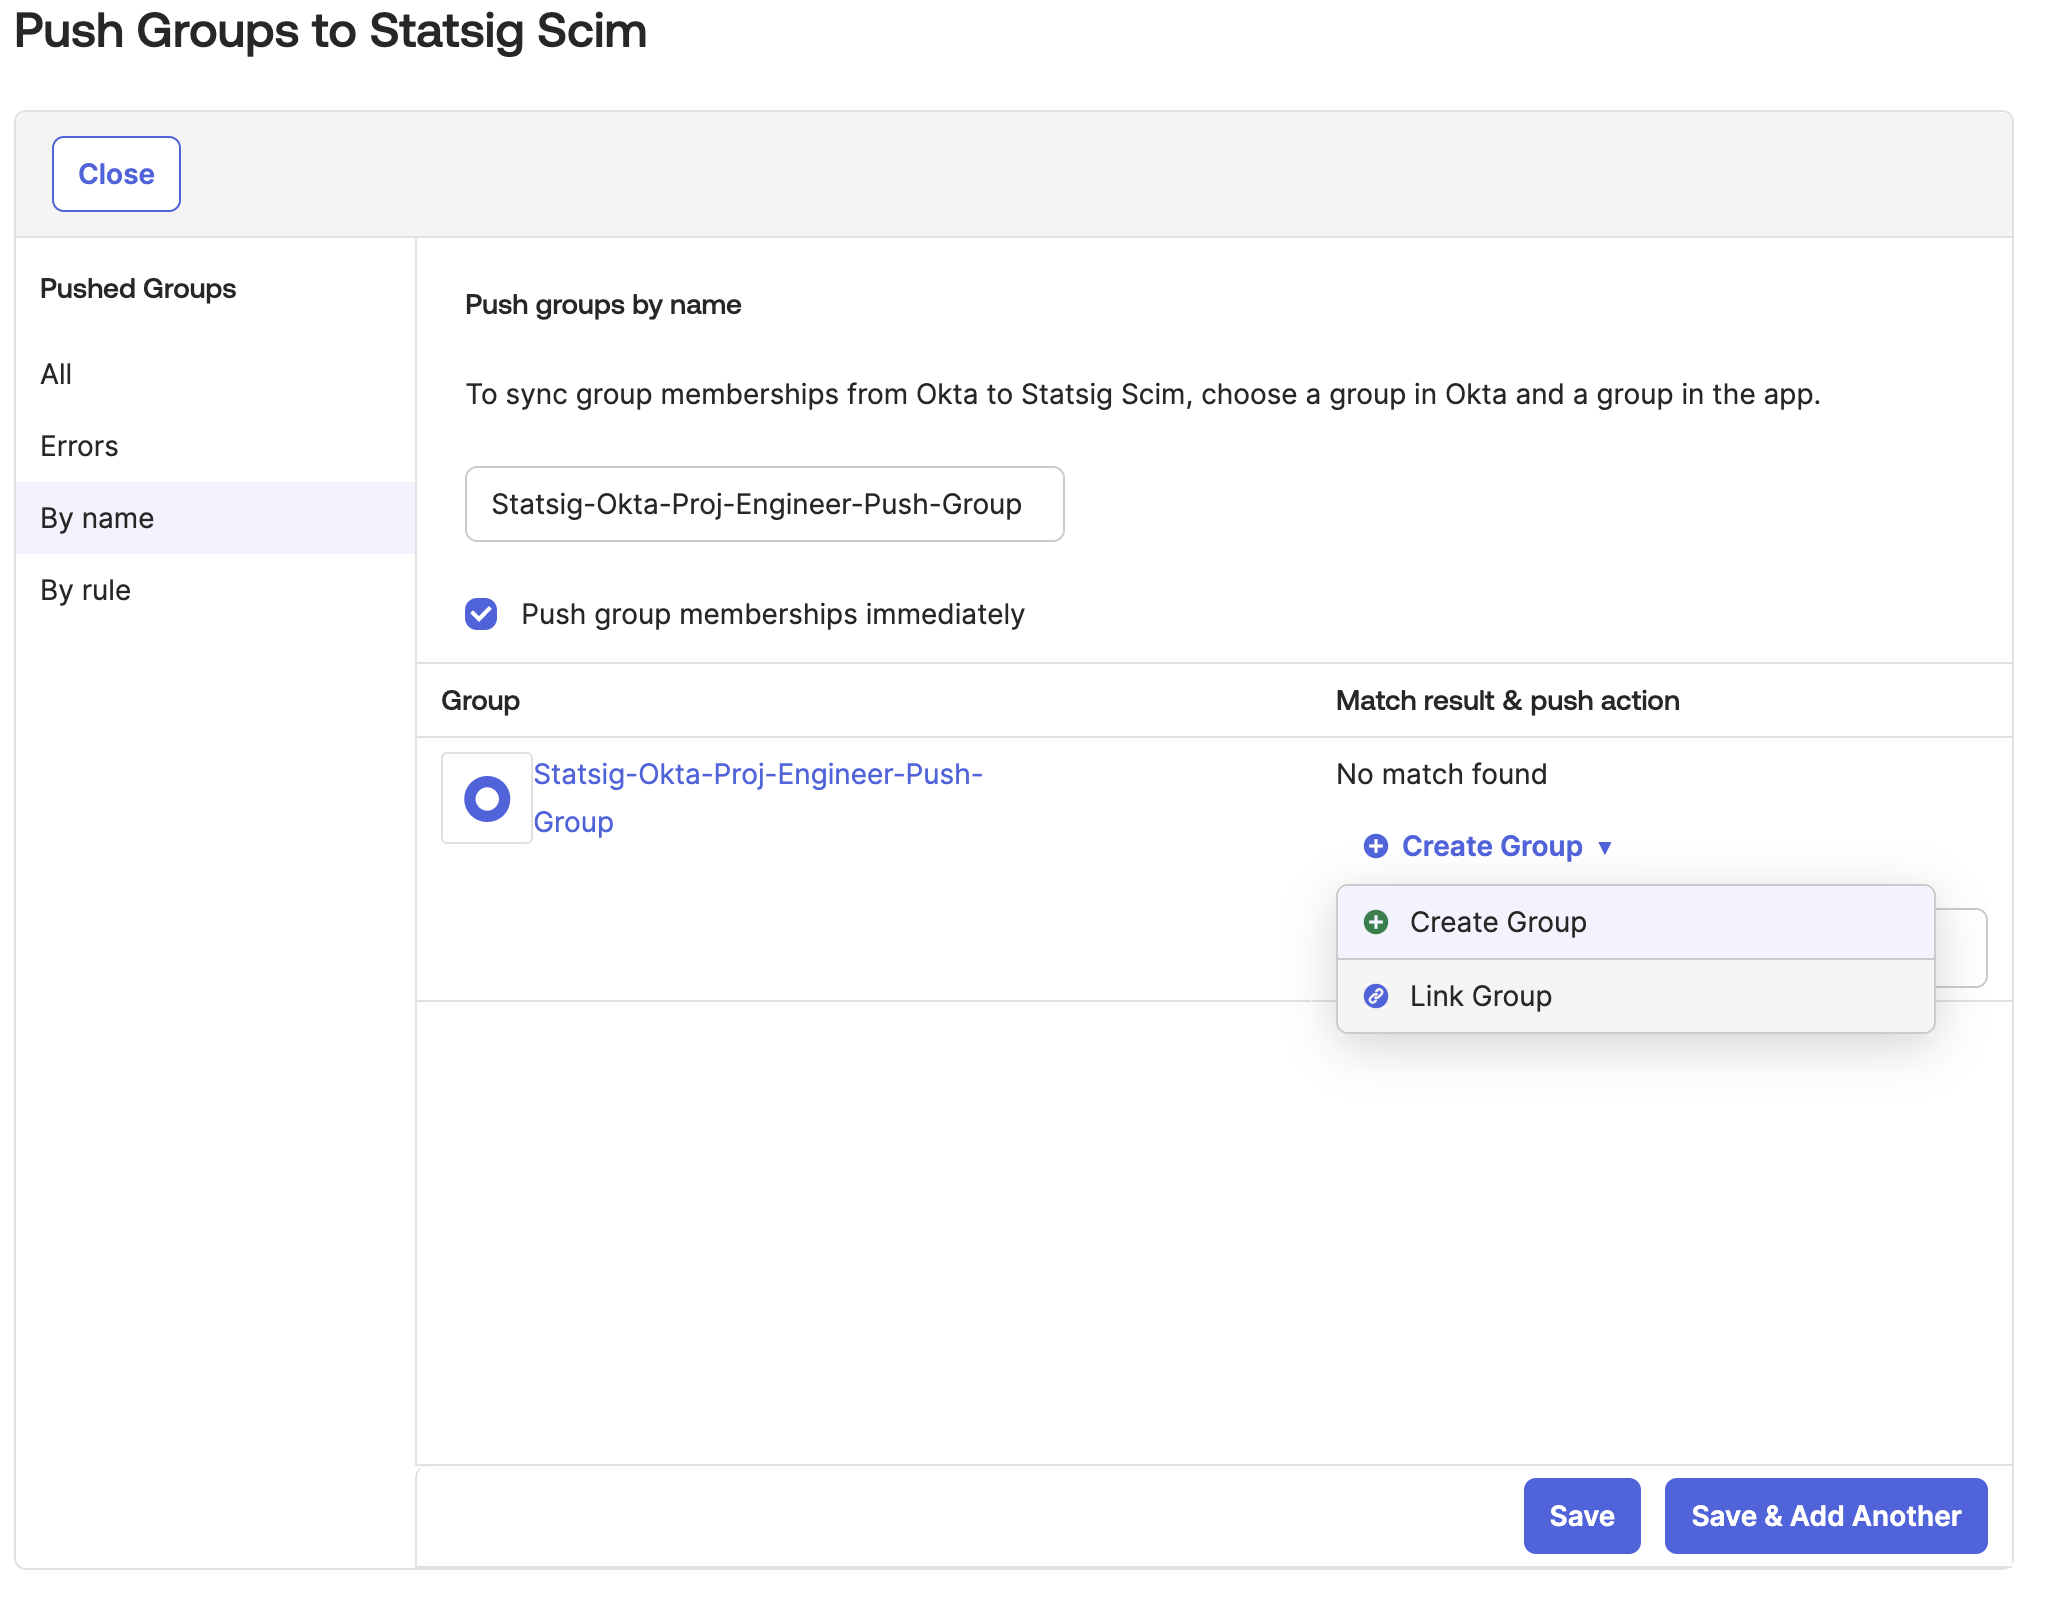
- Select the Statsig Project x Role Group that the Okta group will push to.
- We display the Statsig Project x Role Group with the format
Statsig-<Project Name>-<Role Name>on Okta. - By default Okta only allows you to map 1 Okta Group to 1 Statsig Group.

- Then link the Okta group to a Statsig Project x Role Group. On save the group should push to Statsig. All future group changes on Okta will be pushed to Statsig.
Step 9 (Optional): Update Okta User Org Role
For every user, Statsig surfaces a SCIM field named statsigOrgRole. Through this field, you can manage organization user roles.
Currently, Okta can only push role updates to Statsig.
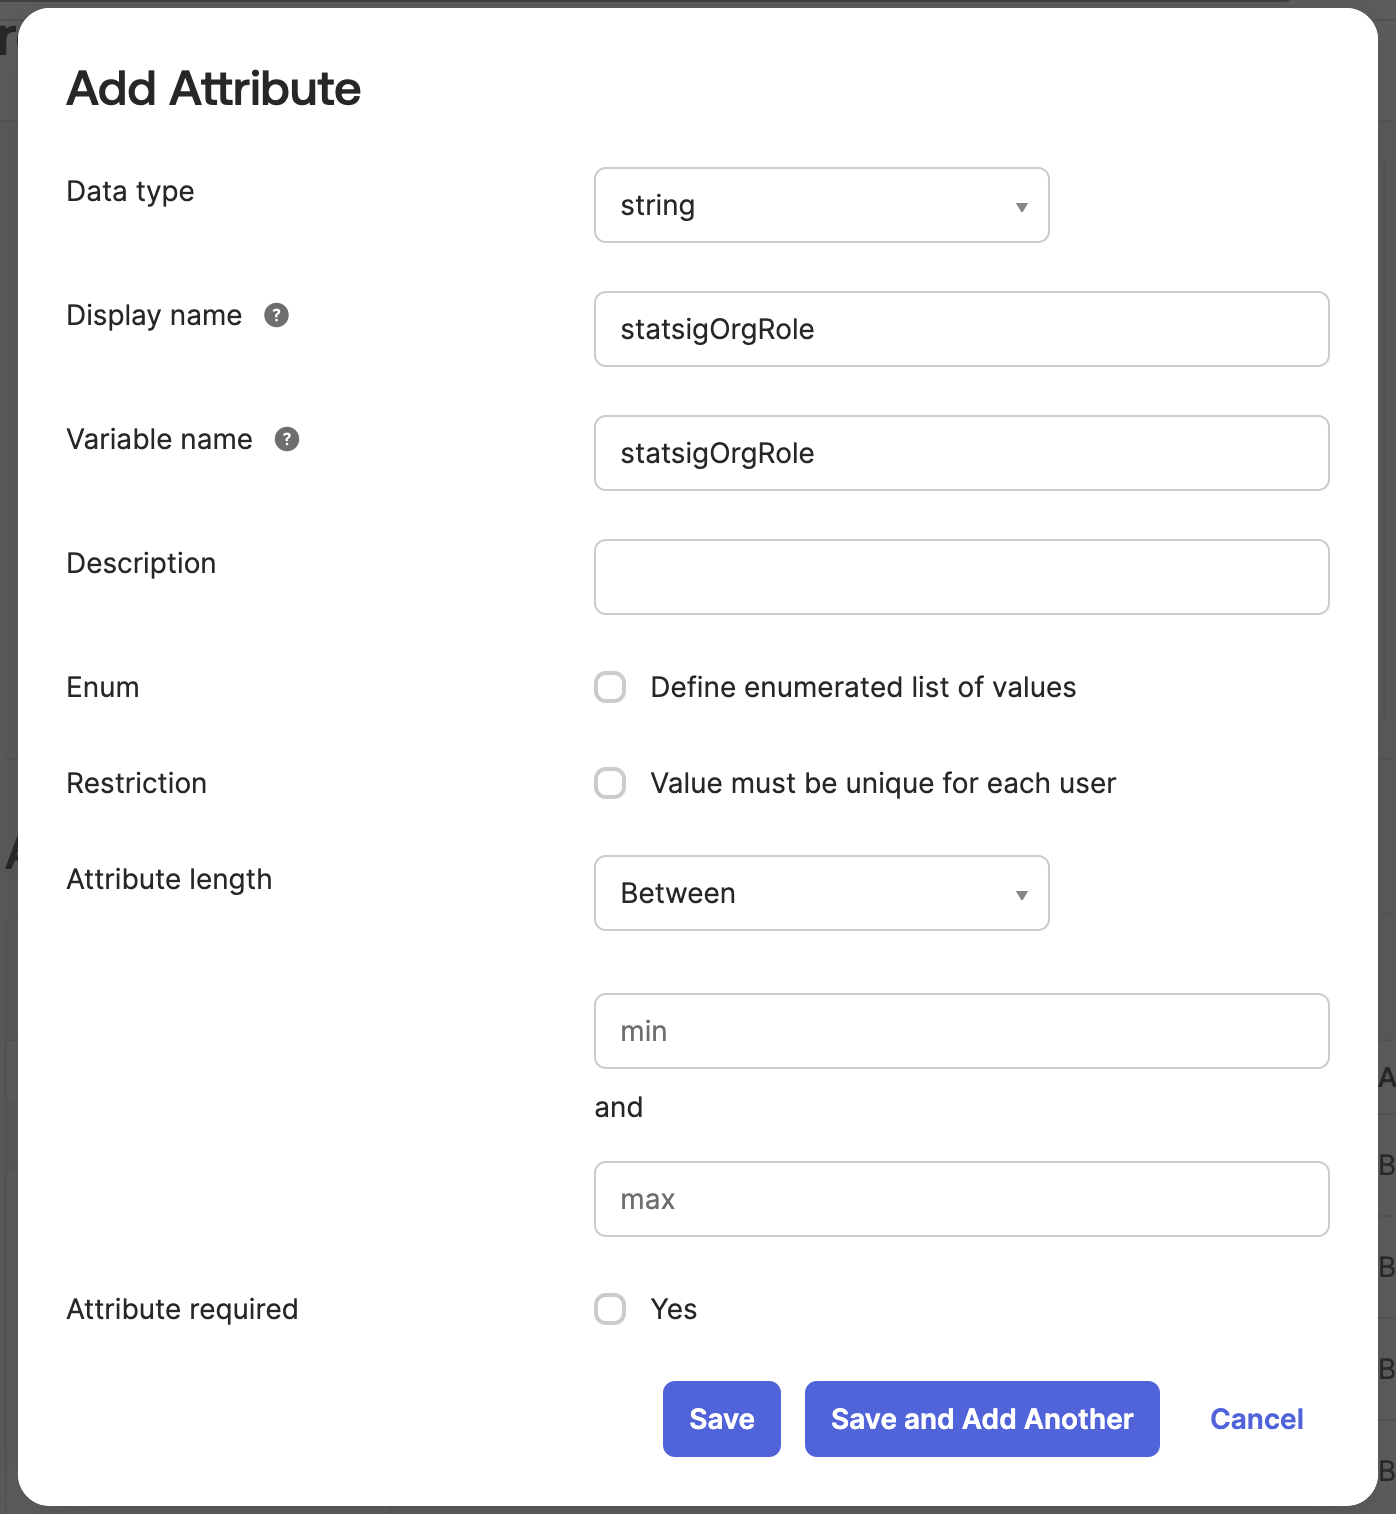
A. Create the Custom Attribute in Okta
Navigate to Directory > Profile Editor and select the User (default) Okta profile. This represents all of the Okta users' attributes.
Scroll down and press Add Attribute and fill out the new attribute to have the variable name statsigOrgRole.
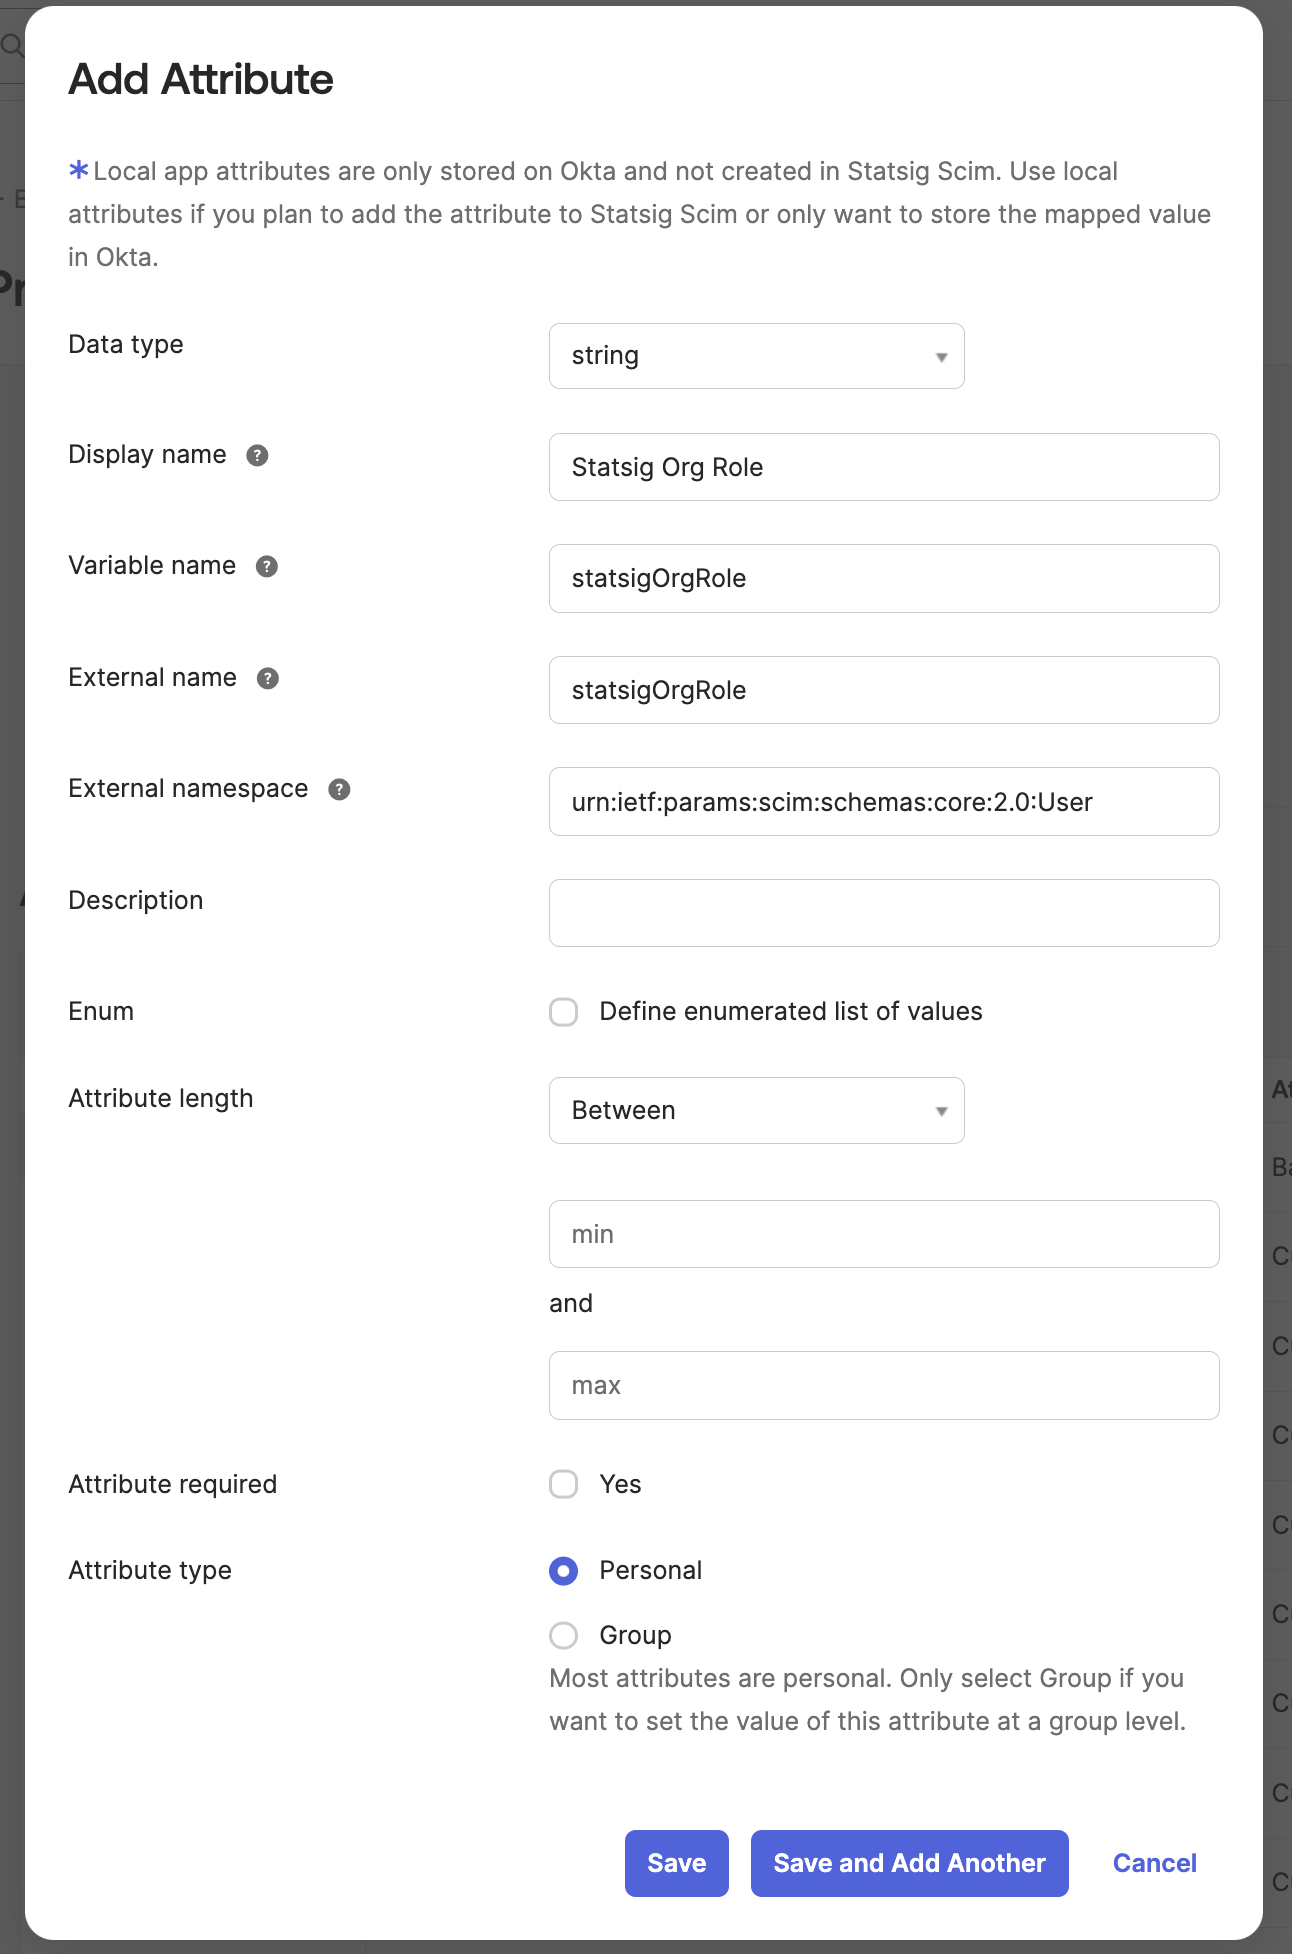
B. Create the Custom Attribute in the Statsig SCIM Integration
Now Navigate to the Statsig SCIM Integration's User Profile in the Profile Editor.
Add an new attribute that matches the following format:
- Variable name:
statsigOrgRole - External namespace:
urn:ietf:params:scim:schemas:core:2.0:User
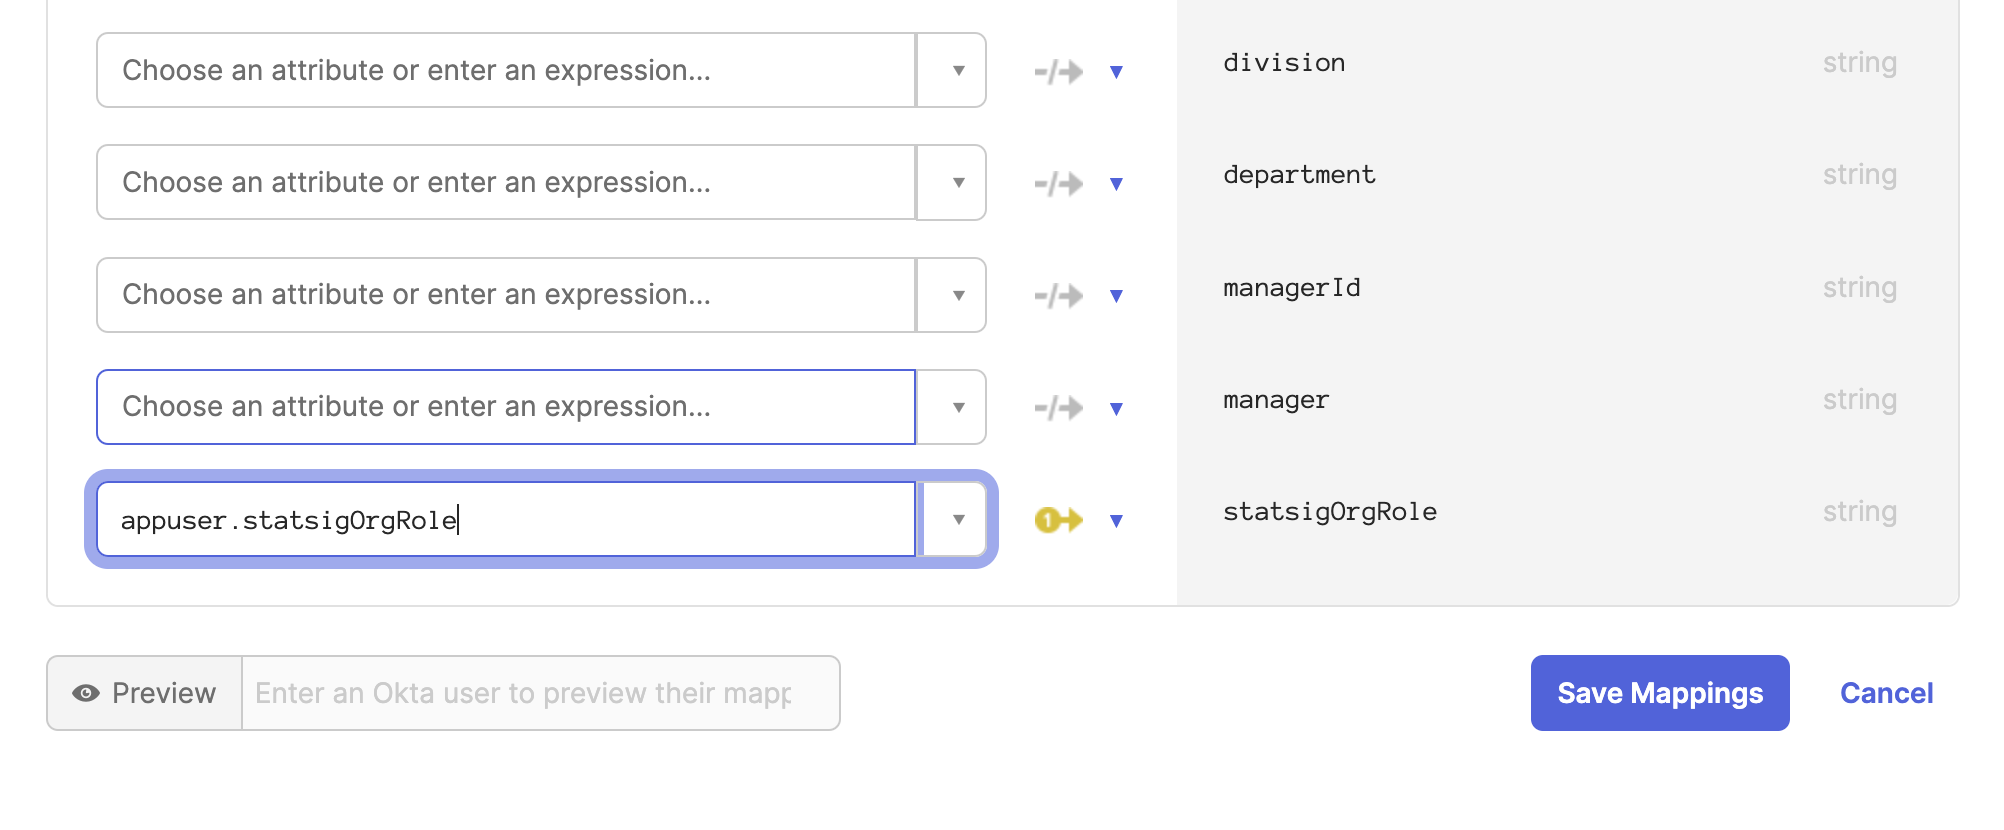
C. Create a Mapping from Statsig to Okta for the Custom Attribute
On the same Statsig SCIM profile editor, navigate to the Mappings button.
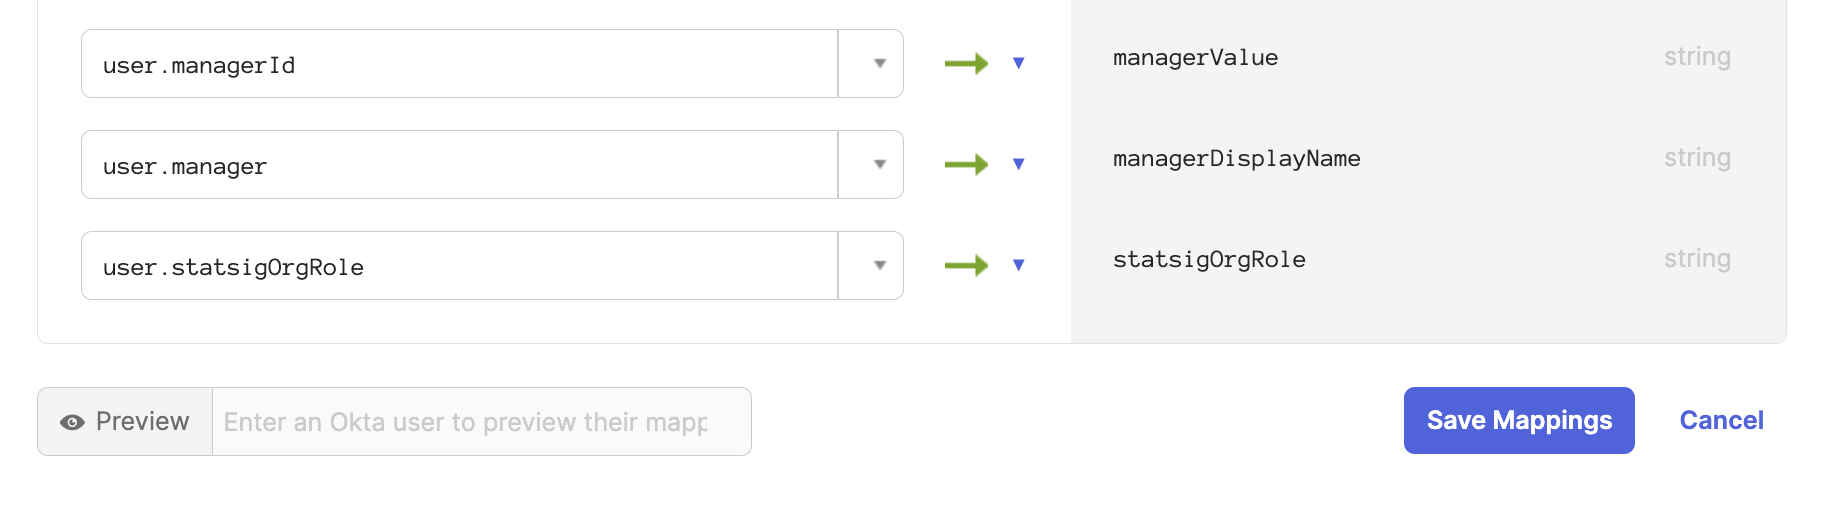
Scroll down to the new attribute statsigOrgRole and map user.statsigOrgRole to the Okta attribute statsigOrgRole.
D. Create a mapping from Okta to Statsig for the Custom Attribute
Now navigate to the Okta User to Statsig SCIM user mapping.
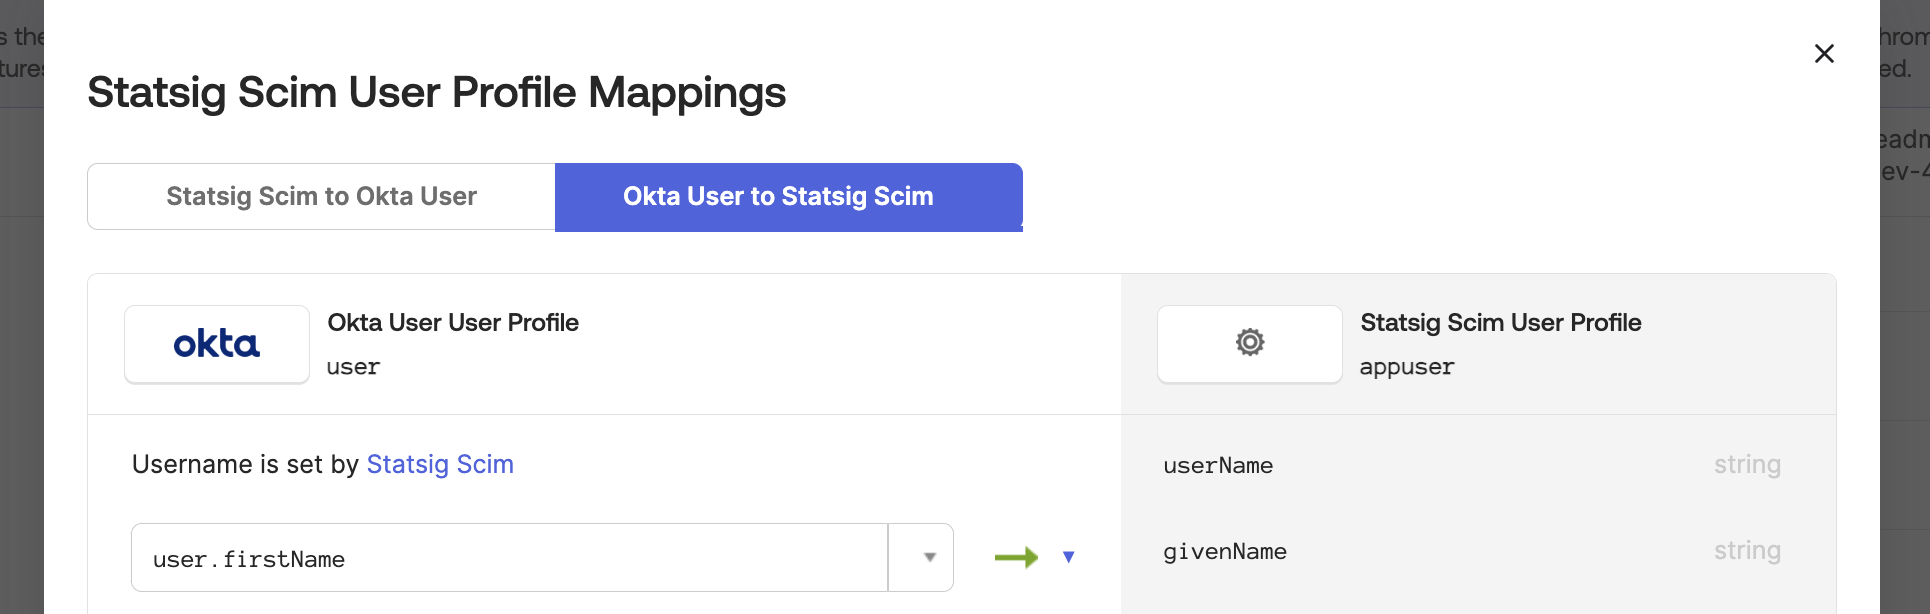
Scroll down to the statsigOrgRole attribute and map user.statsigOrgRole to the Okta attribute statsigOrgRole.
Now all users will be synced with their organization role. On the Statsig SCIM integration you can modify a user's role directly as well.
E. Modify Integration Mappings
Navigate to the Statsig SCIM integration provisioning section.
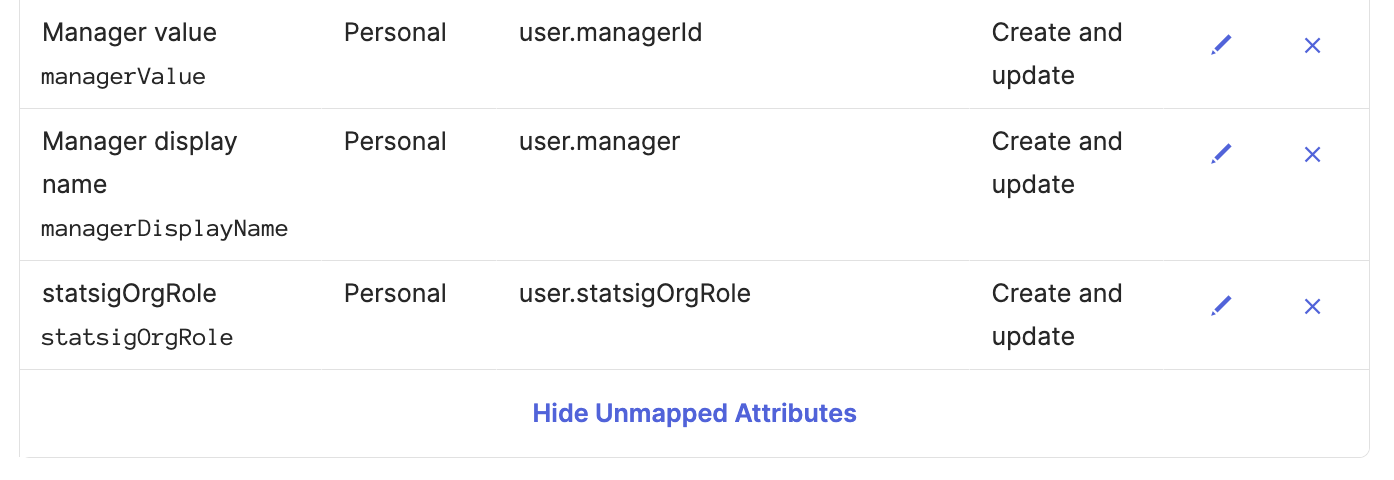
Under the "To App" tab, scroll down to the statsigOrgRole attribute.
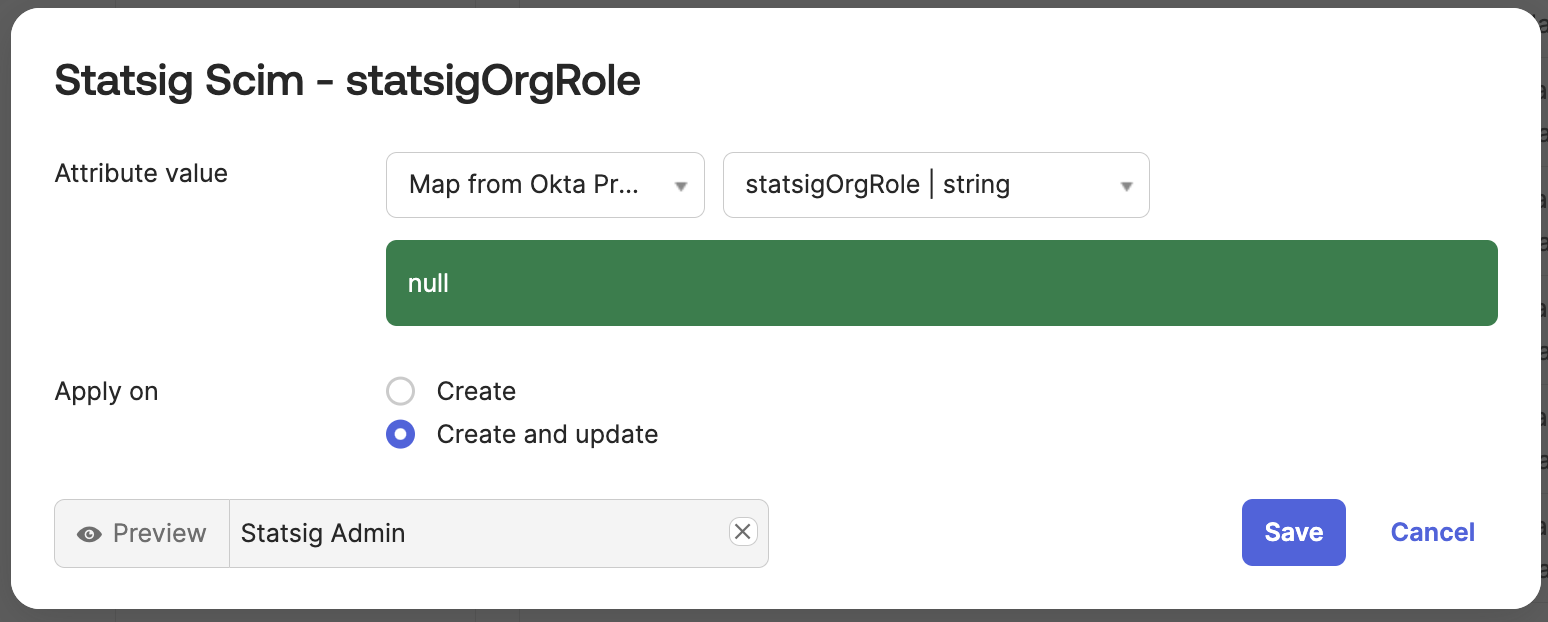
 Set the attribute value to
 Map from Okta Profile and statsigOrgRole.
Set apply on Create and update.
 ]
]
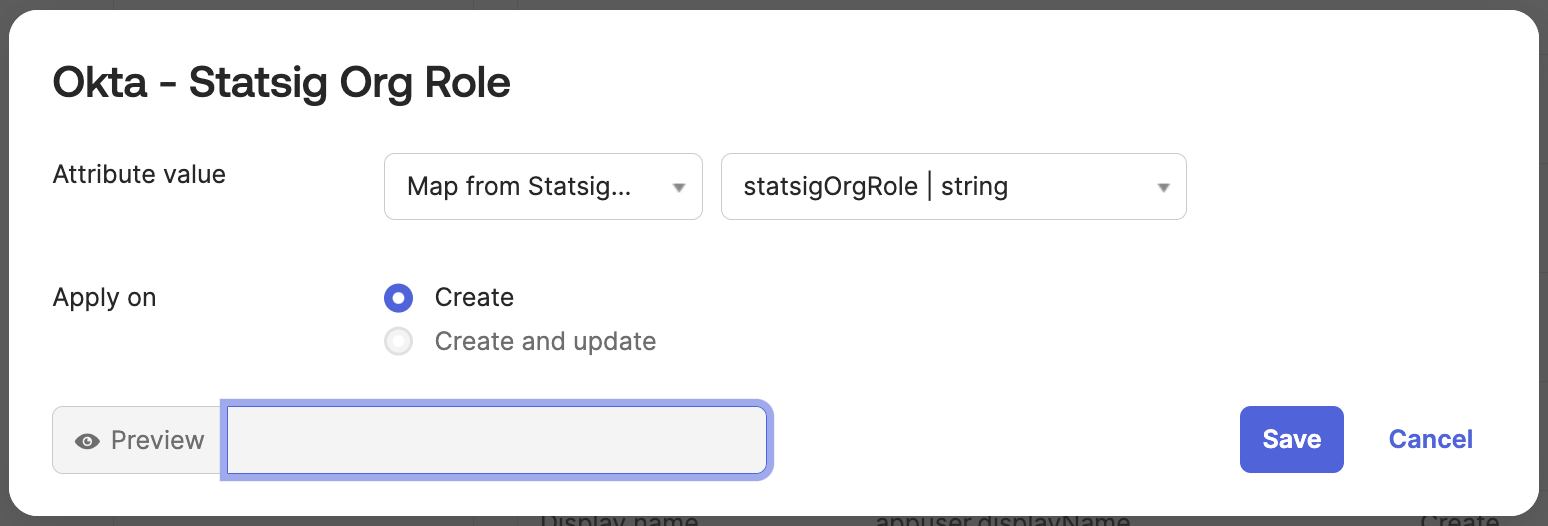
Navigate to the "To Okta" tab and scroll down to the statsigOrgRole attribute.
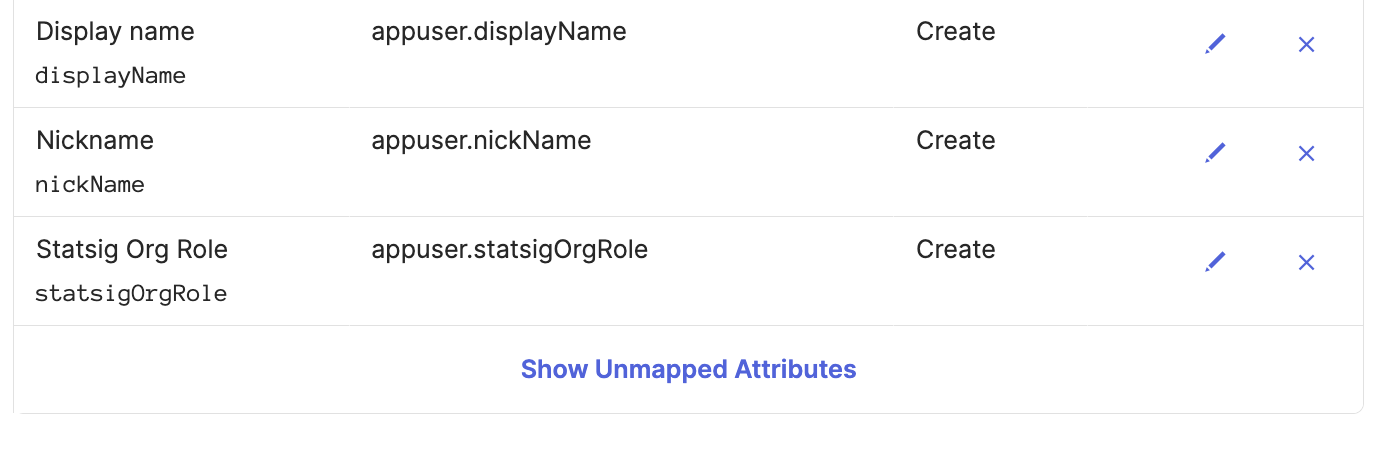
Set the attribute value to Map from Statsig Profile and statsigOrgRole.
Set apply on Create.
Troubleshooting
- Ensure the SCIM Bearer token is correctly entered and has not expired
- Check Okta's System Log for any synchronization errors
- Verify that user attributes are correctly mapped between Okta and Statsig
- Ensure that the key includes the
scimprefix. - Okta organizations with the
SELECTIVE_APP_IMPORT_PLATFORMflag must enableImport Groupsin the SCIM integration settings to sync groups properly. Organizations without this flag cannot enableImport Groups, however groups will still be synced.
For further assistance, please contact Statsig support.