Layers
Group related experiments into mutually exclusive universes and share parameters without code churn.
What are layers
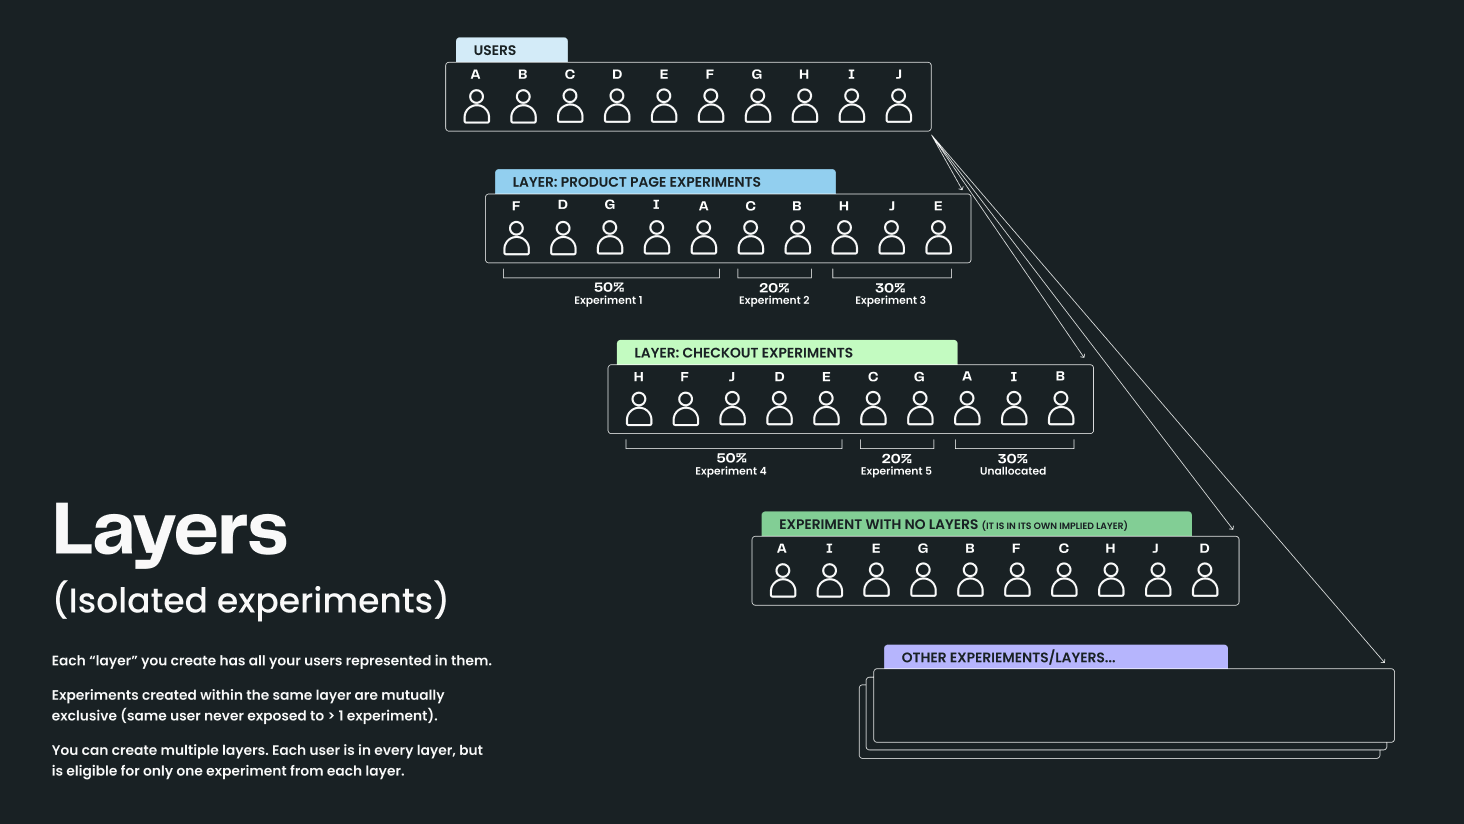
Layers (also known as Universes) allow you to create experiments that are mutually exclusive. Each layer has a logical representation of all your users and can have experiments created within it. Users assigned to one experiment in a layer cannot be in another experiment in the same layer.
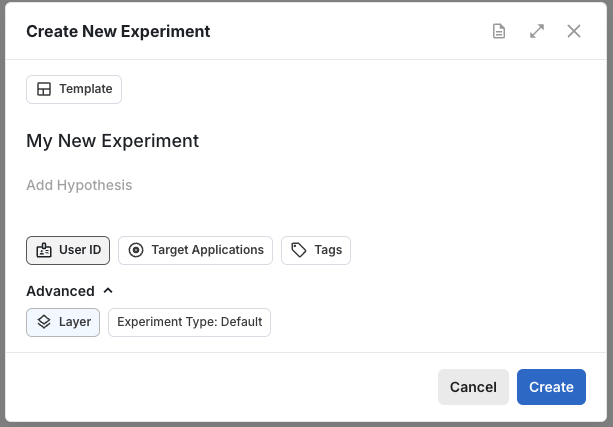
You can add experiments to a layer (or create a layer) during experiment creation.
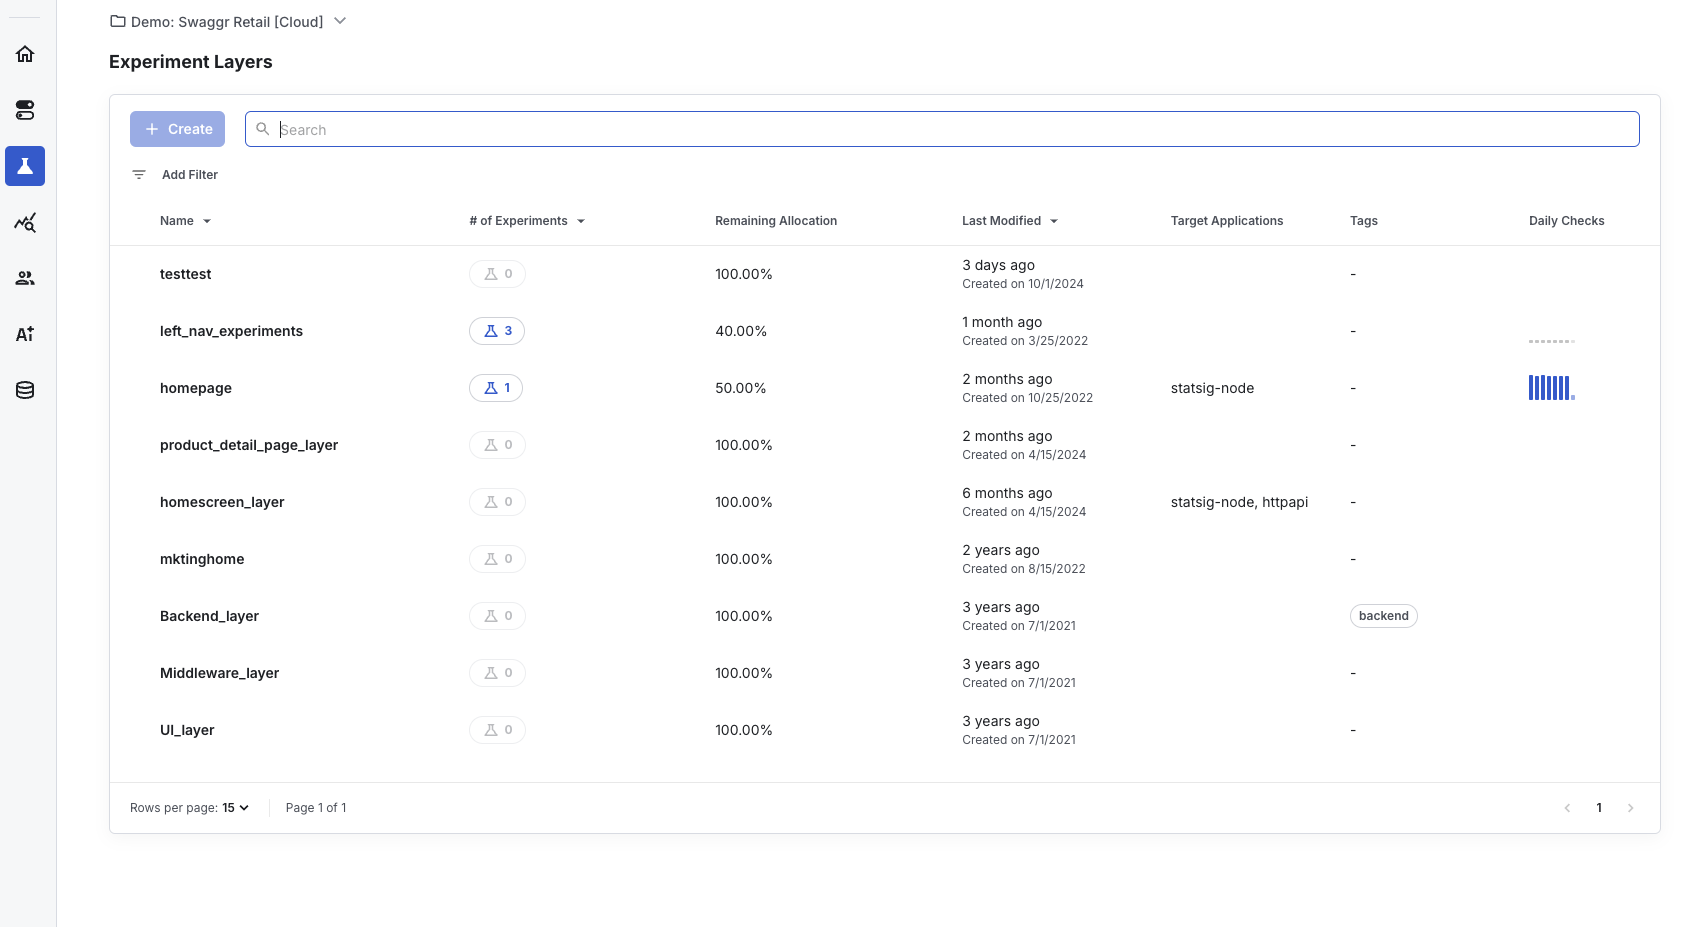
After you create a layer, you can manage layers on the layer management tab under Experiments.
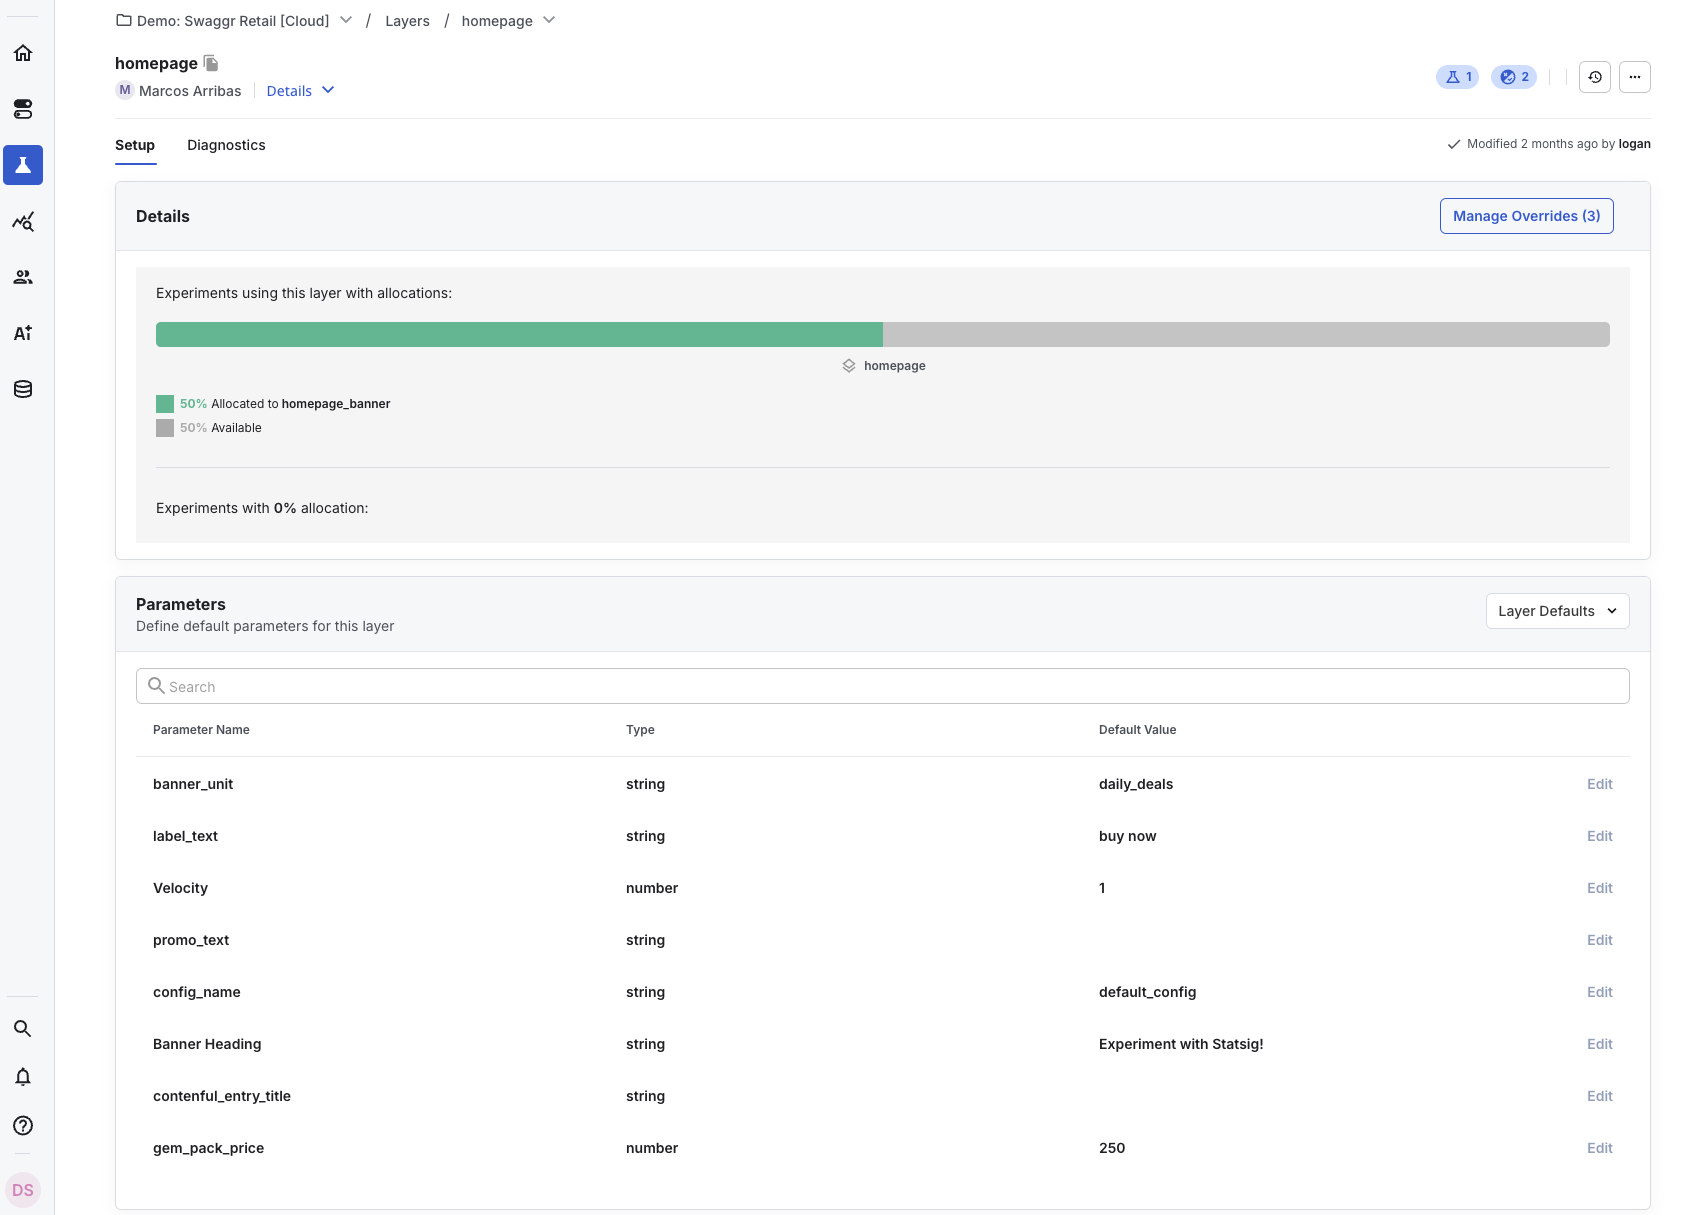
Layers also improve engineering efficiency and iteration velocity for product teams. In a Layer, parameters exist at the Layer level and can be shared across experiments within the Layer. This allows the concept of "Experiment" to be abstracted away from the SDKs, so that users only need to work with parameters in code. Multiple experiments that change the same thing can then run and iterate without any code changes.
Suppose your product has an important signup dialog with text that your team tests frequently. Some tests run in parallel, others are iterations of previous experiments. Working directly with Experiments, your code grows like this over time:
let signUpText = DEFAULT_SIGNUP_TEXT;
const signUpTestV1 = statsig.getExperiment("sign_up_dialog_text_test_v1");
const signUpTestV2 = statsig.getExperiment("sign_up_dialog_text_test_v2");
const specialSignUpTest = statsig.getExperiment("sign_up_test_special_offer");
const holidaySignUpTest = statsig.getExperiment("sign_up_test_holiday");

if (signUpTestV1.get("is_in_test", false)) {
  // original test, added in app version v1.2
  signUpText = signUpTestV1.get("dialog_content", DEFAULT_SIGNUP_TEXT);
} else if (signUpTestV2.get("is_in_test", false)) {
  // v2 of the original test, added in app version v1.6 because we wanted to test a new copy but don't want to stop v1
  signUpText = signUpTestV2.get("dialog_content", DEFAULT_SIGNUP_TEXT);
} else if (specialSignUpTest.get("is_in_test", false)) {
  // test showing a special offer in the text, added in v2.0
  signUpText = specialSignUpTest.get("dialog_content", DEFAULT_SIGNUP_TEXT);
} else if (holidaySignUpTest.get("is_in_test", false)) {
  // test showing some holiday greetings in the dialog, added in v2.1
  signUpText = holidaySignUpTest.get("dialog_content", DEFAULT_SIGNUP_TEXT);
}

// Then we display the text in the dialog
Every time you add a new test, you must change the code, and the change is only available after a new release.
Working with Layers is much simpler:
let signUpText = statsig
  .getLayer("sign_up_tests")
  .get("sign_up_dialog_text", DEFAULT_SIGNUP_TEXT);

// Then we display the text in the dialog
That is all the code you ever need. No more code changes and app releases for new tests. To add a new test, add a new experiment to the same Layer and choose sign_up_dialog_text as a parameter. The SDK determines which value to serve for the user based on which experiment the user is allocated to.
getExperiment vs getLayer API
Even though layered experiments remain technically accessible through getExperiment, that API evaluates only the current experiment. Use getLayer so the SDK honors layer-level decisions, mutual exclusion, and shared parameters.
How exposures work with layers
Calling getLayer(LayerName<string>) by itself doesn't log an exposure. Statsig logs a statsig::layer_exposure event when you access a specific parameter within the Layer using getLayer(LayerName<string>).get(Parameter<string>).
- If Statsig assigns the user to an experiment within the Layer, the
statsig::layer_exposureevent is billable. - If the user isn't assigned to an experiment within the Layer, the
statsig::layer_exposureevent isn't billable.
Repeated reads of the same Layer parameter for the same user within the deduplication window count as a single billable exposure. Reads of different Layer parameters may count separately.
Was this helpful?